

Session-based balancing for multi-transport TINA VPN tunnels is enabled per access rule in the SD-WAN settings of the custom connection object. Session balancing can use a static round robin or an adaptive weighted round robin balancing policy:
(Static) Session Balancing – Sessions are distributed over the configured transports by using a round-robin stye balancing policy. If used without adaptive balancing, it is recommended to use transports of similar bandwidth and latency (Round Trip Time). Static balancing is available for all transport protocols. Static session balancing can be configured to balance over multiple transports in the same SD-WAN class based on the defined SD-WAN ID range.
Adaptive Session Balancing – All sessions are initially balanced statically over the primary and secondary transports. Link quality metrics gathered by Dynamic Bandwidth and Latency Detection are then used to rebalance sessions with lifetimes over 5 seconds to use the optimal transport. Shorter sessions are not rebalanced. Adaptive session balancing is available only on UDP transports. It is not possible to use session balancing with all transports in a class.
Before You Begin
Create a multi-transport VPN tunnel between two CloudGen Firewalls:
Create a TINA site-to-site VPN tunnel. For more information, see How to Create a TINA VPN Tunnel between CloudGen Firewalls or How to Create a VPN Tunnel with the VPN GTI Editor.
Add one or more additional transports to the VPN tunnel. For more information, see How to Add a VPN Transport to a TINA VPN Tunnel with Explicit Transport Selection or How to Configure SD-WAN Using the VPN GTI Editor.
Step 1. (Adaptive Session Balancing only) Enable Dynamic Bandwidth and Latency Detection for the VPN Transports
On both VPN endpoints, edit the TINA site-to-site VPN tunnel to enable Dynamic Bandwidth and Round Trip Time Detection.
Go to CONFIGURATION > Configuration Tree > Box > Assigned Services > VPN Service > Site to Site VPN.
Click Lock.
Double-click the TINA VPN tunnel transport. The TINA Tunnel Transport window opens.
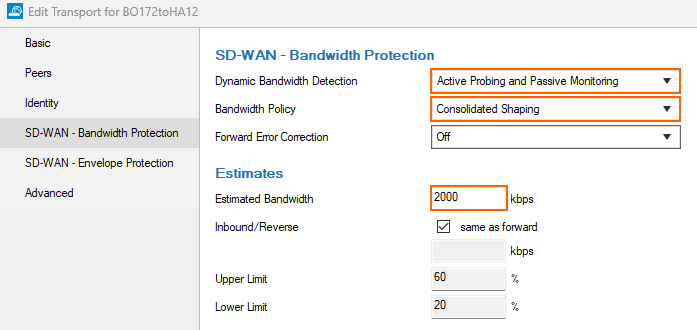
Click the SD-WAN - Bandwidth Protection tab.
From the Dynamic Bandwidth Detection list, select a policy:
Active Probing and Passive Monitoring
Active Probing Only
No Probing - use Estimated Bandwidth
Enter the Estimated Bandwidth bandwidth.
(optional) From the Bandwidth Policy list, select Consolidated Shaping and select the Assigned QoS Profile. For more information, see TINA Tunnel Settings.
Click OK.
Click Send Changes and Activate.
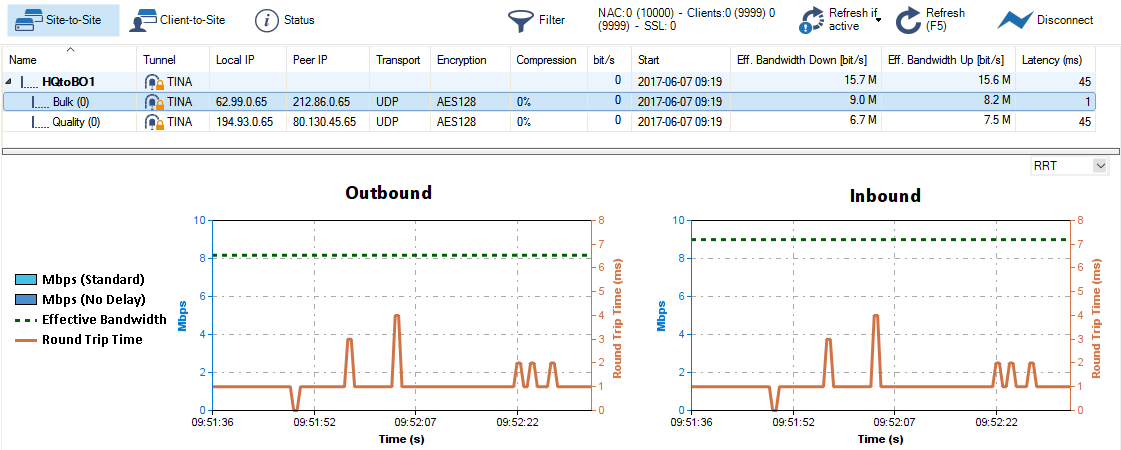
To verify that Dynamic Bandwidth and Round Trip Time Detection is running, go to VPN > Site-to-Site. Right-click the transport and select Monitor Traffic.
Step 2. Create a Custom Connection Object for the Firewall Acting as SD-WAN Primary
Configure session balancing with explicit transport selection. You can balance between the primary and secondary transport, or over multiple IDs of the primary transport class.
Go to CONFIGURATION > Configuration Tree > Box > Assigned Services > Firewall > Forwarding Rules.
In the left menu, click Connections.
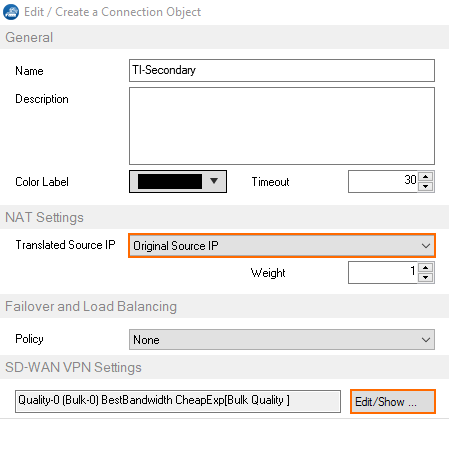
Right-click the table and select New Connection. The Edit/Create a Connection Object window opens.
In the Name field, enter a name for the connection object.
From the Translated Source IP list, select Original Source IP.
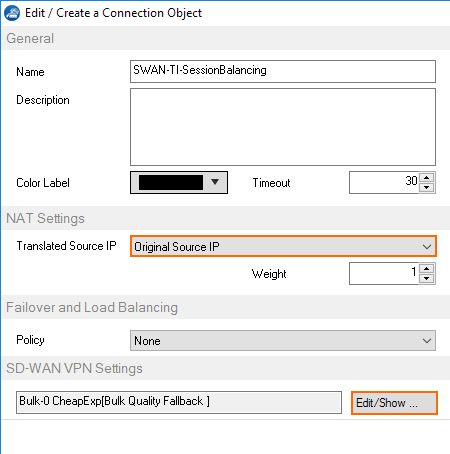
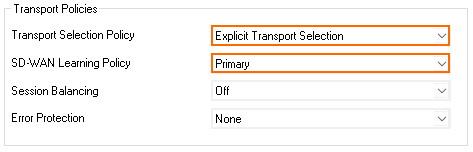
To edit the VPN SD-WAN settings, click Edit/Show... . The SD-WAN Settings window opens.
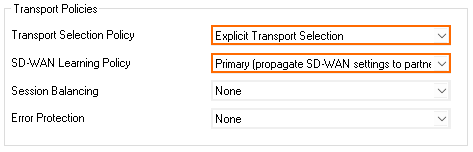
From the SD-WAN Learning Policy drop-down list, select Primary.
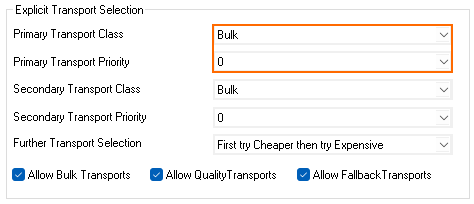
Primary Transport Class – Select the SD-WAN class of the primary transport.
Primary Transport ID – Select the ID for the primary transport.Configure the primary transport class and ID:
Feature Level 8 | Feature Level 9 |
|---|---|
 |  |
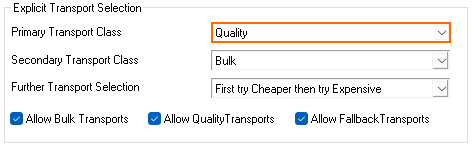
Transport Class and Transport ID
PrimaryTransport Class – Select the SD-WAN class secondary transport.
Primary Transport Priority/ID – Select the ID for the secondary transport.
Feature Level 8.x, >=9.0.4 | Feature Level 9.0 through 9.0.3 |
|---|---|
 |  |
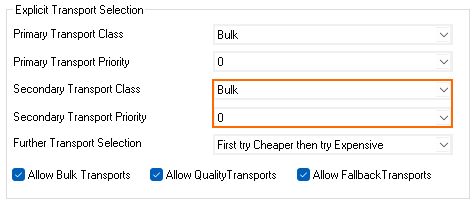
(Balancing between primary and secondary transports only) Configure the secondary transport class and ID:
Secondary Transport Class – Select the SD-WAN class secondary transport.
Secondary Transport Priority/ID – Select the ID for the secondary transport.
Feature Level 8.x, >=9.0.4 | Feature Level 9.0 through 9.0.3 |
|---|---|
 |  |
Click OK.
Click Send Changes and Activate.
Step 3. Create a Custom Connection Object for the Firewall Acting as SD-WAN Secondary
Go to CONFIGURATION > Configuration Tree > Box > Assigned Services > Firewall > Forwarding Rules.
In the left menu, click Connections.
Right-click the table and select New Connection. The Edit/Create a Connection Object window opens.
Enter a Name.
From the Translated Source IP list, select Original Source IP.
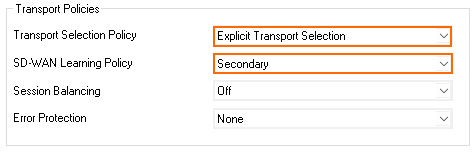
To edit the VPN SD-WAN settings, click Edit/Show... . The SD-WAN Settings window opens.
From the SD-WAN Learning Policy drop-down list, select Secondary.
Feature Level 8 | Feature Level 9 |
|---|---|
 |  |
Click OK.
Click Send Changes and Activate.
Step 4. Modify the Access Rule on the Firewall Acting as SD-WAN Primary
Go to CONFIGURATION > Configuration Tree > Box > Assigned Services > Firewall > Forwarding Rules.
Click Lock.
Right-click the ruleset and select New > Rule to create an access rule to match the VPN traffic you want to balance:
Action – Select Pass.
Bi-Directional – Select the check box to apply the rule in both directions.
Source – Select a network object for all local networks.
Service– Select a service object from the list.
Destination – Select the network object containing the remote networks
Connection Method – Select the connection object for the SD-WAN Primary created in Step 2.
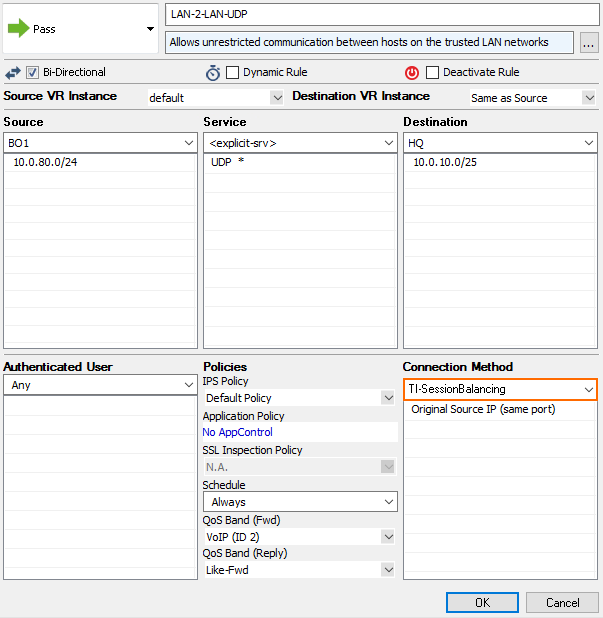
Click OK.
Click Send Changes and Activate.
Step 5. Modify the Access Rule on the Firewall Acting as SD-WAN Secondary
Go to CONFIGURATION > Configuration Tree > Box > Assigned Services > Firewall > Forwarding Rules.
Click Lock.
Right-click the ruleset and select New > Rule to create an access rule to match the VPN traffic you want to balance:
Action – Select Pass.
Bi-Directional – Select the check box to apply the rule in both directions.
Source – Select a network object for all local networks.
Service – Select a service object from the list.
Destination – Select the network object containing the remote networks
Connection Method – Select the connection object for the SD-WAN Secondary created in Step 3.
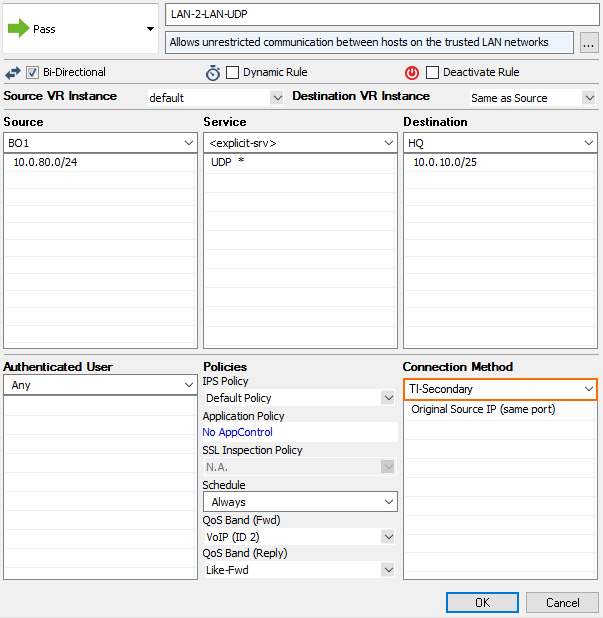
Click OK.
Click Send Changes and Activate.