You can specify which link is used for an application by creating an application-based link selection connection object. In this object, configure a default connection policy, add applications or application categories, and then assign them to a connection object for the Internet connection the link should use. Applications that are not explicitly defined use the default connection policy.
When a user connects to a service, the firewall detects the application and stores the application and the associated destination IP addresses. The first connection for an application always uses the default connection object. Every subsequent connection by this application to the same destination is now sent through the link configured for this application. For some applications that use a wide range of varying destination IP addresses, the effectiveness of the application-based provider selection may be limited.

Before You Begin
Before you create an application-based link selection connection object, complete the following:
- Enable Application Control. For more information, see Application Control.
- Create connection objects for every WAN connection you want to route application traffic over. For more information on how to create connection objects, see Connection Objects.
Step 1. Create an Application Link Connection Object
- Go to CONFIGURATION > Configuration Tree > Box > Assigned Services > Firewall > Forwarding Rules.
- In the left menu, click Connections.
- Click Lock.
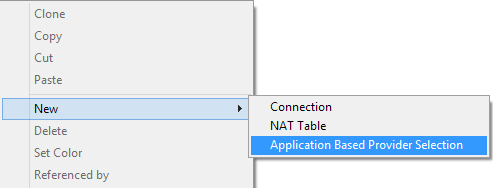
- Right-click the table and select New > Application Based Provider Selection.

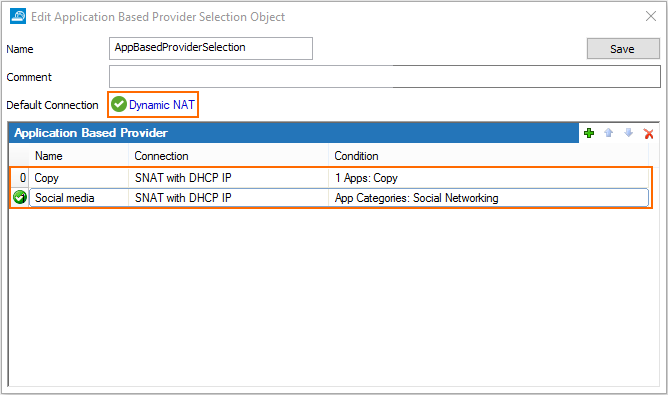
- In the Edit Application-Based Provider Selection Object window, specify the following settings:
- Name – Enter a name for the connection object (e.g.,
AppBasedProviderSelection).
- Default Connection – Select the default connection from the list by clicking the link. Traffic that is not defined in the application-based links is routed over this connection.
- Name – Enter a name for the connection object (e.g.,
- For every application or application category that you want to add, do the following:
- Click the plus sign (+) to add an application-based link entry.
- Edit the Name of the new entry.
- Select the Connection Object for the ISP to route the detected application traffic (e.g.,
Source NAT with DHCPfor the first DHCP line). - Double-click the Condition field.
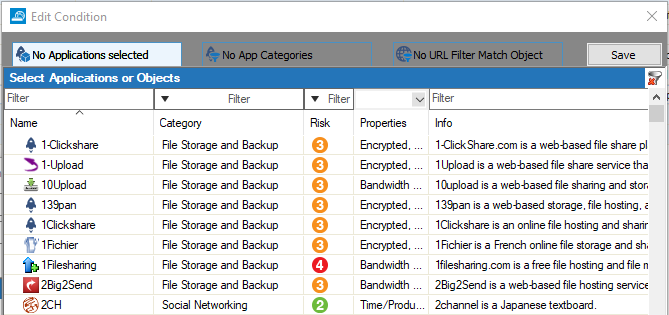
- In the Edit Condition window, click the No Application selected tab.
- Either add applications from the list by category, or double-click the entry. You can also filter the application list by selecting Category, Risk, and Properties.

- Click Save.

- Click Save.
- Click Send Changes and Activate.
The application link connection object is now in the Connections list.
Step 2. Create an Access Rule
Create an access rule to redirect the application traffic. Alternatively, you can also edit an existing matching access rule.
- Go to CONFIGURATION > Configuration Tree > Box > Assigned Services > Firewall > Forwarding Rules.
- Click Lock.
- Right-click the Main Rules table and select New > Rule.
- Create a Pass access rule with the following settings:
- Source – Select Trusted LAN.
- Service – Select the type of service.
- Destination – Select Internet.
- Application Policy – Select Application Control and SSL Inspection. If configured, select a policy from the SSL Inspection Policy drop-down list. For more information, see SSL Inspection in the Firewall.
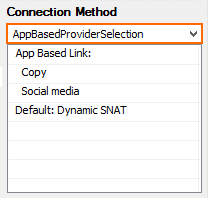
- Connection Method – Select the application link connection object that you created in Step 1 (e.g.,
AppBasedProviderSelection).

- Click OK.
- Click Send Changes and Activate.
All applications are now routed over the provider selected in the application-based link selection object. Go to the Firewall > History page to monitor which link is selected for the applications defined in the connection object.

