

For inbound TLS Inspection, the firewall uses the same TLS certificate that is installed on the internal server.

Before You Begin
- Create or purchase the server certificate to be used for TLS Inspection.
Step 1. Upload the Certificate to the Certificate Store
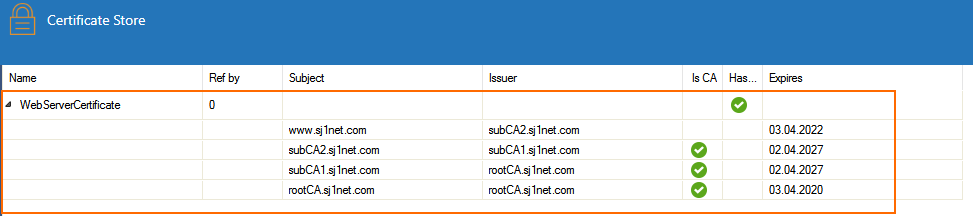
Upload the server certificate used to terminate incoming TLS connections on the firewall.
- Go to the Certificate Store. On the CloudGen Firewall, the certificate store is located under Advanced Configuration, on the Control Center in the Global Settings, Range Settings, or Cluster Settings.
- Click Lock.
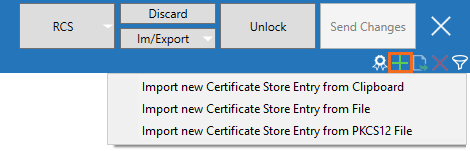
- In the upper-left corner, click + and select Import new Certificate Store Entry from File or Import new Certificate Store Entry from PKCS12.
- Select the certificate file and click Open.
- (optional) Enter the Password and click OK.
- Enter a Name and click OK.
- Click Send Changes and Activate.
Step 2. Create a TLS Inspection Policy Object
Create an SSL Inspection policy object for inbound TLS Inspection.
- Go to CONFIGURATION > Configuration Tree > Box > Assigned Services > Firewall > Forwarding Rules.
- Click Lock.
- In the left menu, click TLS Inspection.
- Right-click the table and select New TLS Inspection Policy. The Edit TLS Inspection window opens.
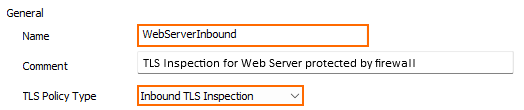
- Enter the Name.
- From the TLS Policy Type drop-down list, select Inbound TLS Inspection.
- From the Inbound TLS Inspection Certificate drop-down list, select the server certificate you uploaded to the certificate store in Step 1.

- (optional) Configure Cryptographic Attributes:
Minimum TLS Version – Select the minimum TLS version.
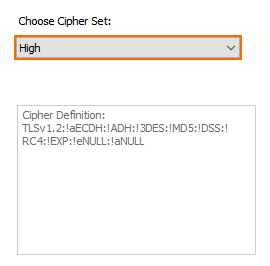
- Cipher Set – Select a preset cipher set, or click Configure to customize the cipher set.
- (optional) Click Configure to customize cipher set and/or click Show Cipher String to view a list of support ciphers of the set.
- Click OK
- Click Send Changes and Activate.
Next Steps
Configure outbound TLS Inspection. For more information, see How to Configure Outbound TLS Inspection.