

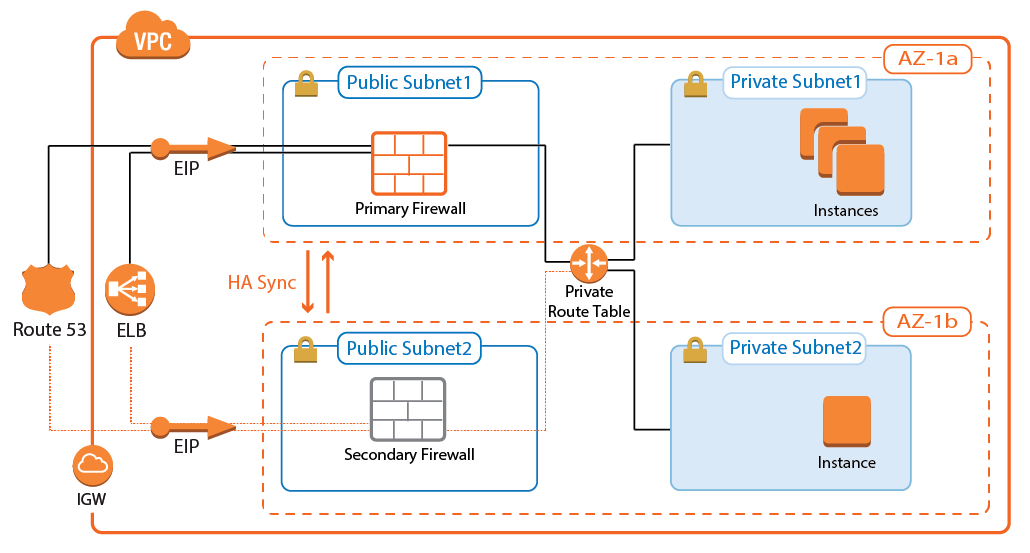
To ensure that at least one firewall is always active, deploy two firewalls into an active-passive high availability cluster. Each firewall is deployed into a different Availability Zone. The active firewall is used as the default gateway in the route table associated with the private networks. When the firewall service fails over from the primary to the secondary firewall, the AWS route table is rewritten to use the now-active secondary firewall as the default gateway.
Depending on the network protocol of the incoming connections, use an Elastic Load Balancer or AWS Route 53. The Classic Load Balancer only supports TCP-based traffic, whereas Route 53 can be used with both TCP and UDP traffic.
Before You Begin
- (BYOL only) Licenses matching the desired instance size are required when using BYOL images.
- Prepare an IAM role for the firewall instance. For more information, see How to Create an IAM Role for a CloudGen Firewall in AWS.
Step 1. Select the AWS Datacenter
- Log into the AWS console.
- In the upper right, click on the datacenter location, and select the datacenter you want to deploy to from the list.

The selected datacenter location is now displayed in the AWS console.
Step 2. Create an Elastic IP for Each Firewall
Create two elastic IP addresses. These are the public IP addresses that will be used for your firewall instances.
For each firewall,
- Log into the AWS console.
- Click Services and search for
EC2. - Select EC2.

- The EC2 Resources window opens. In the Network & Security section of the left menu, select Elastic IPs.

- Click Allocate Elastic IP address.
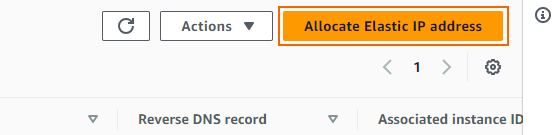
- On the Allocate Elastic IP address page, keep the default settings and click Allocate to allocate a new IP address.
A random unassigned elastic IP gets generated and displayed in the Elastic IP addresses table. Copy the Allocation IDs for future use.
Step 3. Create a VPC
Create a VPC with two subnets. Each subnet must be created in a different availability zone. Additional subnets for the backend instances are added afterwards.
- Log into the AWS console.
- Click Services and search for
VPC. - Select VPC.
- Click Create VPC.

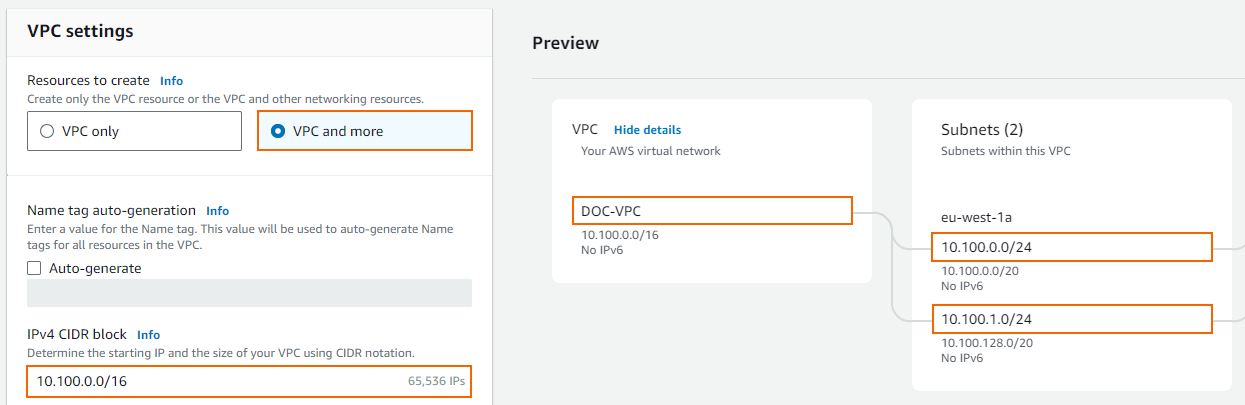
- The VPC configuration window opens. Select VPC and more and customize the following details:
- Auto-generate – (optional) Specify a name tag to be added to all resources. Otherwise, disable this checkbox.
- IPv4 CIDR block – Enter a /16 CIDR block that does not overlap with any of your other networks.
- Number of Availability Zones (AZ) – Select 1, expand Customize AZs, and select which availability zone the VPC is created for.
- NAT gateways ($) – Select None.
- (optional) Disable Enable DNS hostnames to only use IP addresses to access your VPC.
- In the Preview section:
- VPC Name – Enter a name for your VPC.
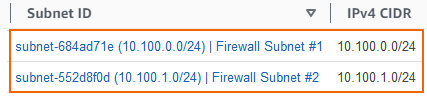
- Specify the subnets:
- Public subnet – Enter the /24 subnet used for the primary firewall.
- Private subnet – Enter the /24 subnet used for the secondary firewall.
You can add more subnets and functionalities later.
- Click Create VPC.

The VPC is now listed in the Your VPCs list.

Step 4. Add a Subnet to the VPC
Add a private subnet for instances that use the firewall.
- Log into the AWS console.
- Click Services and select VPC.
- Click Subnets in the left menu.
- Click Create Subnet.
- Create a subnet:
- VPC ID – Select the VPN created in Step 3.
- Subnet name – Enter a name for the subnet.
- Availability Zone – Select an availability zone from the list.
- IPv4 CIDR block – Enter a free subnet in the scope of the network defined for the VPC.
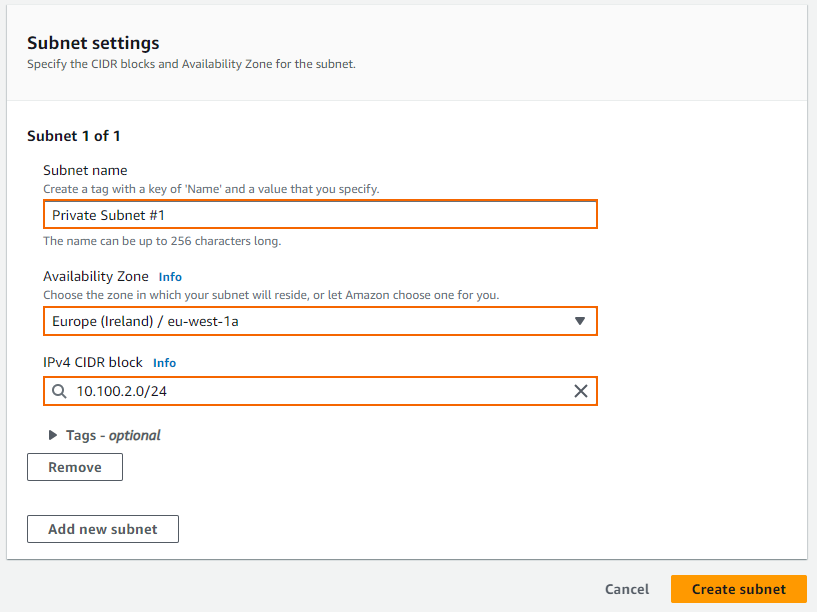
- Click Create subnet.
You now have three subnets in your VPC.

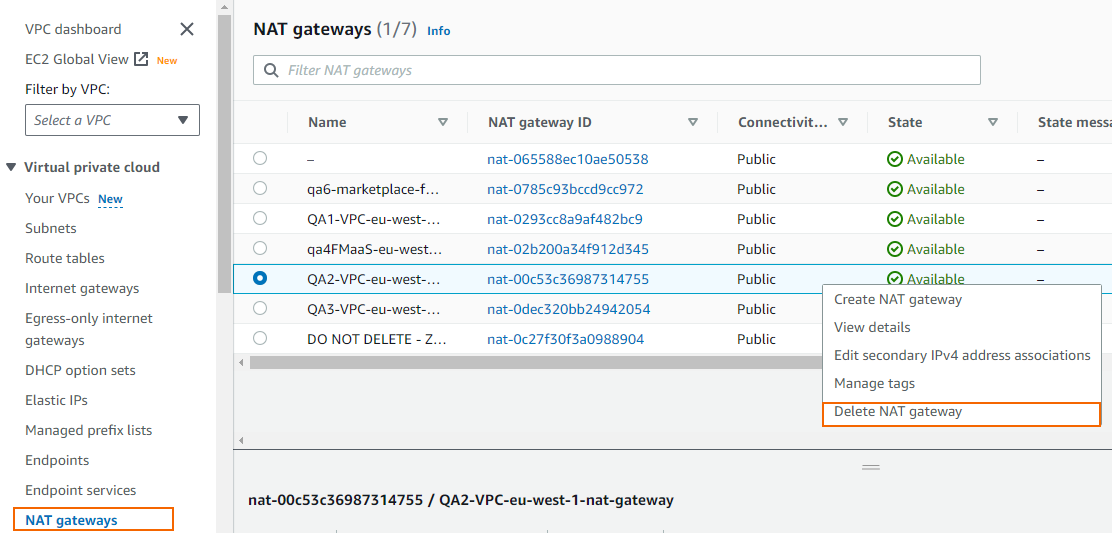
Step 5. Check the NAT Gateway
Since the Barracuda CloudGen Firewall already includes NAT gateway functionality, make sure that no NAT gateway instance is present for your VPC. If a NAT gateway was automatically created during the VPC configuration, you must delete it.
To do so, complete the following steps:
- Log into the AWS console.
- Click Services and select VPC.
- In the Virtual private cloud section of the left menu, click NAT gateways.
- (optional) Enter the VPC ID in the search bar.
- Right-click the NAT gateway created for your VPC and click Delete NAT gateway.
- Confirm the deletion.
The elastic IP address associated with the NAT gateway is released automatically and is now free to use for one of the firewall instances.
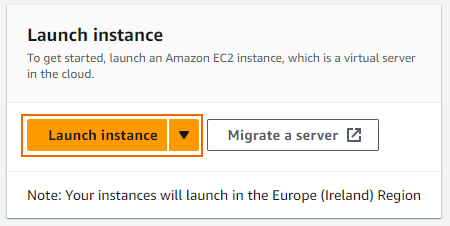
Step 6. Deploy the Primary Firewall
The primary firewall is deployed into the first firewall subnet of the VPC. Two image types are available in the AWS Marketplace: BYOL and hourly.
- Log into the AWS console.
- Click Services and select EC2.
- In the Create Instance section, click Launch Instance.
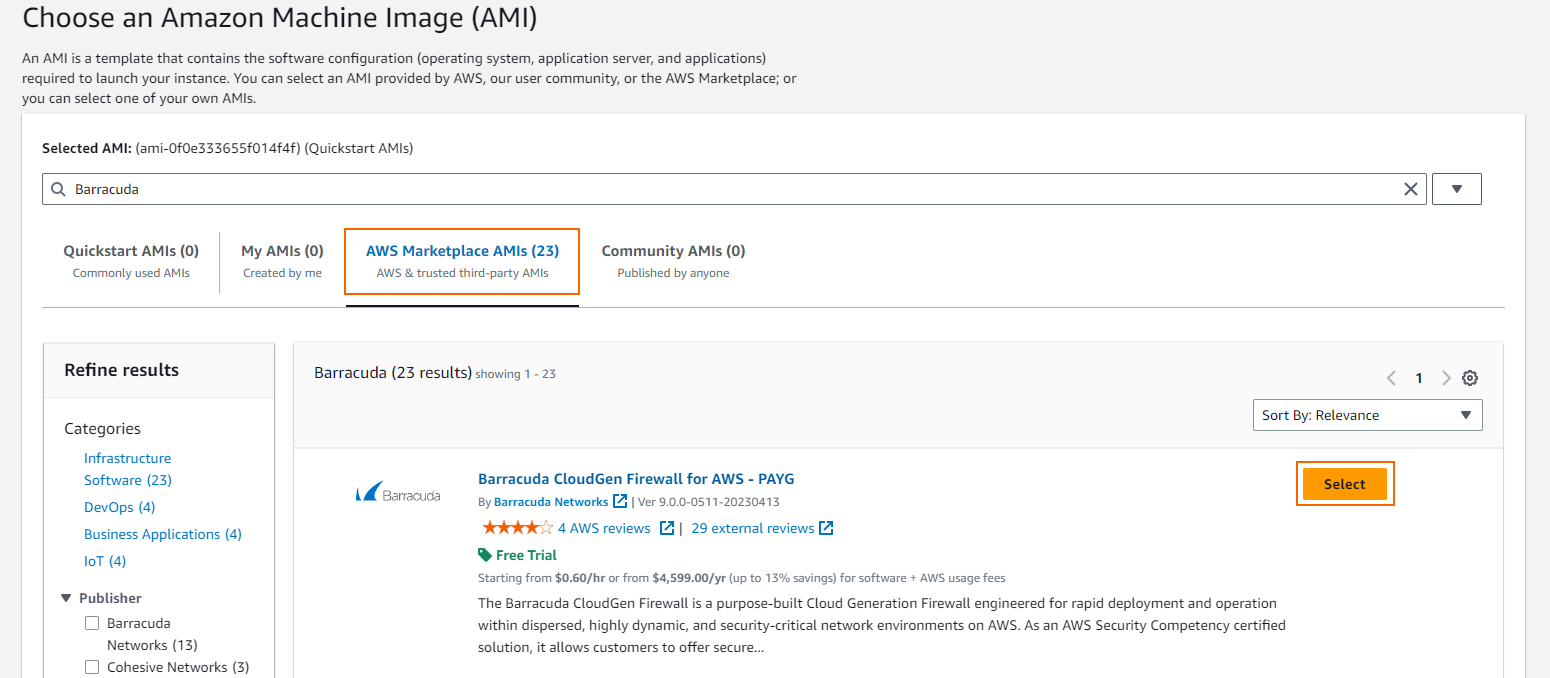
- Click Browse more AMIs, and search the AWS Marketplace for
Barracuda. - Click Select next to the image type you want to deploy: BYOL or PAYG.
- Select the Instance Type. If you are deploying a BYOL image, verify that the number of CPU cores of the instance matches your license.
- Click Continue.
- Configure the instance details:
- In the Name and tags section, enter a Name for your instance. A tag consists of a key and an optional value (name). To tag your instance, click Add new tag and define values for it.
- Scroll down and select your Instance type.
Key pair (Login) – From the drop-down list, select an existing key pair name or click Create new key pair and create a key pair.
- Expand Network settings and click Edit for the configuration:
- Network / VPC – Select the VPC you created previously.
- Subnet – Select the public subnet of the primary firewall.
- Auto-assign public IP – Select Disabled to use the subnet setting.
- Firewall (security groups) – Select your security group.
- Remove the preconfigured rules in the security group.
- Click Add security group rule and open up the security group for all traffic.
- Type – Select All traffic.
- Source type – Select Anywhere.
- Expand the Advanced network configuration section.
- In Network Interface, enter the Primary IP address. The IP address must be in the subnet selected above.
- Scroll down to Advanced details, expand this section and edit the configuration:
- IAM instance profile – Select the IAM role created for the firewall instance. Verify that all required IAM policies for the route-shifting high availability cluster are attached.
- Configure advanced settings according to your requirements. For details, click Info next to a parameter and refer to the help box on the right.
- In the Summary section on the right, enter 1 in the Number of instances field.
- Click Launch instance.
On the Launch Status page, locate and copy the Instance ID. This is the default password used to log in via Barracuda Firewall Admin.
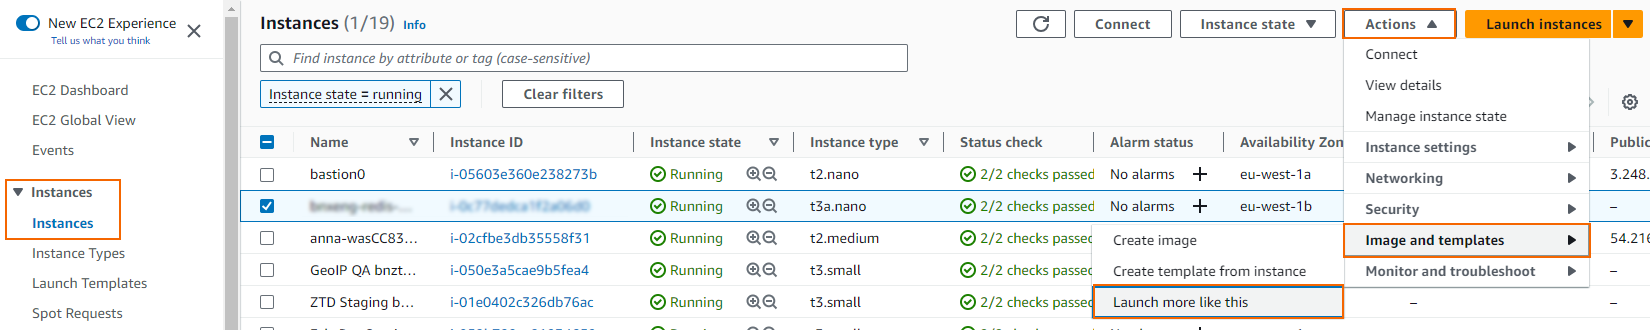
Step 7. Deploy the Secondary Firewall
The secondary firewall instance is deployed into the secondary firewall subnet of the VPC. The configuration of the primary firewall is used as a starting point.
- Log into the AWS console.
- Click Services and select EC2.
- Go to Instances.
- Select the primary firewall instance created in Step 6.
- Expand the Actions menu, go to Image and templates, and select Launch more like this.
You can now configure the instance: - Change the subnet in the Network settings section: For Subnet, select the subnet for the secondary firewall.
- In Advanced network configuration, enter the Primary IP address in the Network interface section. The IP address must be in the subnet selected above.
- Click Launch instance.
- When prompted, select the key pair used for the first firewall.
- The Launch Status page opens.
Locate and copy the Instance ID. This is the default password used to log into the secondary firewall via Barracuda Firewall Admin.
Step 8. Disable the Source/Destination Check for Both Firewalls
To allow the firewall to perform NAT operations, you must disable the source/destination check for the firewall network interfaces.
- Log into the AWS console.
- Click Services and select EC2.
- In the Network & Services section of the left menu, click Network Interfaces.
Right-click on the network of the firewall instance and select Change source/dest. check.
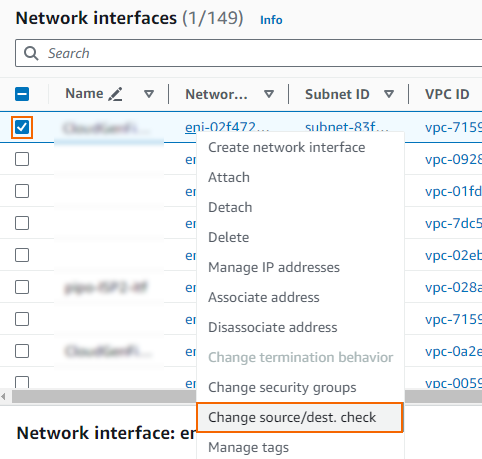
- The Change source/dest. check window opens. Clear the Enable check box to disable the interface.
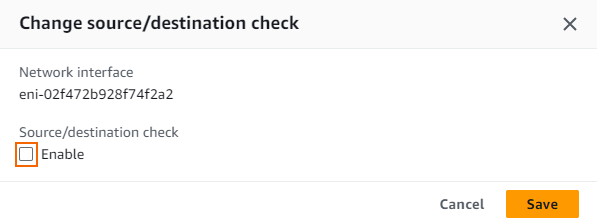
- Click Save.
- Repeat these steps for the secondary firewall.
Step 9. Configure an AWS Route Table for Private Subnets
Configure the default route of the main routing table to use the primary firewall instance as the default gateway. Since this is the main route table, it is automatically applied to any subnets not specifically assigned to another route table.
- Log into the AWS console.
- Click Services and select VPC.
- In the left menu, click Route Tables.
- Click on the main route table for your VPC.

- On the bottom, click on the Routes tab.
- Click Edit routes.

- In the Target column of the default route (0.0.0.0/0), enter the instance ID of the primary firewall.
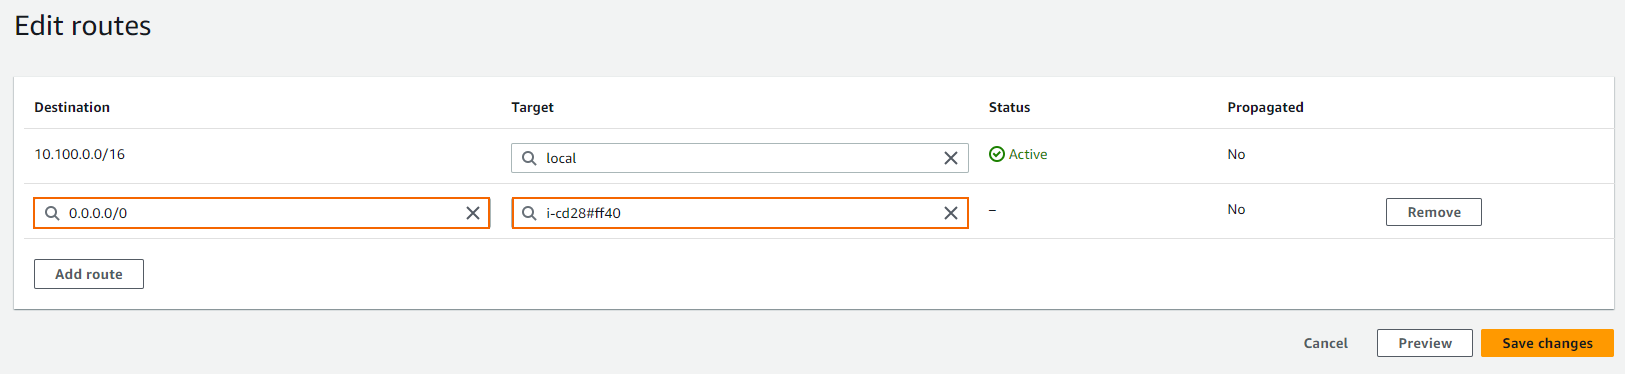
- Click Save changes.
The default route now shows an Active state in the Status column:
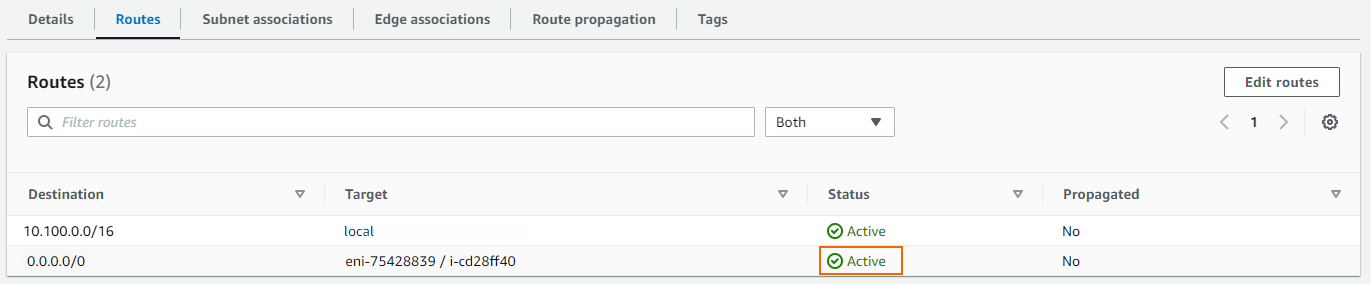
Step 10. Configure an AWS Route Table for the Firewall Subnets
The route table for the firewall subnet routes incoming and outgoing connections through the Internet gateway created by the VPC wizard in Step 3.
- Log into the AWS console.
- Click Services and select VPC.
- In the left menu, click Route Tables.
- Click on the second route table, which is currently associated with the subnet for the primary firewall.

- On the bottom, click on the Subnet associations tab.
- Click Edit subnet associations.

- Select both firewall subnets.
- Click Save.
The firewall subnets are now associated with the AWS route table routing connections over the Internet gateway.
Step 11. Associate the Elastic IPs
Associate the elastic IPs created in Step 2 with the firewall network interfaces.
- Log into the AWS console.
- Click Services and select EC2.
- In the Network & Security section of the left menu, click Elastic IPs.
- Select the first Elastic IP created in Step 2.
- Expand the Action list and click Associate Elastic IP address.

- Select Instance, enter the Instance ID (select the primary firewall).
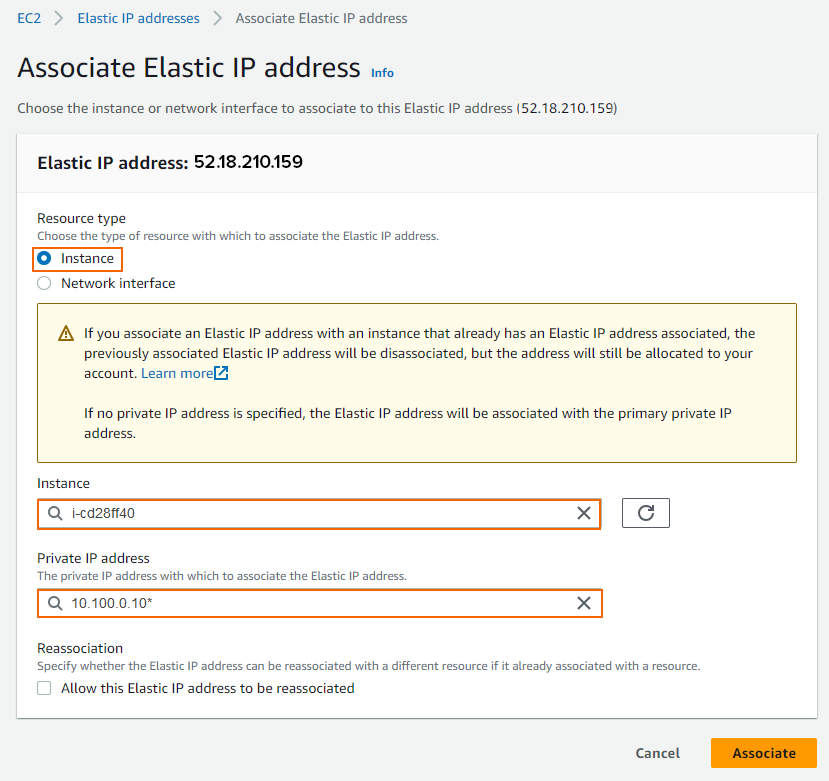
- Click Associate.
- Right-click the second Elastic IP created in Step 2 and click Associate Address.
- Expand the Action list and click Associate Elastic IP address.
- Select the secondary firewall and click Associate.
Traffic to the two Elastic IPs is now automatically forwarded to the network interface of the primary and secondary firewalls.

Step 12. Create a Security Group
Create a security group for the private networks that allow all traffic from the security group assigned to the firewall.
- Log into the AWS console.
- Click Services and select VPC
- In the Security section of the left menu, click Security groups.
- Locate the security group created during the firewall deployment, and copy the Security group ID.

- Click Create security group.
- Security group name – Enter a name for the security group.
- Description – Enter a description for the security group.
- VPC – Select the VPC you created in from the list.

- Click Create security group.
- In the lower half of the page, click on the Inbound rules tab.
- Click Edit inbound rules.
- Create a rule to allow traffic from the firewall security group:
- Type – Select All traffic.
- Protocol – Select All.
- Source – Select Custom and enter the group ID of the security group assigned to your firewall.
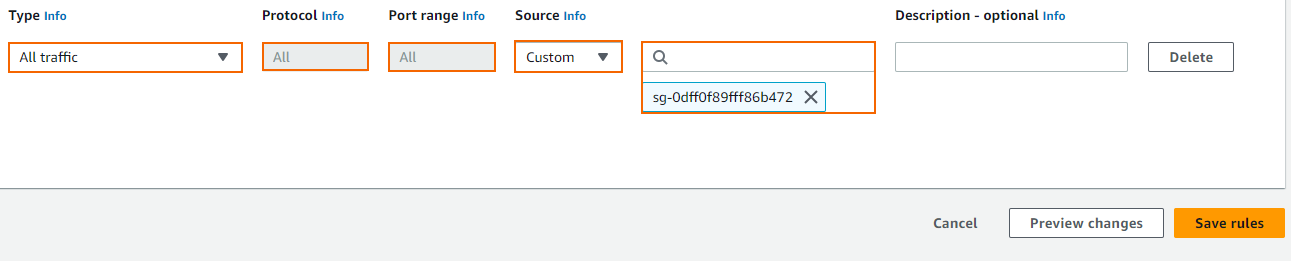
- Click Save rules.
Assign this security group to all instances in one of the private networks that are routed through the firewall.
Step 13. (optional) Create Network ACLs
The Network ACLs created by the VPC wizard are configured by default to allow traffic through. If required, go Network ACLs to edit the network ACL assigned to your VPC.
Step 14. Change the Primary Firewall Network Configuration from Dynamic to Static
On the primary firewall instance, change the network configuration from the DHCP to a static network interface. Use the static private IP address you assigned during deployment. Always use the first IP address of the subnet as the default gateway.
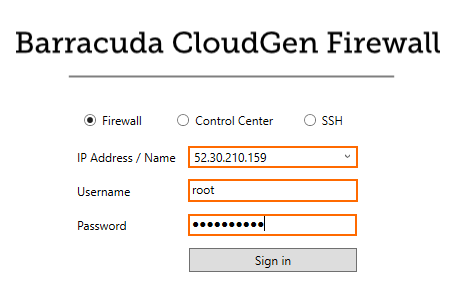
- Log into the primary firewall via Barracuda Firewall Admin:
- IP Address /Name – Enter the Elastic IP of the primary firewall.
- Username – Enter
root. - Password – Enter the instance ID of the primary firewall.
- Go to CONFIGURATION > Configuration Tree > Box > Network.
- In the left menu, click on xDSL/DHCP.
- Click Lock.
- If present, delete the DHCP01 entry in the DHCPv4 Links list.
- Set DHCPv4 Enabled to No.
- In the left menu, click on IP Configuration.
- In the Management Network and IPs section, reconfigure the Management IP:
- Interface – Select Other and enter
eth0. - Management IP – Enter the private IP address of the primary firewall. Go to CONTROL > Network. The private IP address is assigned to the DHCP interface.
- (optional) Associated Netmask – Change the netmask to match the subnet of the primary firewall subnet.
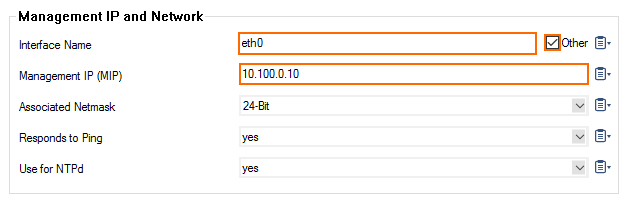
- Interface – Select Other and enter
- In the left menu, select Advanced Routing.
- Click + in the IPv4 Routing Table table and configure the following settings:
- Target Network Address – Enter
0.0.0.0/0 - Gateway – Enter the first IP address of the primary firewall subnet. E.g.,
10.100.0.1if the IP address of the firewall is 10.100.0.10. - Route Type – Select gateway.
- Trust Level – Select Unclassified.
- Target Network Address – Enter
- Click OK.
- Click Send Changes and Activate.
- Activate the changes to the network configuration:
- Go to CONTROL > Box.
- In the Network section of the left menu, click on Activate new network configuration.
- Click Activate Now.
Open the CONTROL > Network page. Your interface and IP address are now static.
Step 15. (PAYG only) Import the PAYG License from the Secondary Firewall
Step 15.1 Export the PAYG License from the Secondary Firewall
- Log into the secondary firewall.
- Go to CONFIGURATION > Configuration Tree > Box Licenses.
- Click Lock.
- Select the license file, click the export icon, and select Export to File.
- Click Unlock.
Step 15.2 Import the PAYG License on the Primary Firewall
- Log into the primary firewall.
- Go to CONFIGURATION > Configuration Tree > Box > Licenses.
- Click Lock.
- Click + and select Import from Files.
- Select the license file exported from the secondary firewall.
The primary firewall now has both PAYG licenses listed in the Licenses list.
Step 16. Create a Stand-Alone HA Cluster
Create a stand-alone high availability cluster between the primary and secondary firewall. The management IP address of the secondary firewall (HA network) must be configured as a static IP address using the private IP address of the secondary firewall. Also, the gateway IP address for the default route of the secondary firewall must be changed to match the subnet the second firewall is running in.
For more information, see How to Set Up a High Availability Cluster.
Step 17. Configure Services to Listen on the Loopback Interface
Because AWS does not support floating IP addresses, you must configure all firewall services to listen on a loopback address (127.0.0.X). Use Application Redirect access rules to redirect incoming traffic from the eth0 interface to the services. Use the private IP addresses of both firewalls as the destination of the rule to ensure that it matches without regard to which firewall VM the service is currently running on.
Step 18. (BYOL only) Activate and License the HA Cluster
Activate the secondary firewall first, then the primary firewall. This ensures that the primary firewall can download the licenses of the secondary firewall.
For more information, see How to Activate and License a Standalone High Availability Cluster.
Step 19. (optional) Configure the Amazon Load Balancer or Amazon Route 53
Depending on the type of traffic, you can use either the AWS Elastic Load Balancer for TCP traffic, or Route 53 for UDP traffic.
Amazon Elastic Load Balancer
The Elastic Load Balancer receives public TCP traffic and forwards it to the active firewall. Protocols other than TCP are not supported. For each TCP port you want to load balance, you must add a Load Balancer rule that maps the external port and protocol to the internal protocol and port. Configure the health checks to check a service, such as TCP 691 for the VPN service. In this way, only the firewall running the service is regarded as healthy by the Load Balancer, and traffic is forwarded only to the active firewall.
For more information, see How to Configure an Elastic Load Balancer for CloudGen Firewalls in AWS
DNS Load Balancing Using Route 53
For services not using TCP connections, Amazon Route 53 can be used to configure a DNS-based Load Balancer. Route 53 is also the preferred load balancing service for geographically distributed cloud resources.
For more information, see How to Configure Route 53 for CloudGen Firewalls in AWS.