Complete the CC Wizard to configure all necessary box layer and Control Center settings. The CC Wizard can be launched from the options menu or automatically starts when logging into a new Control Center on box layer.
Before You Begin
- The CC Wizard can be used only on new or freshly installed Control Centers.
- Virtual Control Centers require a license token for activation. The license token is included in the email received from Barracuda Customer Support after purchasing the Control Center license.
Step 1. Start the CC Wizard
The CC Wizard will launch automatically when logging into a new Control Center or can be launched from the options menu in Barracuda Firewall Admin:
Wizard Starts Automatically on First Login
Log into the box layer of a new Control Center to use the CC Setup Wizard.
- Launch Barracuda Firewall Admin.
- Select Firewall to log into the Control Center box layer:
- IP Address / Name – If you are using a hardware Control Center appliance, enter
192.168.200.200. For virtual Control Centers, enter the IP address you set during deployment. Password – Enter the default password:
ngf1r3wall.
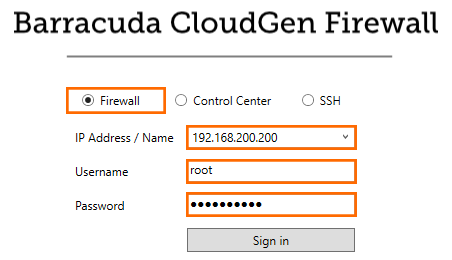
- IP Address / Name – If you are using a hardware Control Center appliance, enter
- Click Sign In. The CC Setup Wizard window opens.
Launch the CC Wizard Manually
The CC Setup Wizard can also be accessed by the options menu in Barracuda Firewall Admin.
- Launch Barracuda Firewall Admin.
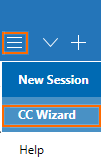
- In the top left, click the hamburger menu and select CC Wizard. The CC Setup Wizard window opens.
- Log into the Control Center:
- Management IP – If you are using a hardware Control Center appliance, enter
192.168.200.200. For virtual Control Centers, enter the IP address you set during deployment. - Password – Enter the default password:
ngf1r3wall.
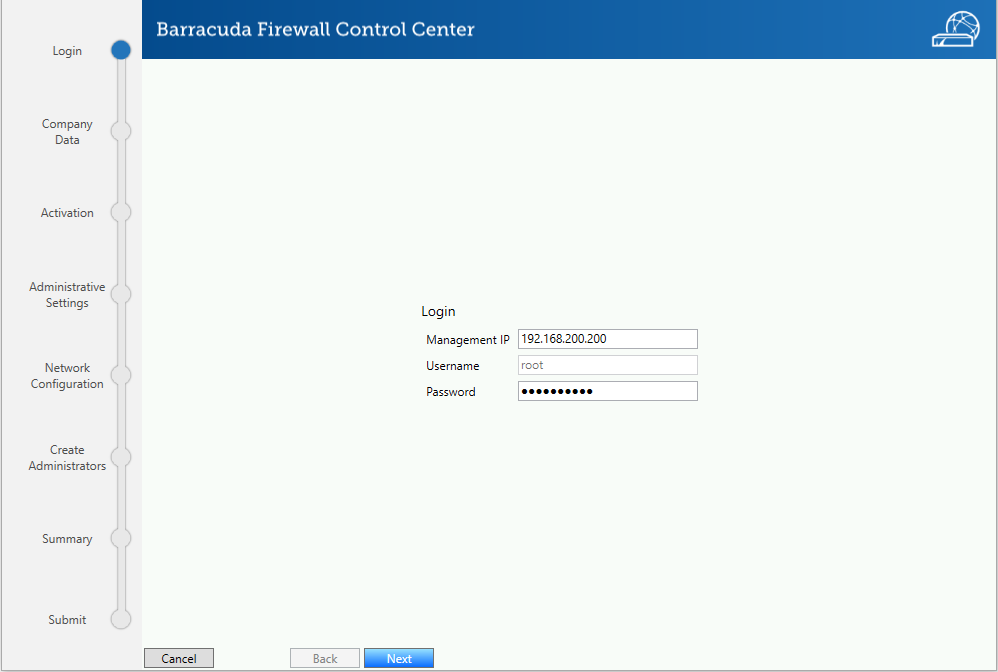
- Management IP – If you are using a hardware Control Center appliance, enter
- Click Next.
Step 2. Enter your Company Data
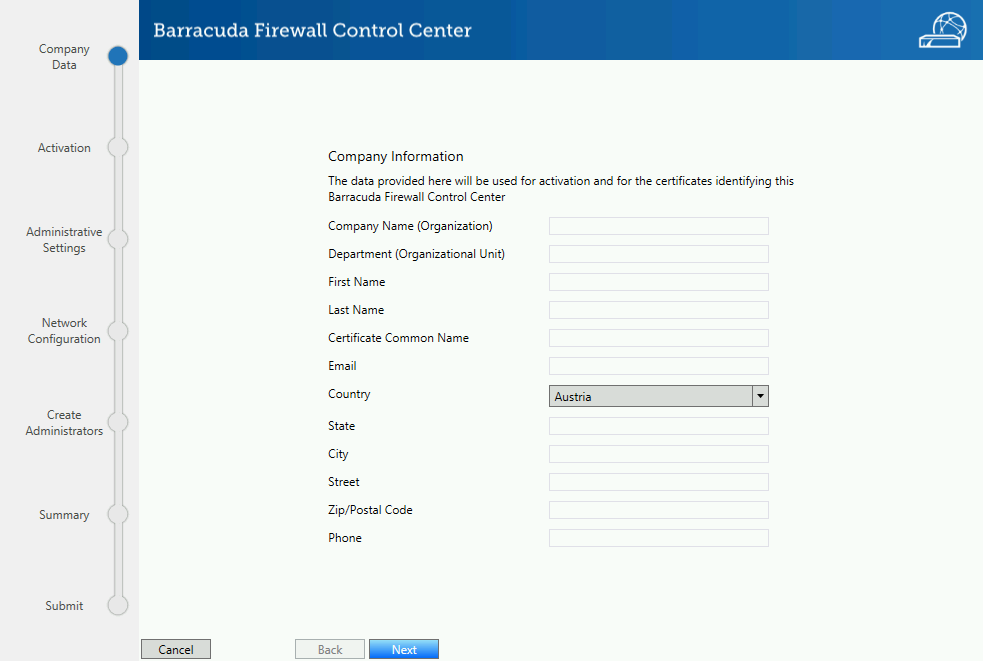
You must enter your company data to supply the information needed for:
- Control Center license activation
- Box level certificates
- CC certificates
- Activation template used on the Control Center to activate managed CloudGen Firewalls.
- System email address.
- Enter the following information:
- Company Name
- Department
- First Name
- Last Name
- Certificate Common Name – Enter the Fully Qualified Domain Name (FQDN) of your company site, e,g.:
www.yoursite.comoryoursite.com. - Email – After successful activation, a confirmation email is sent to this email address.
- Country
- State
- City
- Street
- ZIP/Postal Code
- Phone
- Click Next.
Step 3. Activate the Control Center
- Barracuda Control Center (BCC) Activation will ask you for the Username and the Password. These credentials will be used later to automatically download licenses without additional authentication. The Control Center Wizard will place the credentials in Global Settings > CC Parameters > BCC Authentication. On a single box, Username and Password will be placed under CONFIGURATION > Box > Properties > Operational.
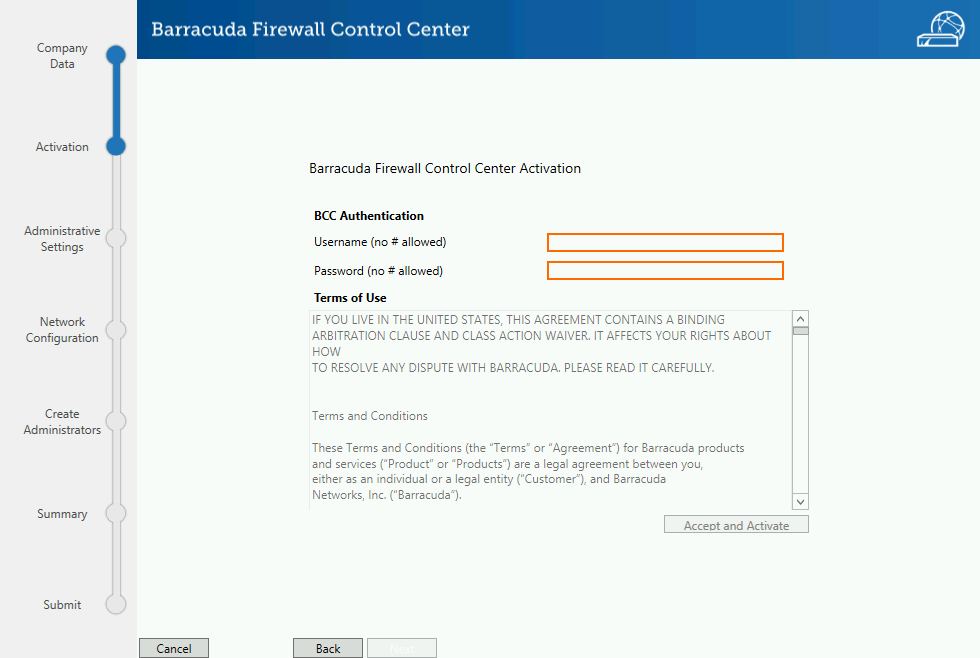
- Accept the Terms of Use to download, install, and activate the licenses. If you are using a virtual Control Center, you are prompted to enter the license token you received from Barracuda Customer Support after purchasing the license. Customer data entered in Step 1 is used to complete the contact information in the activation form.
- Click Accept and Activate.
- If you are using a virtual Firewall Control Center, enter the License Token: E.g., XXXXX-XXXXX-XXXXX
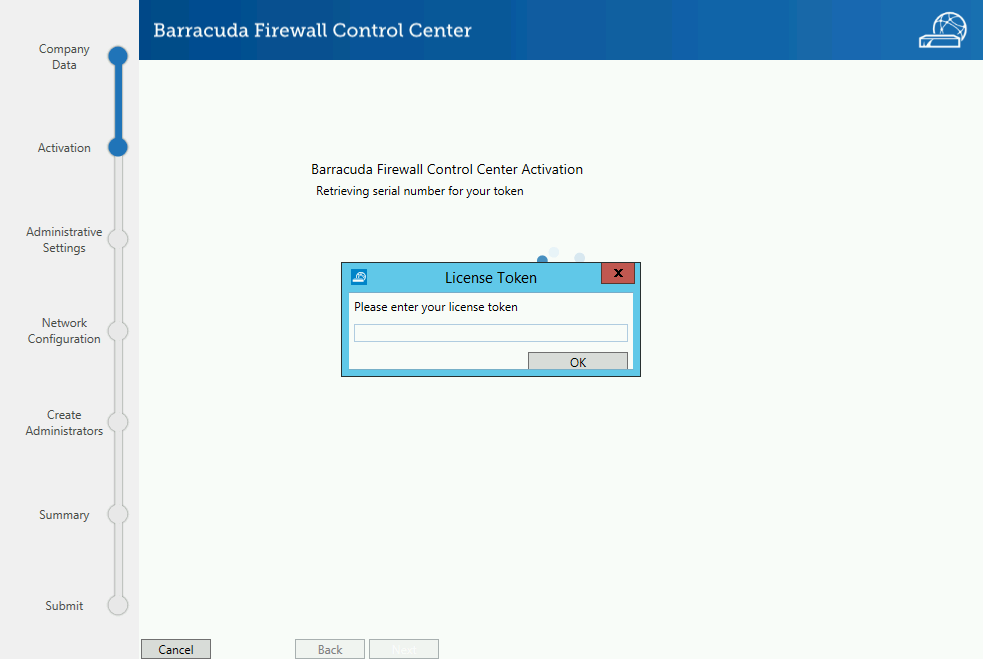
- Click OK.
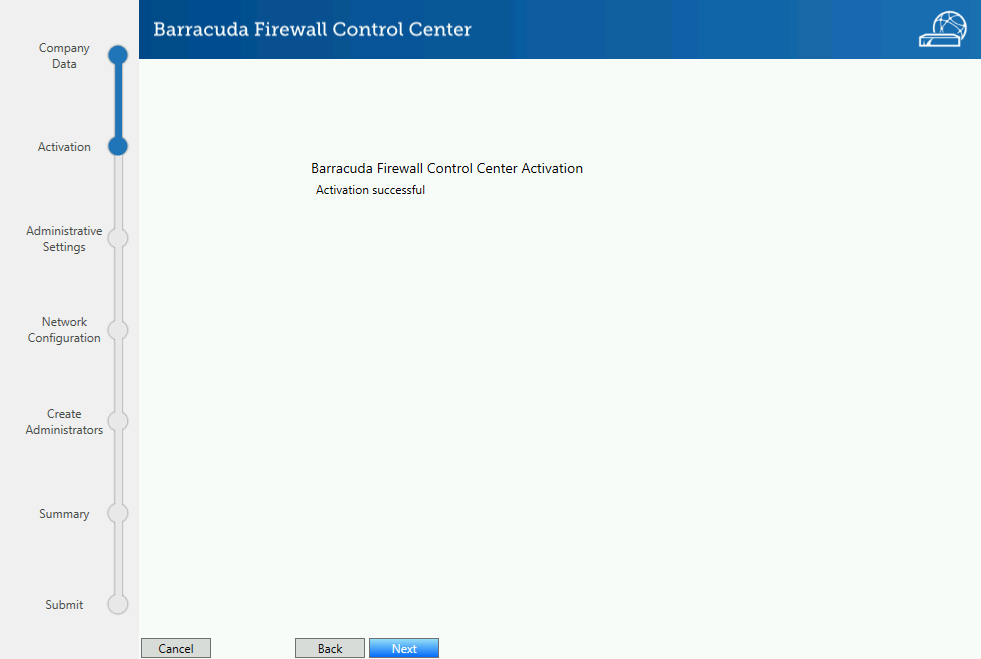
- Click Next.
Step 4. Administrative Settings
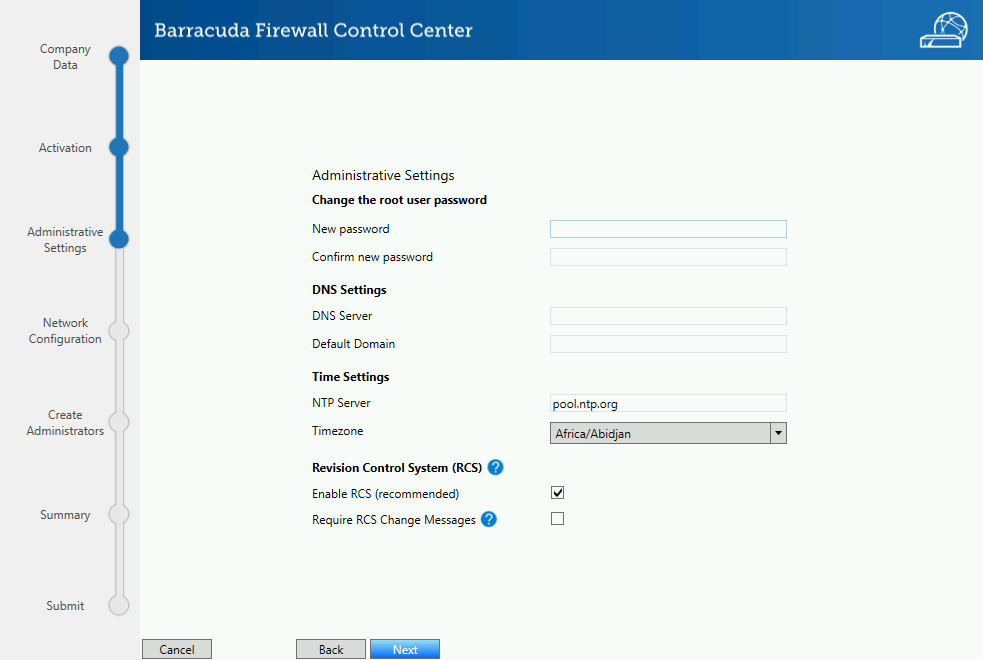
Enter administrative settings for your Control Center. Enabling the Revision Control System (RCS) is strongly recommended.
- Change the root user password. Depending on the password strength, the background of the New password textbox is green (strong), yellow (medium), or red (weak).
- Enter the DNS Settings:
- DNS Server – Enter the IP address for the primary DNS server on your network.
- Default Domain – Enter the default domain.
- Enter the NTP Settings:
- NTP Server – Enter an IP address or hostname for your preferred NTP server.
- Timezone – Select the time zone from the drop-down menu.
- Enable Revision Control System (RCS):
- Enable RCS (recommended) – Enable to allow the administrator to view and, if necessary, revert configuration changes made on the Control Center.
- Require RCS Change Messages – Enable this option to force the admin to enter a description for every configuration change.
- Click Next.
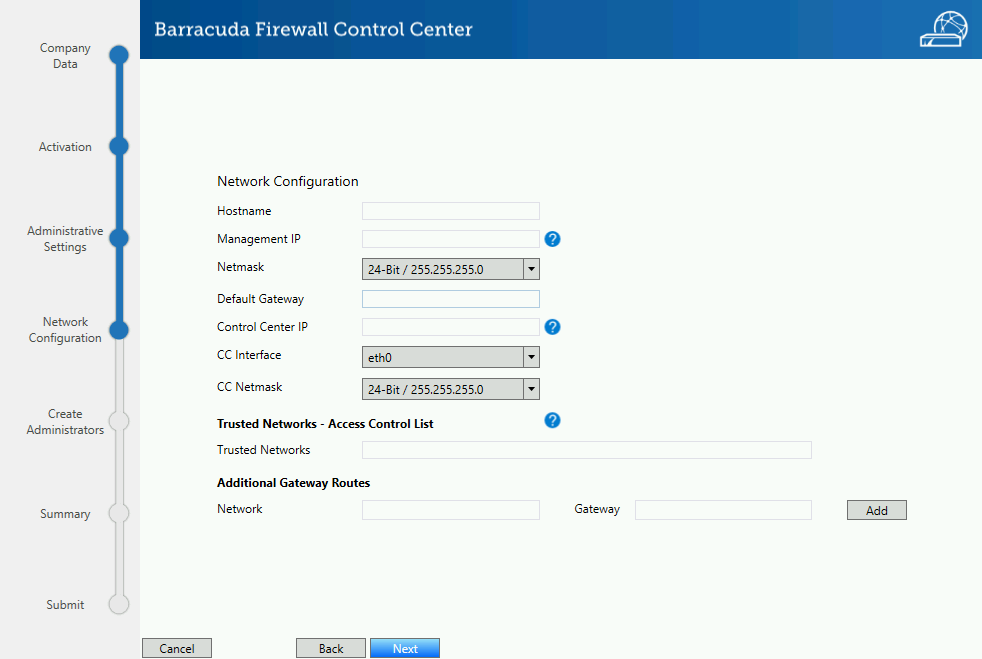
Step 5. Network Configuration
Configure basic network settings, such as management and Control Center IP address, gateway routes, and trusted networks (management ACLs).
- Enter a Hostname for your CC.
- (optional) Change the Management IP.
- Select the Netmask from the drop-down menu.
- Enter the Default Gateway.
- Enter the Control Center IP. If the Control Center IP and the Management IP are configured to be in the same subnet, the list for CC Interfaces will be disabled. If these two IPs differ, the menu CC Interfaces is enabled to select another interface.
- Select the Netmask from the drop-down menu.
(optional) Enter all Trusted Networks that are allowed to access the Control Center.
For each Additional Gateway Route:
- Enter the destination Network and Gateway.
- Click Add.
- Click Next.
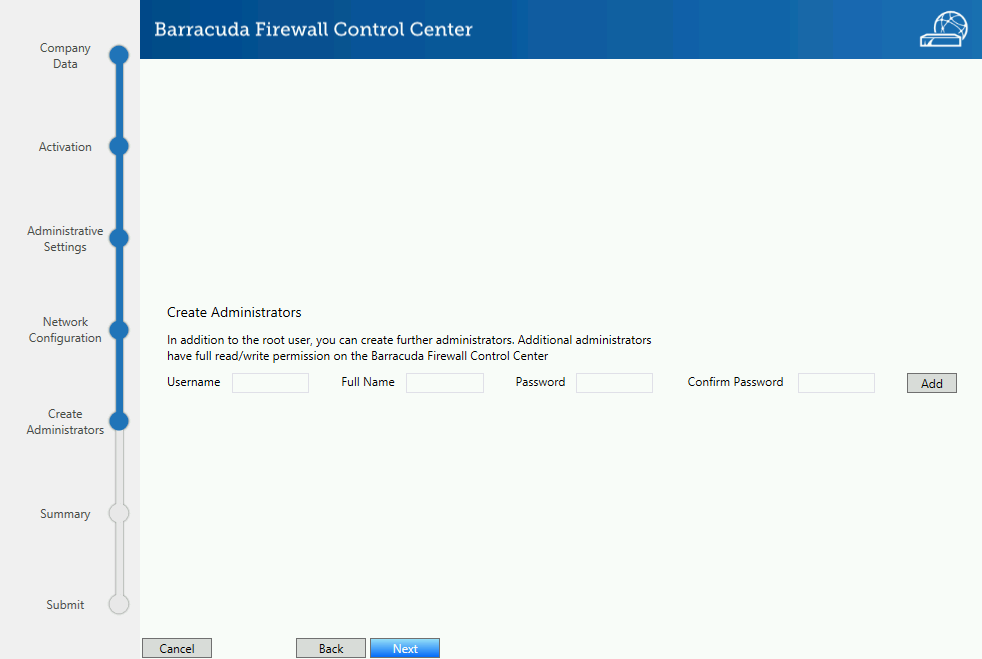
Step 6. (optional) Create Administrators
You can create additional administrators. All administrators created have full read/write permissions on the Control Center and also full access to the box layer. If you want to use an external authentication server, create the CC admins after completing the CC Wizard. For more information, see Control Center Admins.
- For each additional administrator, enter the following settings and click Add.
- Username – Enter a username.
- Full Name – Enter the full name of the user.
- Password / Confirm Password – Enter a password. Depending on the password strength, the background of the Password textbox is green (strong), yellow (medium), or red (weak).
- Click Next.
Step 7. Review Configuration Summary
(optional) Click Print Summary to print the configuration settings on the systems default printer.
(recommended) Click Save Summary to save a text file containing the configuration parameters collected by the CC Setup wizard.
- Click Next.
Step 8. Submit the Configuration
The CC Wizard now sends and activates all configuration settings collected in Steps 1 to 7. If one configuration step fails, use the Back button to go back and change the configuration. You can then resubmit the settings to finish the configuration of the Control Center. When the configuration changes are complete, click Finish. The CC Setup Wizard is automatically disabled for this Control Center.
Next Steps
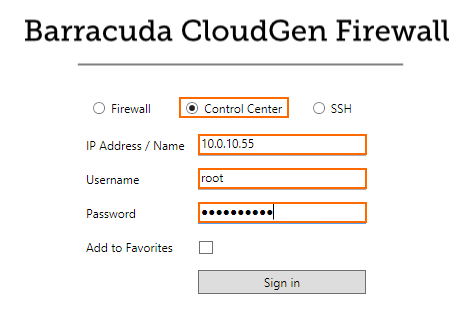
Use the CC IP Address to connect to the Control Center.
| Link | |
|---|---|
| Create Admins | Control Center Admins |
| Configure Central Management | |
| Add a CloudGen Firewall to the Control Center | |
| Licensing for managed CloudGen Firewalls | |
Revision Control System (RCS) |
