

Define polling intervals for network routes, HA partner units, and other parameters that are monitored to ensure that the box layer of the CloudGen Firewall or Control Center is running. HA units can be configured to use an additional network connection for heartbeat communication.
Configure Monitoring Settings
- Go to CONFIGURATION > Full Configuration > Box > Infrastructure Services > Control.
- Click Lock.
- In the Monitoring Parameters section, specify the monitoring interval and which services or daemons should not be monitored:
- Startup Poll Interval [Secs] – The period of time that has to expire after booting or activating the network until an HA action can take place (default: 10). This is important especially with "slow learning" NICs that need quite a time after booting/activating until the link is activated.
Regular Poll Interval [Secs] – The number of seconds between HA heartbeats. This setting also specifies the reaction time for activating and deactivating routes and the server (Monitor IPs). For faster HA failovers, you can decrease the default poll interval by 5 seconds.
- Deactivate Service – Infrastructure services like logging, REST, and many others also consume resources on your firewall. If the firewalls' resources get exhausted because of a high load or if you just do not need certain services to be operative, you can deactivate them. This can reduce load and RAM consumption, especially on smaller appliances or platforms.
If you want to deactivate certain services, click the green '+' and select the service from the menu list.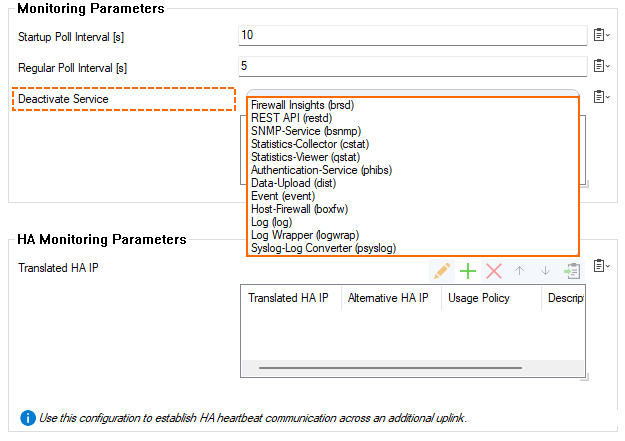
- In the HA Monitoring Parameters section, define a translation table specifying the IP addresses to use for communication in network setups that provide a private uplink between two HA partners. In the Translated HA IP table, specify the following settings for each entry:
- Translated HA IP – The primary management IP address of the HA unit as specified in the Management IP field on the Network page (Config > Full Config > Box).
Alternative HA IP – The alternative HA IP is part of the private uplink network as specified in the Additional Local IPs section on the Network page (Config > Full Config > Box).
- Usage Policy - Specify how to proceed if the alternative HA IP becomes unavailable.
- Description - Optional description.
- In the ICMP Gateway Monitoring Exemptions section, specify the interfaces on which the gateway cannot be reachable via regular ICMP-based probing. In the No Probing for Interfaces table, select the interfaces.
- Click OK.
- Click Send Changes and Activate.