You can install the Firewall Control Center as a virtual machine in the Microsoft Azure public cloud. The Firewall Control Center is licensed using the Bring-Your-Own-License (BYOL) model. For more information, see Firewall Control Center.
Before You Begin
- Create a Microsoft Azure account.
- Purchase a Firewall Control Center for Microsoft Azure license, or register to receive a 30-day evaluation license from the Barracuda Networks Evaluation page.
Step 1. Basics
- Go to the Azure portal: https://portal.azure.com
- In the upper-left corner, click + Create a resource.
Search the Marketplace for
Barracuda Firewall Control Center for Azureand click Barracuda Firewall Control Center for Azure.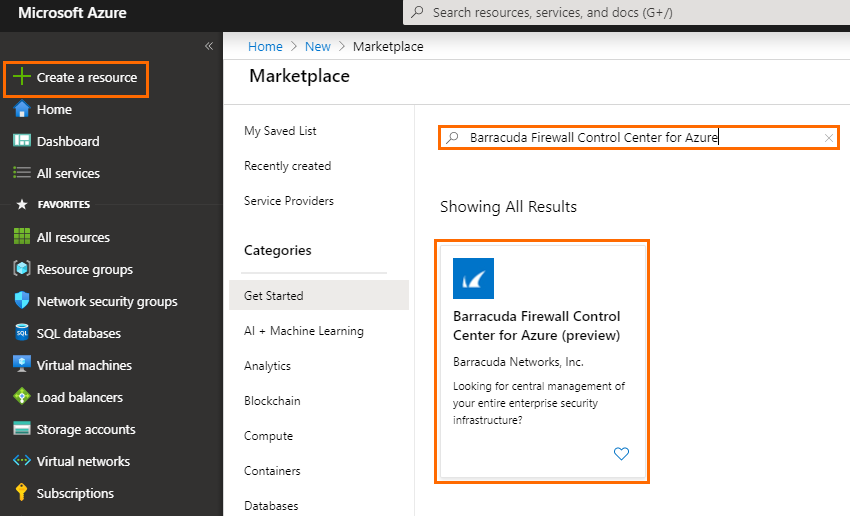
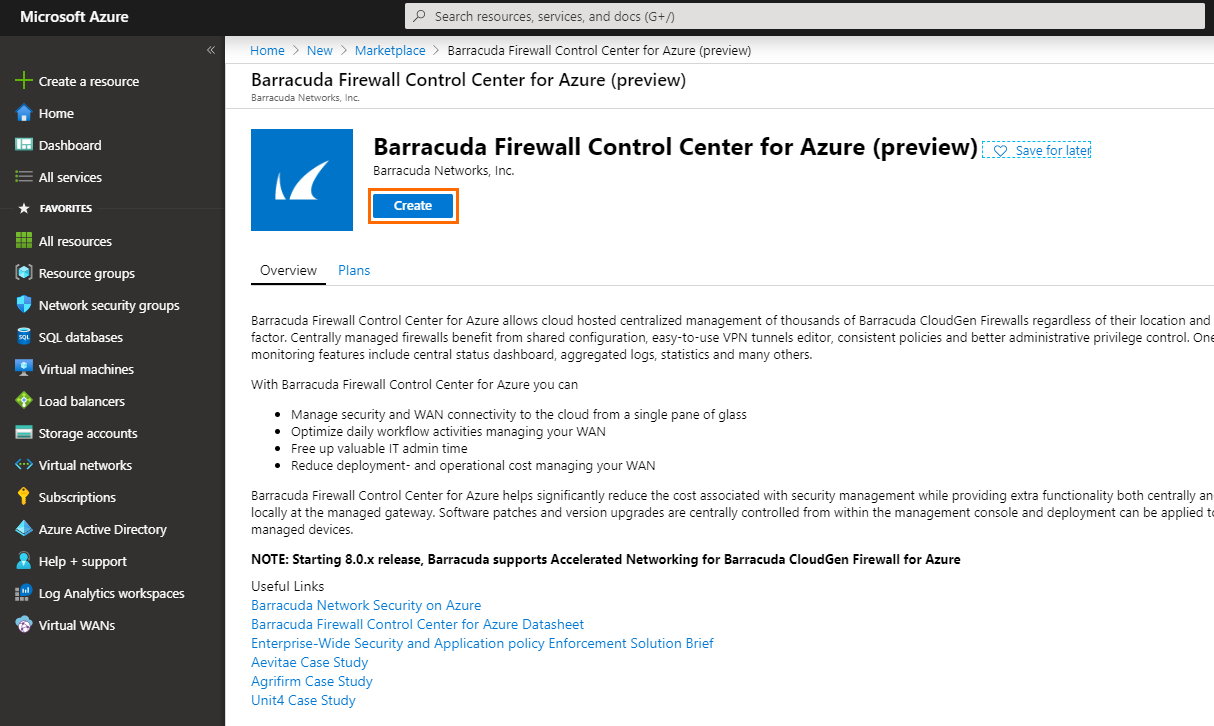
- In the next window, click Create.
- In the Basics blade, configure the following settings:
- Subscription – Select your subscription.
- Resource Group – Select an existing resource group to deploy to, or click Create new for a new resource group.
- Region – Select the desired location the Control Center will be deployed to.
- Control Center Name – Enter the hostname for the Firewall Control Center.
- Firmware version – Select one of the available firmware versions. Barracuda Networks recommends deploying the highest available version.
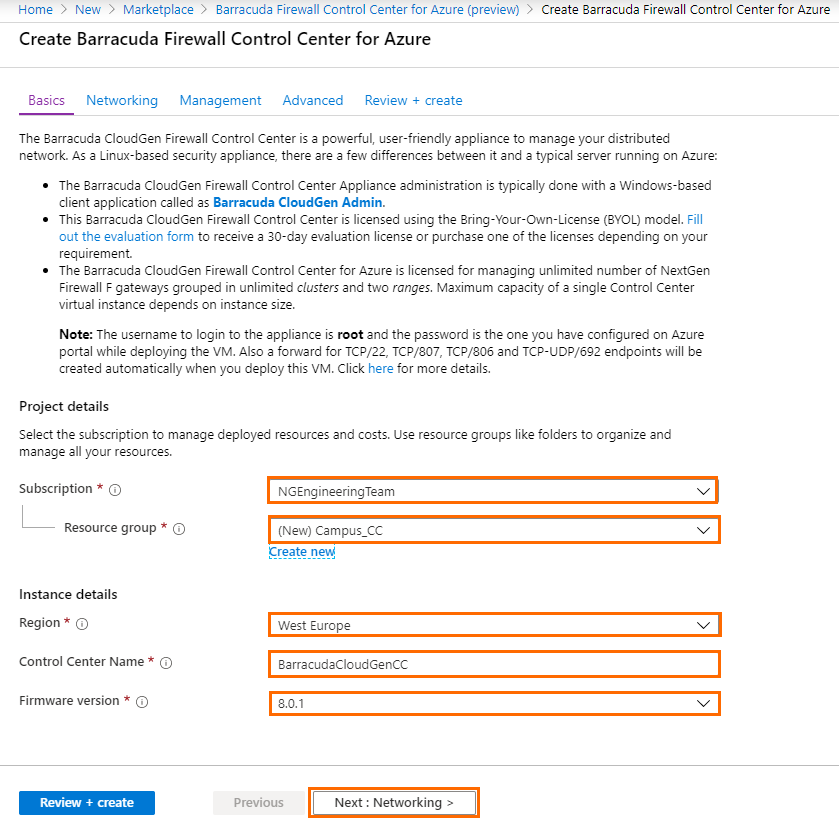
- Click Next : Networking >.
Step 2. Networking
- In the Size and Networking blade, configure the following settings:
- Virtual network – Select an existing Virtual network, or create a new one.
- Control Center Subnet – Select an existing subnet, or create a new one. This subnet will host your Control Center.
Public IP address name – Select an existing Public IP address, or create a new one.
- Domain name label – Enter a domain name for your Control Center.
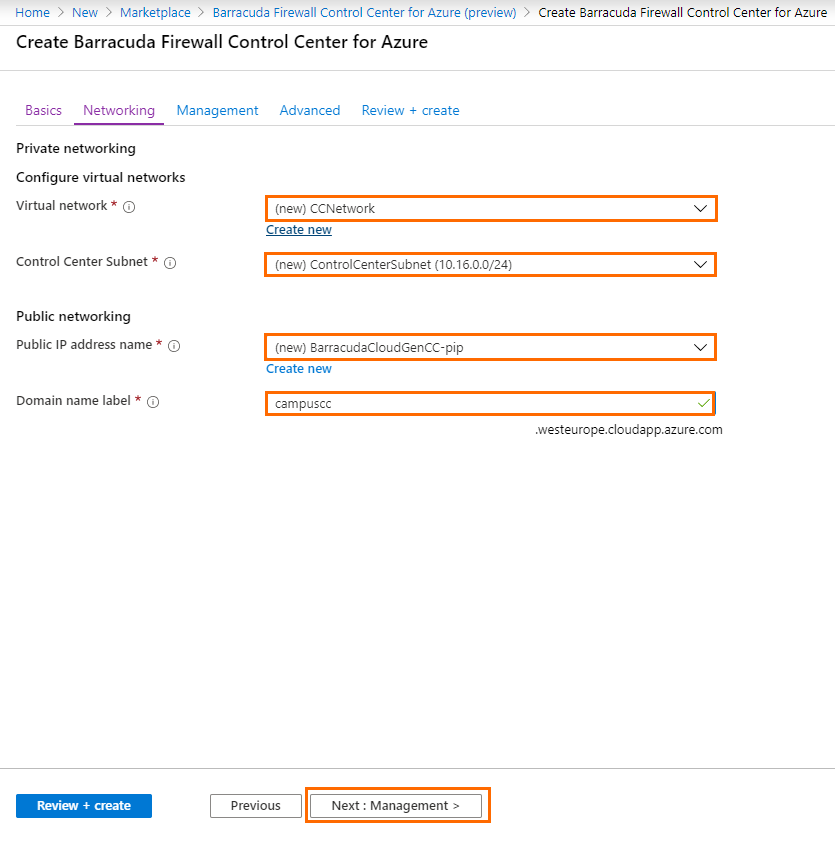
- Click Next : Management >.
Step 3. Management
- In the Management blade, configure the following settings:
Management ACL – Introduces a Network Security Group that restricts access to management ports of the Control Center. Enter
0.0.0.0/0to allow access from any network and to skip creating a Network Security Group.Root password – Enter the password for the root user of the Control Center.
- Confirm password – Retype the password for the root user of the Control Center.
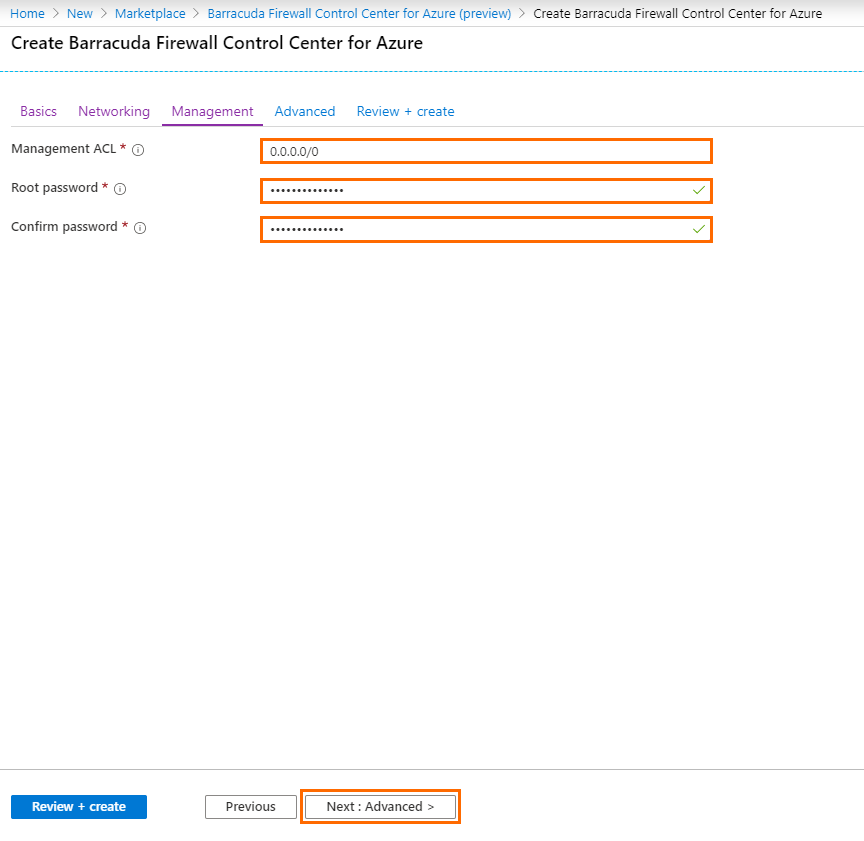
- Click Next : Advanced >.
Step 4. Advanced
- In the Advanced blade, configure the following settings:
- Private IP address – Enter a static private IP address from the subnet the Control Center is deployed to. The first four and the last IP addresses in the subnet are reserved by Azure.
- VM size – If not already configured, change the virtual machine size.
Accelerated networking – Enable or disable Azure Accelerated Networking if the size of your virtual machine meets the requirements of Microsoft.
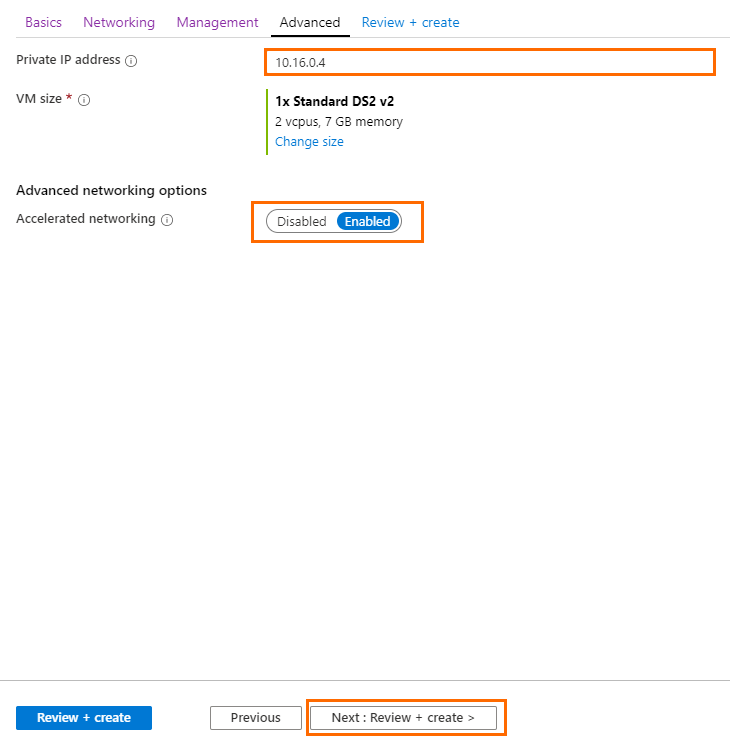
- Click Next : Review + create >.
Step 5. Summary
- The basic configuration of the Control Center is validated, and if no errors are found, the virtual machine is ready for provisioning. For automated deployments, you can download the configuration template.
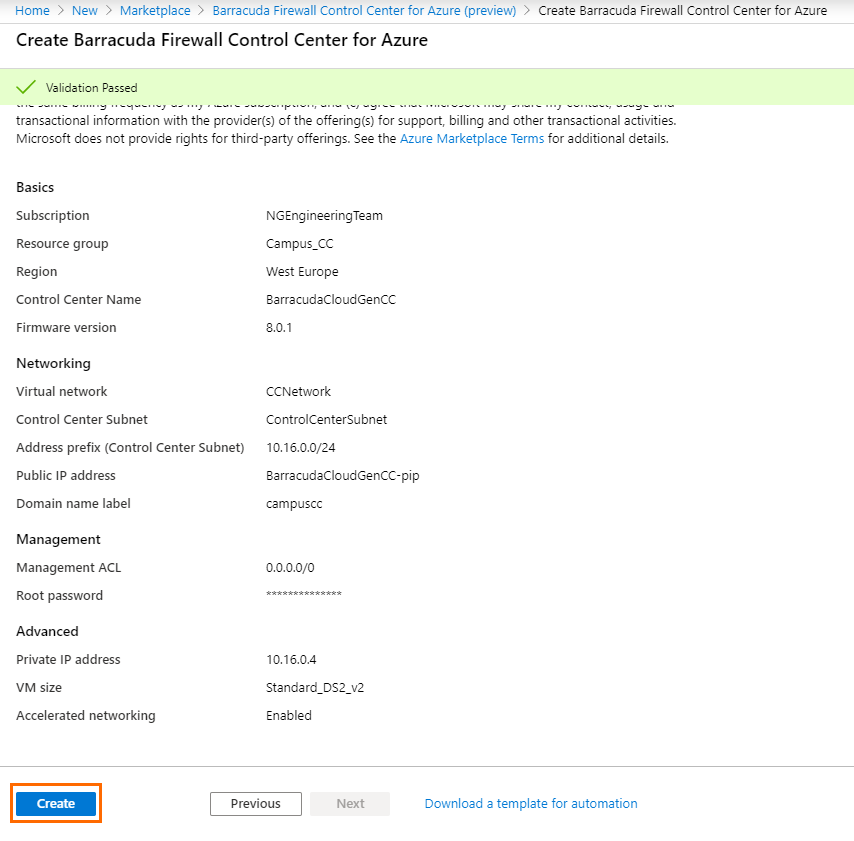
- Click Create.
- Wait for Microsoft Azure to finish the deployment of your Control Center.
- Go to Virtual machines, click on the Control Center VM, and locate the Public IP address used to connect to your Control Center. Use this IP address to connect to your Control Center via Barracuda Firewall Admin. The username is root and the password is the password you configured in Step 3.
