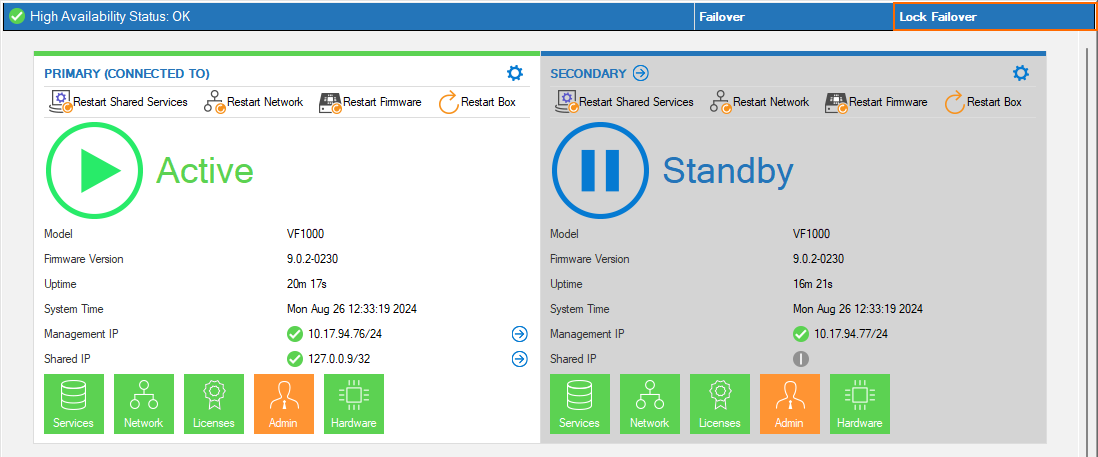
To prevent downtime when updating your high availability cluster, make the primary firewall the active one. To install updates on the secondary one, which is the passive HA partner, you must prevent the cluster from performing a failover during the update installation.
After installing the necessary update files on the secondary firewall, you must unlock and perform a failover so that the secondary firewall becomes the active one and the primary one is set to standby mode. Then, you must lock the failover again and perform the same update steps you did for the secondary firewall. After updating, you can then unlock the failover again.
Before You Begin
Ensure to make the primary firewall the active one.
Step 1. Perform a Lock Failover to Prevent Downtime for Updating the Secondary Firewall
Log into the secondary firewall.
Go to CONTROL > Services.
In the upper-right corner of the viewing area, click Lock Failover.

Step 2: Update the Secondary Firewall
Log into the secondary firewall and update its firmware.
For more information, see How to Install Updates via Barracuda Firewall Admin or How to Update Managed High Availability Clusters with Automatic Failover.
Step 3. Unlock the Failover and Perform a Failover Manually
In the upper-right corner of the viewing area, click Unlock Failover.
In the upper-right corner, click Failover.
Wait until the secondary firewall becomes the active one.
Step 4. Update the Primary Firewall
Log into the primary firewall and update its firmware.
For more information, see How to Install Updates via Barracuda Firewall Admin or How to Update Managed High Availability Clusters with Automatic Failover.
Step 5. Unlock the Failover and Perform a Failover Manually to Make the Primary Firewall the Active One Again
In the upper-right corner of the viewing area, click Unlock Failover.
In the upper-right corner, click Failover.
Wait until the secondary firewall becomes the active one.
