

The backup daemon operates on the box level of an unmanaged box, a CC-managed box, and a Control Center and always must be configured on the box level. Configure the Backup Daemon to perform scheduled backups on storage that can be either locally on your firewall / Control Center or on remote Cloud storage.
Step 1. Enable the Backup Daemon and Create a Storage Backend
- Log in to your Firewall or Control Center on box level.
- Go to CONFIGURATION > Configuration Tree > Infrastructure Services > Config Backup Daemon.
- Click Lock.
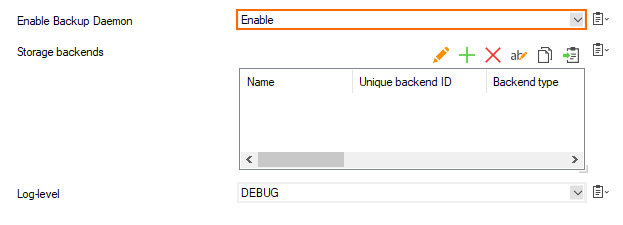
- For Enable Backup Daemon, select Enable.
- (Optional) If you want to change the default preset for Log-level, select another entry from the list
- Click + for Storage backends.
Step 2. Configure the Storage Backend and Create a Backup Job
- The Storage backends window is displayed.
- For Unique backend ID, enter a unique name for your back-end storage.
- For Backend type, select whether to create a local or remote storage:
- Local – Allocate space storage on your firewall/Control Center.
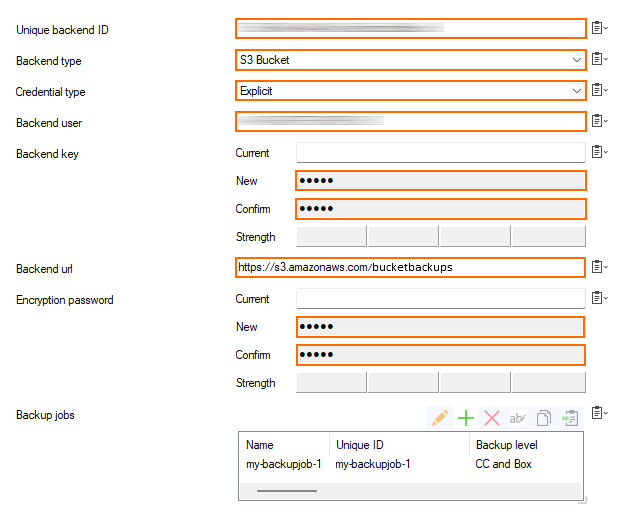
- S3 Bucket – Allocate space on an AWS Cloud storage. This option will enable the edit fields for Backend user and Backend key.
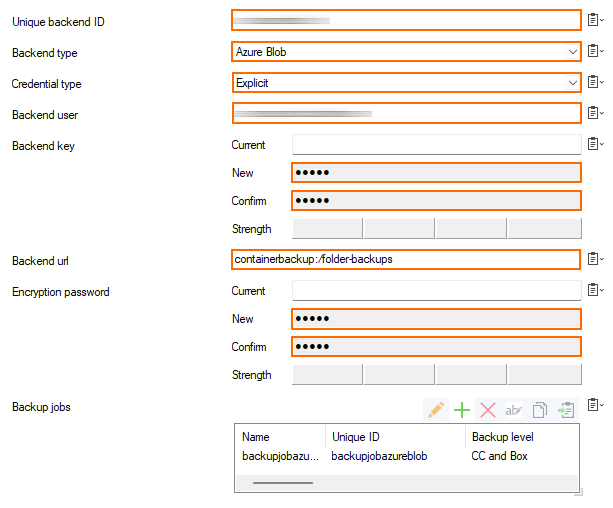
- Azure Blob – Allocate space on an Azure Cloud storage. This option will enable the edit fields for Backend user and Backend key.
- In order to access the storage space, your firewall/Control Center must be authorized. You have two options:
- (Option #1) Authorize using explicit credentials
- For Credential type, select Explicit.
- (Option #2) Authorize using system Cloud credentials.
- For Credential type, select Use system cloud credentials.
- (Option #1) Authorize using explicit credentials
- If you have selected remote backend type (S3 Bucket, Azure Blob):
- Add the name of the Backend user.
- Add the password of the Backend key.
Add the path for the Backend url so that the backup daemon can connect to the storage space. This is a mandatory field.
Local Storage Example AWS Storage Example Azure Storage Example /myLocalStorage https://s3.amazonaws.com/bucket-backups containerbackup:/folder-backups 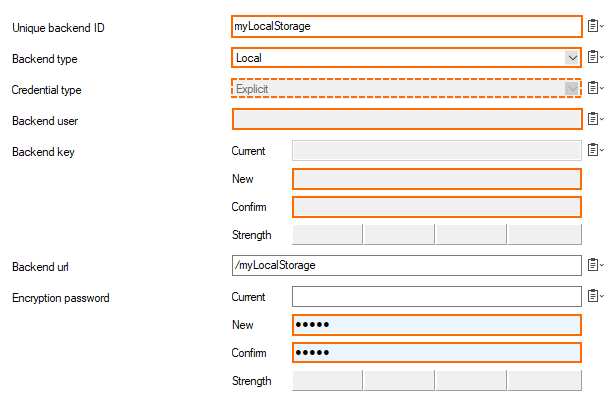
- For encrypting your backup, you must enter an encryption password. The indicator for Strength should display a green color:
- If you have already configured a valid password anytime before, the edit field for Current will display multiple black bullets hiding your current password.
- For New, enter your new password.
- For Confirm, re-enter the password to check whether it matches the previous input for New.
- Click + for Backup jobs.
Step 3. Configure and Schedule the Backup Job
- The Backup jobs window is displayed.
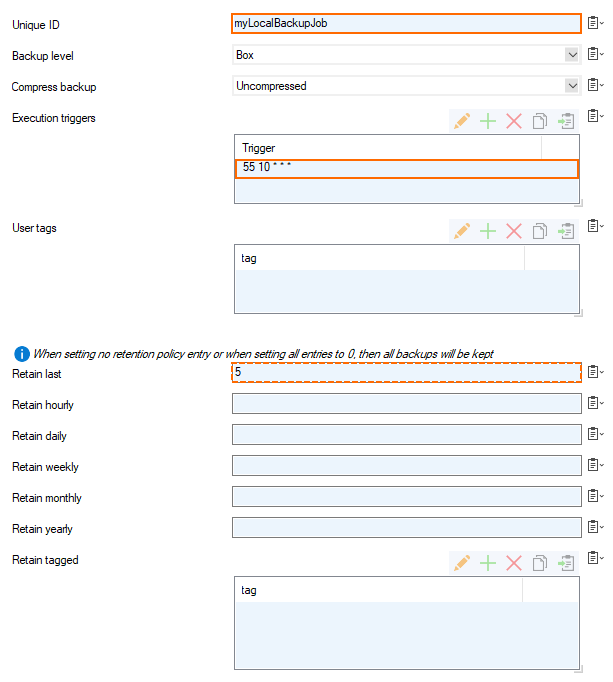
- Enter a unique name into the edit field for Unique ID.
- Select on which level the backup must be performed.
- Box – The backup will be created for a firewall's/Control Center's configuration on the box level.
- CC – The backup will be created for the configurations of all Control Center-managed firewalls.
- CC and Box – Both previous options for Box and CC will apply.
- For Compress backup, select Compressed if you want to have the backup compressed, otherwise select Uncompressed.
- For Execution triggers, click + to create a new execution trigger:
- The Execution triggers window is displayed.
- Enter the timestamp in Unix-like time format following the template 'Minute - Hour - Day of Month - Month - Day of the Week', e.g. every 31st of December at 18:00:
0 18 31 12 *
- Click OK.
- For User tags, click + to add tags to the backup job.
- The User tags window is displayed.
- For tag, enter a single tag into the edit field.
- Click OK.
- (Optional) If you want to add more tags, repeat all previous steps starting at point 7.
- If you want to modify the retention time of the backups, configure the following parameters. Leaving all fields blank or setting all edit fields to '0' will keep the backup unlimited.
- Retain last – Keep the #n most recent backups. (The default value is 5).
- Retain hourly – For the last #n hours with a backup, keep the most recent for each hour.
- Retain daily – Keep the latest #n daily backups.
- Retain weekly – Keep the latest #n weekly backups.
- Retain monthly – Keep the latest #n monthly backups.
- Retain yearly – Keep the latest #n yearly backups.
- Retain tagged – If you want to exempt certain backups from being deleted after surpassing the configured limits above, click + to add the Retain tag that must match at least one of the User tags. If you want, you can add further retain tags.
- Click OK.
- Click OK.
- Click OK.
- Click Send Changes/Activate.
You have now configured the backup daemon to perform backup jobs.