

To configure Microsoft 365 to use CloudGen Access as its Identity Provider, you need to federate a Microsoft account domain. To federate is to establish authentication and/or authorization trust of your domain with Microsoft. CloudGen Access will then be used to log into Microsoft 365. Follow the steps below or see https://learn.microsoft.com/en-us/azure/active-directory/hybrid/how-to-connect-fed-saml-idp to get started.
Before you begin
If an external Identity Provider will be used for authentication in CloudGen Access to log into Microsoft 365, configure one in Identity > Settings > Authentication Protocol (see How to Configure an Identity Provider).
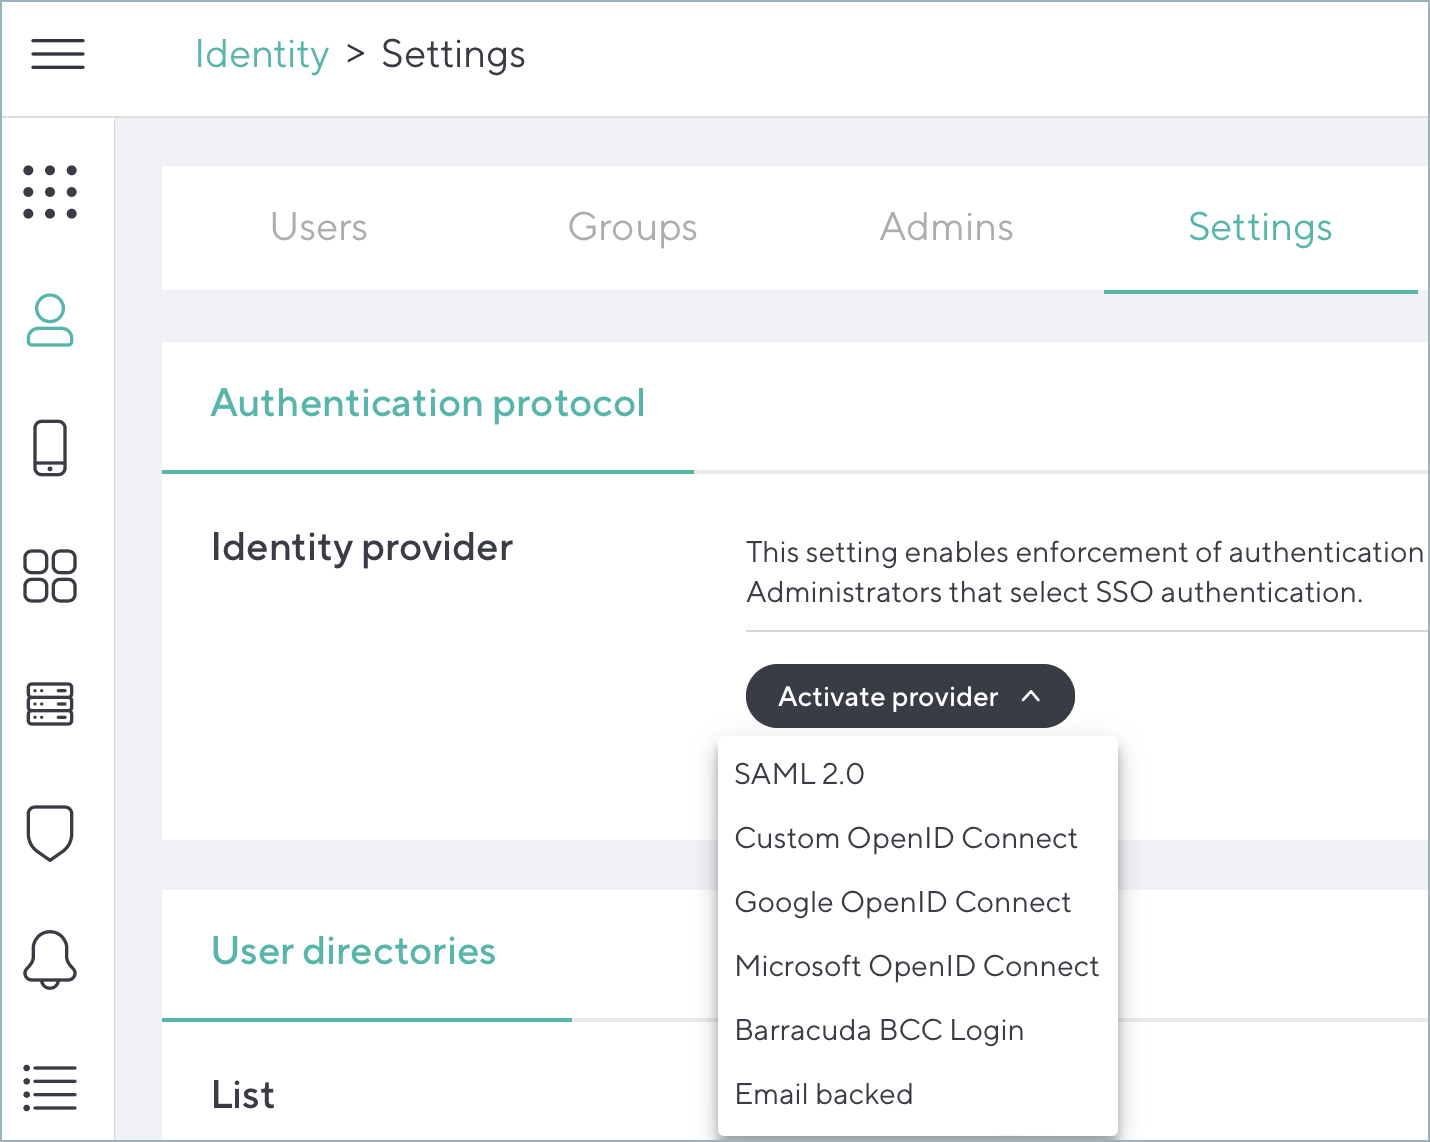
Important: Microsoft OpenID Connect or SAML 2.0 connected to Azure AD / Microsoft Entra ID will not work in combination with having CloudGen Access as an Identity Provider for Microsoft 365. If an external authentication provider has not been configured, the device/user will be authenticated via CloudGen Access against the certificate created during the enrollment.
CloudGen Access server information to use with domain configuration
You will need the SAML configuration information for Single Sign-On (SSO) configuration.
- Log into your CloudGen Access account.
- If a Microsoft 365 resource has not been configured yet, create a new resource of the type SaaS with SAML as the SSO type and configure the SSO settings, either with the Metadata URL or manually (see Add Resource).
Go to Access > Resources and click on the configured Microsoft 365 resource. Click View Server Settings under SSO configuration. This will also guide you through the domain federation process.
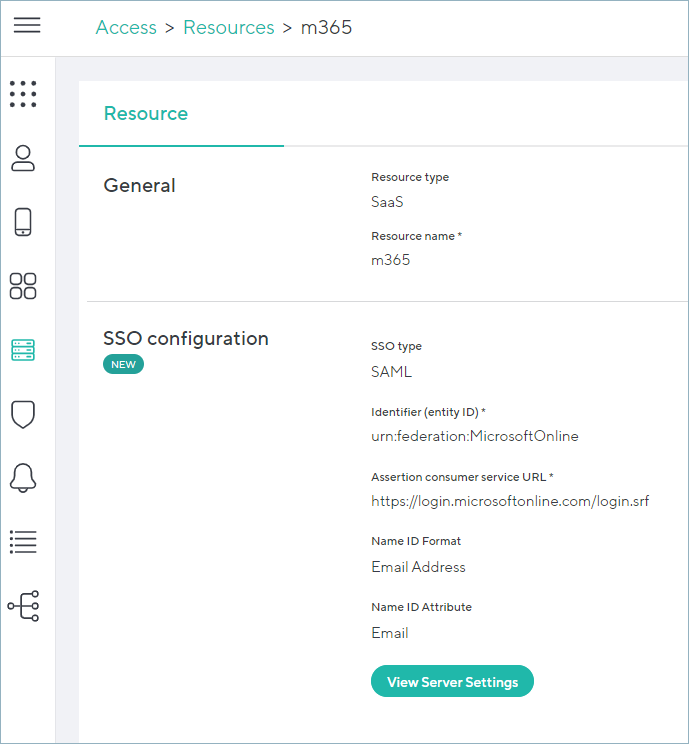
- Click View Server Settings and follow the steps shown in the popup window.
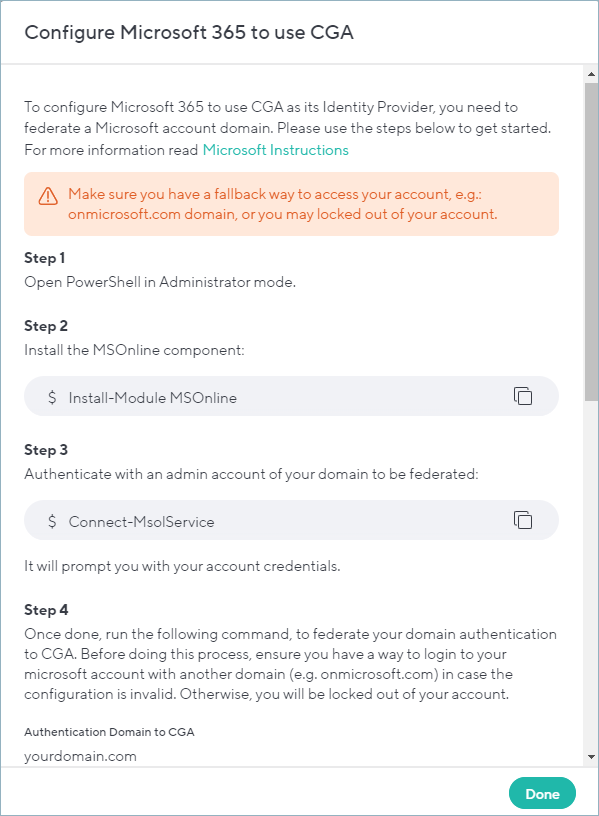
Tip: Click the Copy icon next to each command and paste them into a notepad to save them for later. They will be needed in the next steps.
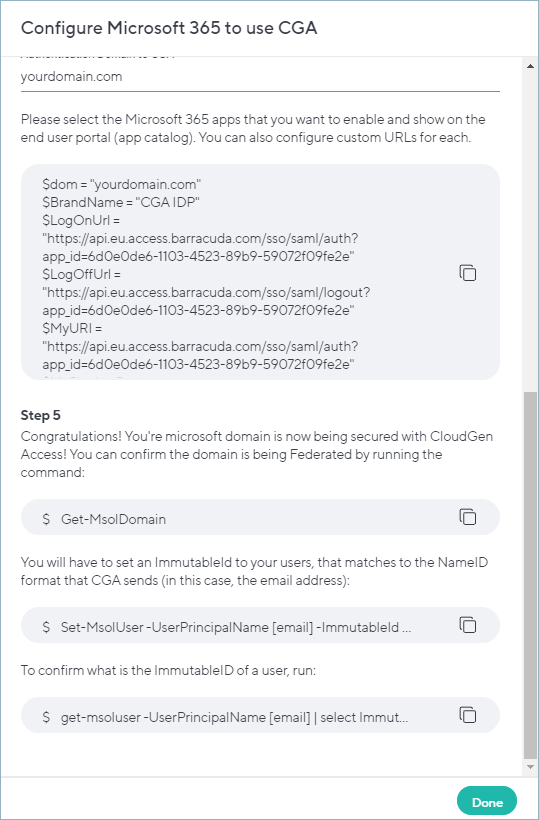
- In Step 4 from the popup window shown above, enter the domain that you want to have secured via CGA (or for which you want to have CGA as an Identity Provider). Then copy the commands from Step 4 from the popup window. Copy the commands from step 5 as well.
- Click Done.
Federating your domain
- Open PowerShell in Administrator mode.
- Install the MSOnline component with the following command:
$Install-Module MSOnline - Authenticate with an admin account of your domain:
Connect-MsolService
It will prompt you for your account credentials. - Paste the commands copied from step 3 of the popup View Server Settings window:
Example values:- $dom = "test.com"
- $BrandName = "CGA IDP"
- $LogOnUrl = "https://api.eu.access.barracuda.com/sso/saml/auth?app_id=xxxxxxxx"
- $LogOffUrl = "https://api.eu.access.barracuda.com/sso/saml/logout?app_id=xxxxxxxx"
- $MyURI = "https://api.eu.access.barracuda.com/sso/saml/auth?app_id=xxxxxxxx"
- $MySigningCert = "mycerthashvalue"
- $Protocol = "SAMLP"
- Set-MsolDomainAuthentication `
- -DomainName $dom `
- -FederationBrandName $BrandName `
- -Authentication Federated `
- -PassiveLogOnUri $LogOnUrl `
- -LogOffUri $LogOffUrl `
- -SigningCertificate $MySigningCert `
- -IssuerUri $MyURI `
- -PreferredAuthenticationProtocol $Protocol
- Confirm that the domain is now federated:
Get-MsolDomain
If the domain that is intended to be federated shows Federated next to it, the steps were successful. - Set an
ImmutableIDfor your users that match to theNameIDformat that CloudGen Access sends (in this case, the email address).Set-MsolUser -UserPrincipalName [email] -ImmutableId [email]
Tip: This can also be done with a small script as it needs to be done for all users.# Get all users on the domain$users = Get-MsolUser -All# Loop through each user and set the ImmutableIDforeach ($user in $users) {Set-MsolUser -UserPrincipalName $user.UserPrincipalName -ImmutableId $user.UserPrincipalName} - To confirm the
ImmutableIDof a user, run:Get-msoluser -UserPrincipalName [email] | select ImmutableID
Tip: This can also be done in a loop to print all immutable IDs at once, or use the following option.
Run the following command to generate a CSV file containing immutable IDs:$onlineusers = Get-MsolUser -All | Select-Object UserprincipalName,ImmutableID,WhenCreated,LastDirSyncTime| Export-Csv c:\MyFile.csv -NoTypeInformation