This article provides troubleshooting information for cases where the Hyper-V Service Module does not collect backup status data however, it does not discuss troubleshooting event collection and alerting related to the Policy Modules for the Hyper-V Service Module. The content of this article works on the assumption that the Hyper-V module has been installed and configured according to the latest version of the Hyper-V Integration Guide, available from Barracuda Campus.
The Hyper-V Service Module uses PowerShell Scripting to collect information from Hyper-V. In order for the Service Module to function, the Onsite Manager must have PowerShell 2.0 or later installed, and the PowerShell Execution cannot be restricted. The Service Module scripts leverage remote WMI commands to query information from the Hyper-V Servers.
Before proceeding with the steps below, ensure that the following services are enabled and running on the Hyper-V hosts before the Hyper-V Service Modules can collect data:
- Hyper-V Image Management Service
- Hyper-V Networking Management Service
- Hyper-V Virtual Machine Management
Step 1 - Verify the Plugin is working on the Onsite Manager
- Log into the Onsite Manager.
- Open the following log file in Notepad:
C:\Program Files (x86)\Level Platforms\Onsite Manager\Logs\com.avg.microsoft.hyperv.txtIf the log file does not exist, please ensure that you have configured the Service Module as per the latest version of the Hyper-V Integration Guide, available from Barracuda Campus.
- Scroll to the end of the log and verify that the last line is as follows: 2
014/02/16 23:32:23 [7] INFO LPI.Sdk.SC.PluginDomain - Log4Net initialized for Hyper-V plugin.The log entry indicated that the plugin has been passed down to the Onsite Manager and that it is being loaded properly
If this log file does not exist, verify the Hyper-V Service Module configuration as per the Hyper-V Integration Guide. After doing so, if the issue persists, please contact support.
Step 2 - Verify the PowerShell Execution Policy
- Log into the Onsite Manager.
- Open the Microsoft Windows PowerShell.
- Type the following command:
Get-ExecutionPolicy - Press Enter.
If the Execution Policy is not 'Unrestricted', proceed to step 5. - Type the following command and press Enter:
Set-ExecutionPolicy Unrestricted - Press Y to accept the changes and press Enter.
Step 3 - Verify that the PowerShell WMI queries from the Onsite Manager to Hyper-V Servers are functional
- Log into the Onsite Manager using the MWService account.
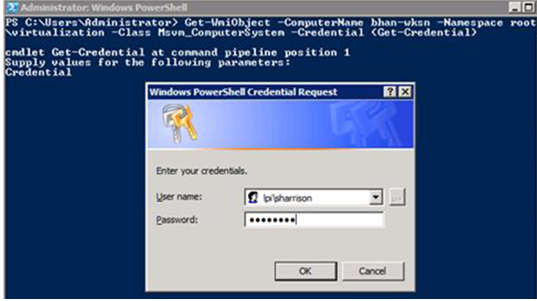
Open PowerShell and run the following command:
Get-WmiObject -ComputerName MYHYPERVSERVER -Namespace root\virtualization -Class Msvm_ComputerSystem
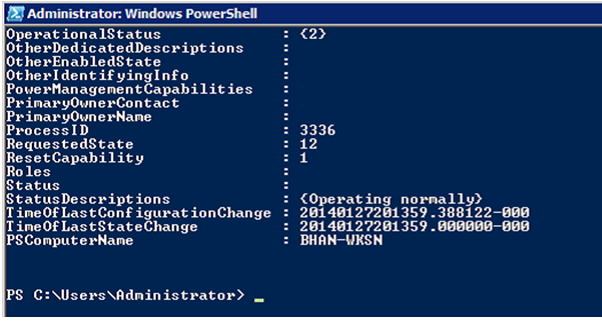
You should receive an output like the following:
- Repeat Step 2 for the following classes in the root\virtualization namespace to ensure that all required WMI classes are functional:
Msvm_ComputerSystem
MsVM_VirtualSystemSettingData
Msvm_VirtualSystemManagementService
MsVM_VirtualSystemGlobalSettingData
Msvm_ImageManagementService
Msvm_VirtualSwitchManagementService
Msvm_MemorySettingData
Msvm_KvpExchangeComponent
Msvm_HeartbeatComponentSettingData
Msvm_KvpExchangeComponentSettingData
Msvm_ShutdownComponentSettingData
Msvm_TimeSyncComponentSettingData
Msvm_VssComponentSettingData
Msvm_VirtualSwitch
Msvm_SwitchLANEndpoint
Msvm_InternalEthernetPort
Msvm_ExternalEthernetPort
MsVM_ResourceAllocationSettingData
Msvm_EmulatedEthernetPortSettingData
Msvm_SyntheticEthernetPortSettingData
If you get any errors, verify that WMI is properly enabled on the host. You can do this via the group policy or by running the Workgroup preparation utility. Verify that the correct credentials are configured for the host in the Credentials tab in Site Management. If you continue to experience issues with any of the above WMI classes, refer to Microsoft's Support Articles for information on troubleshooting WMI.
