

If you want to configure user or group specific policies in your Barracuda Content Shield (BCS) account, you need to connect your LDAP or AD server to BCS. You use your Barracuda Cloud Control (BCC) account to connect the two. When you begin your BCS trial, a BCC account is automatically created for you. The basic workflow is as follows:
- Install the BCS suite on endpoint machines. See How to Manage Deployment of the Barracuda Content Shield Agent for Windows or How to Download and Install the Barracuda Content Shield Agent for macOS.
- Log into BCC at https://login.barracudanetworks.com/auth/login/ with your BCS credentials and connect your LDAP or AD server to BCC as described in this article. BCC then connects your LDAP or AD to your BCS account automatically. Barracuda Cloud Control (BCC) offers three methods of connecting to your LDAP server:
- Use a standard LDAP connection.
- Use LDAP over SSL or LDAP/STARTTLS. This option offers additional security.
- Further refine your firewall policy to only allow traffic from Barracuda IP addresses and ranges, and restrict ports to the protocol you choose. See How to Configure Your Firewall to Allow LDAP Settings.
- After your LDAP is connected to your BCS account, you can select LDAP users and/or groups on the ADVANCED FILTERING page in BCS to apply policies, as described in How to Configure Advanced Filtering Policies.
Viewing Existing Directories and Groups
Complete the following steps to view existing directories and groups in BCC:
- Log into BCC at https://login.barracudanetworks.com/auth/login/. If you have not logged in before, use your BCS credentials.
Click Home.
From the Admin tab in Barracuda Cloud Control, click Directories. The Directories table includes a row indicating whether or not Authentication has been set to On or Off.
Click View groups to display the groups associated with a configured directory; each group is listed as a line item. Groups are synchronized automatically to ensure that user information is up-to-date.
- Click Edit for a specified group to modify the settings for the host or domain. When you have finished making changes, click SAVE. After modifying the settings, you can use the Test Settings button on the Host tab to verify setting changes were applied.

Adding a New LDAP Active Directory
Complete the following steps to add a new LDAP Active Directory:
- On the same Directories page you navigated to per the instructions above, click ADD DIRECTORY and click LDAP Active Directory.
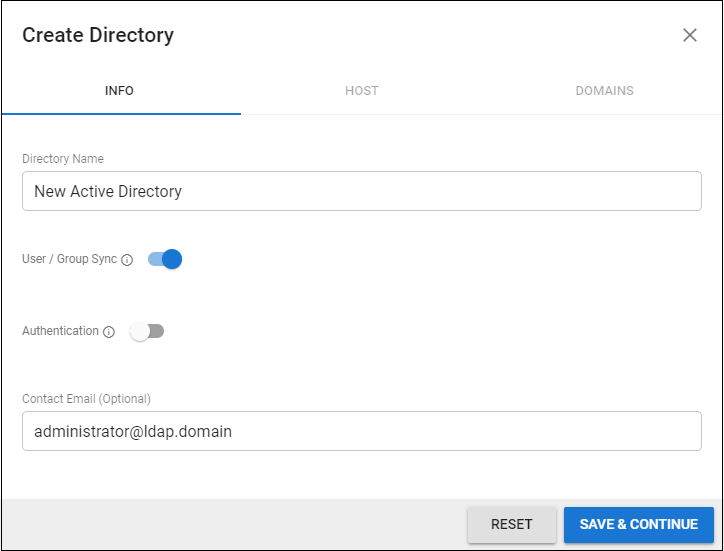
- Specify the Directory Name.
- Activate the User / Group Sync option to synchronize with Active Directory.
You can optionally add administrator contact information.
- Click SAVE & CONTINUE.
Fill in the following to specify your LDAP Host:
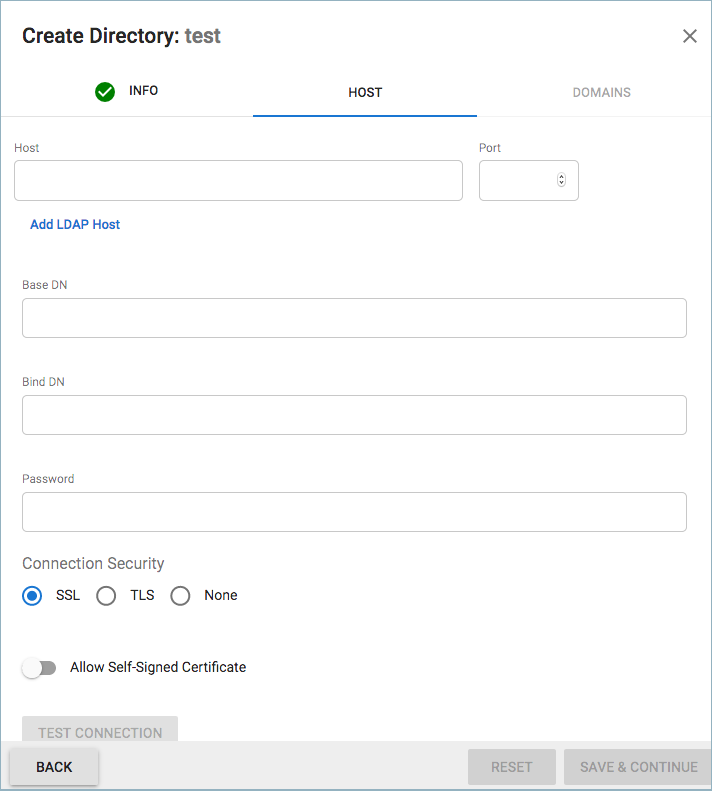
- Host (LDAP Host IP address)
- Port (LDAP Host Port)
- Base DN (Base domain name)
- Bind DN (Username)
- Password
- Select the Connection Security: SSL, TLS, or None
- Set Allow Self-Signed Certificate as an option.
Click TEST CONNECTION to check connectivity to the host. If the connection succeeds, it displays as Connected. Click SAVE & CONTINUE.
To add domains, click Add domain to add each domain to the Active Directory configuration.
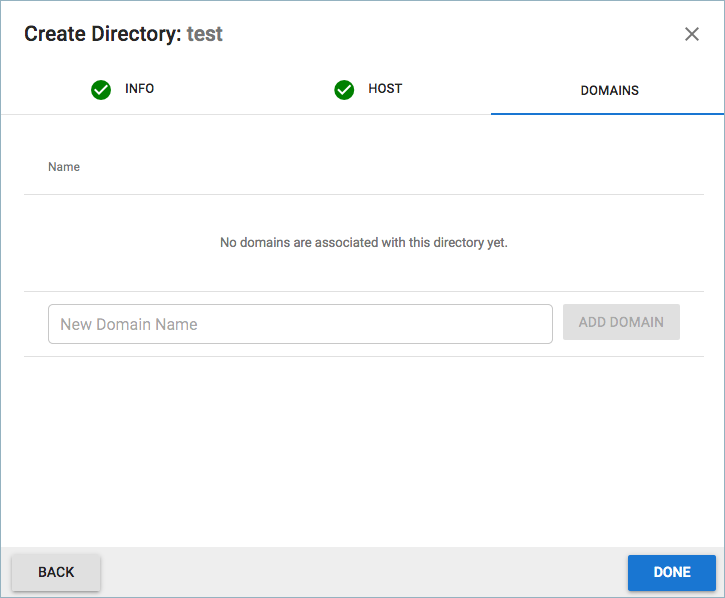
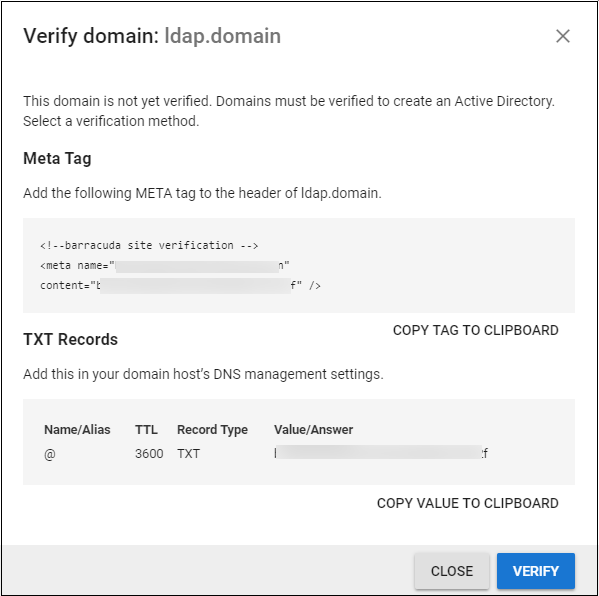
To ensure you own the domains you plan to include in your Active Directory configuration, you need to verify each domain. To verify a domain, you can add either a META tag to your domain header or you can add a TXT record to your host's DNS management settings. When you have made the necessary changes to your domain, click VERIFY. Once you have verified all domains, click DONE.
Configuring Directory Services in BCS
- Log into BCS.
- Go to the USERS page and select Directory Services next to Configure Users. This completes the process of connecting your LDAP users to your BCS account.
Applying Policies to LDAP/AD Users and Groups
Log into BCS and go to the ADVANCED FILTERING page. When you click the drop-down below Advanced Filtering at the top of the page, you can select your LDAP/AD users or groups, in addition to other options, for which you want to apply policies.