

This article refers to Barracuda ArchiveOne version 6.6.0 or higher.
This article assumes you have enabled journaling in Microsoft Exchange Journaling.
You must create a policy in ArchiveOne to use journal archiving. The only action allowed in a journal policy is to archive. This rule archives the data from the selected journal mailbox and deletes the original based on the defied default journal clean up behavior.
To create a journal archiving policy,
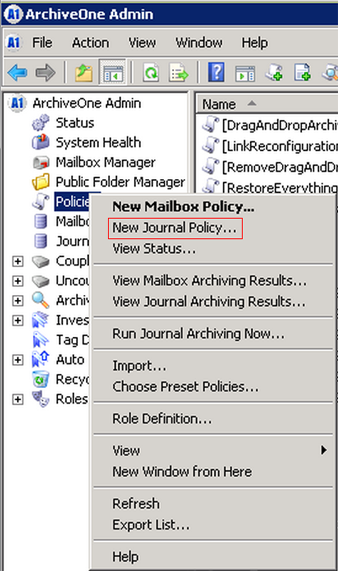
- On the ArchiveOne Server, open the ArchiveOne Enterprise (Policy) Admin Console.
- Right-click Policies, and then click New Journal Policy:
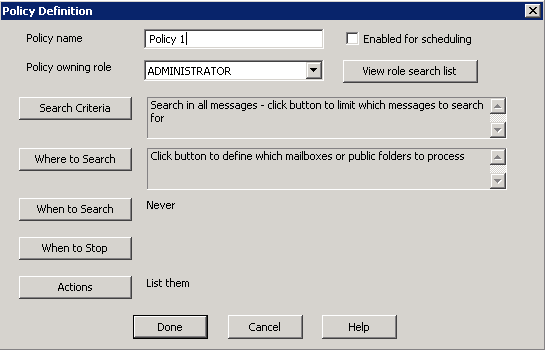
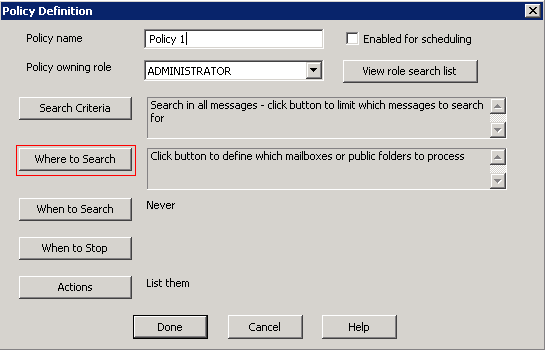
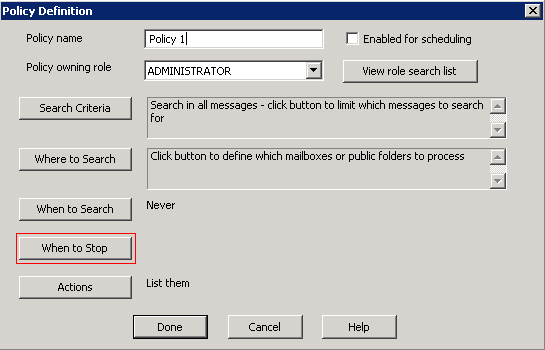
- In the Policy Definition dialog box in the Policy name field, enter a name to identify the new policy:
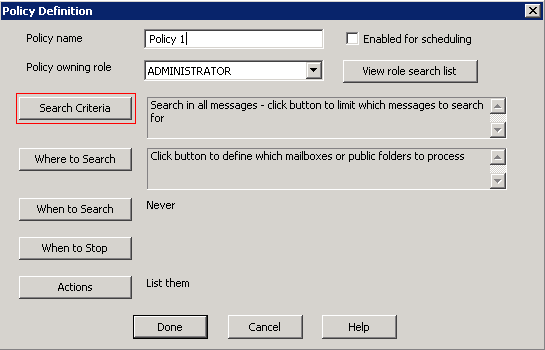
- Click Search Criteria:
- Specify the search criteria for the policy in the Search criteria for policy dialog box:
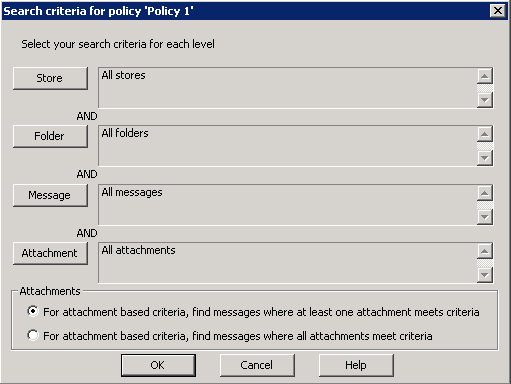
- Store – Click to display criteria based on the mailbox store itself: mailbox name, mailbox size in MB or % of warn/send/receive limits, or total number of items.
- Folder – Click to display criteria based on folders: folder name/type/path, if replicated, or how many items it holds.
- Message – Click to display criteria based on messages: text in the subject and/or body, from, to, delivered, etc.
- Attachment – Click to display criteria based on attachments: file name, size in K, file date, last modified, or text within the document if the attachment has been indexed as well.
- For example, click Message and select the search criteria:
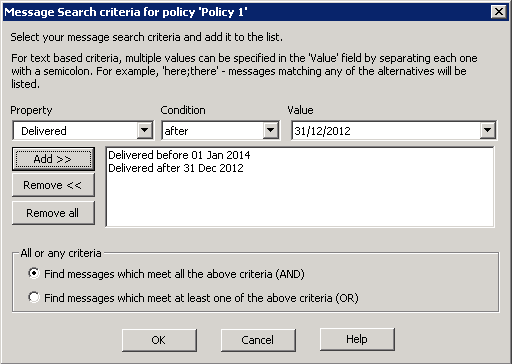
- Property – Select the desired property of the message to search on such as who the message was 'To' or when it was 'Delivered'. Some of these are properties of the attachments, if any, to the message.
- Condition – Select the range of conditions; options display based on the selected property (string or numeric).
- Value – Select the value used to compare with the property's value.
- Click OK to save your search criteria, and then click OK to return to the Policy Definition dialog box. Click Where to Search:
- In the Where to search for policy dialog box, select Selected mailboxes or dlists to display your list of Journal Mailboxes, and then click Browse.
In the Choose Journal Mailboxes dialog box, select the journal mailbox you want to add to the policy; note that this dialog lists only mailboxes configured by Microsoft Exchange for journaling:
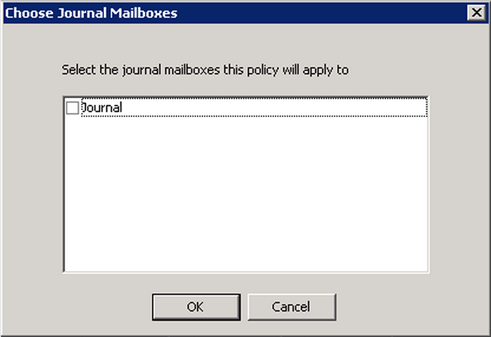
- Click OK to save your settings and return to the Policy Definition dialog box. Click When to Search:
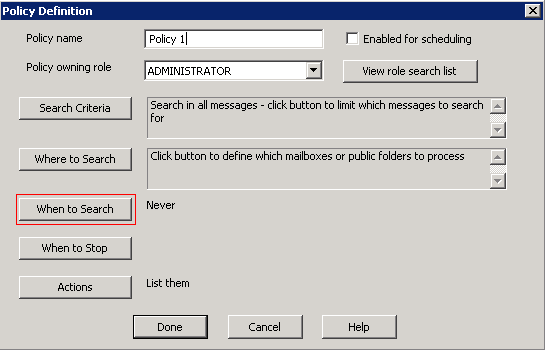
- in the Schedule for policy dialog box, specify scheduling options:
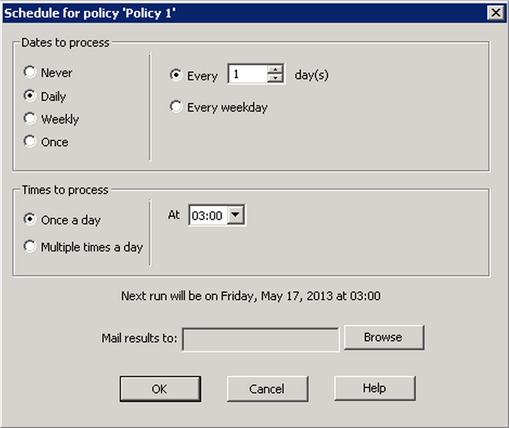
- Dates to process/Times to process:
- Never – Default setting, no schedule is set.
- Daily – Set the schedule to run every n days (or every weekday), and at which time(s) to run the policy.
- Weekly – Set the schedule to run every n weeks on a set day(s) of the week, and at which time(s) to run the policy.
- Once – Set the schedule to run on a specific date, and at which time(s) to run the policy.
- Mail results to – Email the policy results to the selected mailbox.
- Dates to process/Times to process:
- Click OK to save your settings and return to the Policy Definition dialog box. Click When to Stop:
- In the When to stop policy dialog box, select whether to stop the policy after a certain number of minutes:
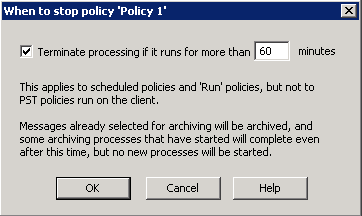
- Terminate processing if it runs for more than n minutes – Turn on to stop the first phase of the policy run after it has been running for the specified amount of time. The second phase is not affected by this setting.
- Click OK to save your settings and return to the Policy Definition dialog box. Click Actions:
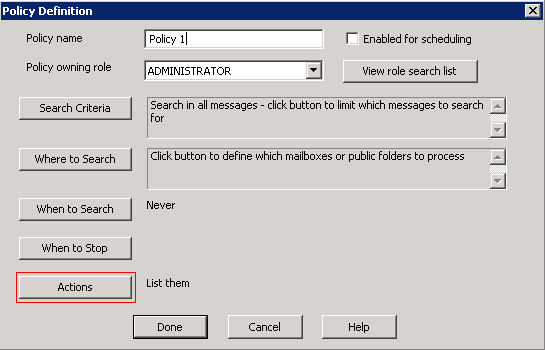
- The Actions for policy dialog box displays the repository override options. select the repository where you want the data archived:
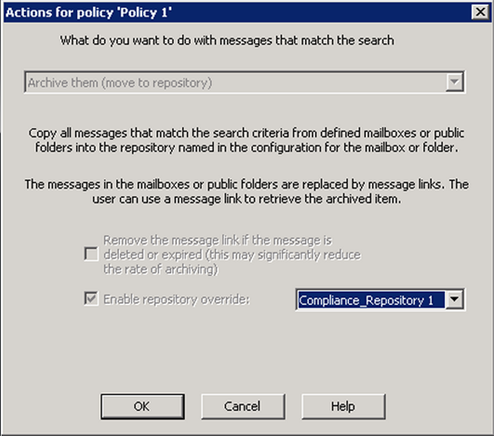
- Click OK to save your settings, and then click Done in the Policy Definition dialog box to save your policy.


You can now wait until the scheduled time for your policy to run, or right-click the policy and select Run to begin running the policy immediately.