

This article refers to the Barracuda ArchiveOne for Files version 7.2.0 and higher.
The top level node in the Management Console is the ArchiveOne Node:
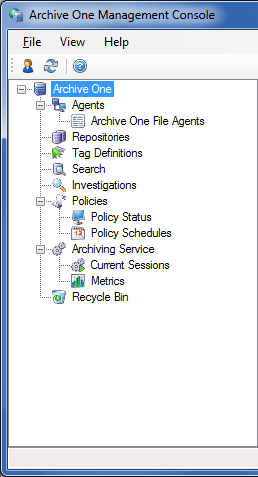
This node displays your current installation details including the name of the Data Processing Server and the software versions.
System Configuration
To access System Configuration options, right-click ArchiveOne, and click System Configuration.
- Archiving tab – Select the directory where ArchiveOne temporarily stores data used during the archiving and retrieval processes. By default this is located under the Data Processing Services installation directory.
- Licensing tab – Contains current license summary and whether license is valid.
- Generate License Application – Click to generate a license application file you send to Barracuda Networks. This file is used to generate a license file which is returned to you.
- Install License – Once you receive the license file supplied by Barracuda Networks, click to install the license.
- Diagnostics tab – Used by Barracuda Networks Technical Support to change your system logging details for diagnostic purposes. Do not change the details on this page unless instructed to do so by your Barracuda support technician.
- Notifications tab – Set up notification emails to be sent whenever a policy completes.
- Send notifications – Select whether to enable notifications.
- Mail Server Name – Enter an email server in your environment that accepts SMTP connections over port 25.
- Mail Recipients Address – Enter a valid recipient email address that is to receive notification emails.
- Mail Subject – Enter a prefix to be used for each notification email.
- From – Enter the email address to use as the notification email sender.