

This section refers to the Barracuda ArchiveOne for Files version 7.2.0 and higher.
See also: Understanding the Agents Node.
An agent is a software component that discovers files and performs the specified operation on those files. When you run a policy, each agent processes the assigned directories and files. Before an agent can run a policy, you must define that agent's Area of Interest. An Area of Interest directs the agent to the directories and files it is to process. Any directory or file outside of the Area of Interest is not examined or processed by that agent.
Define Area of Interest
- Start the ArchiveOne Management Console.
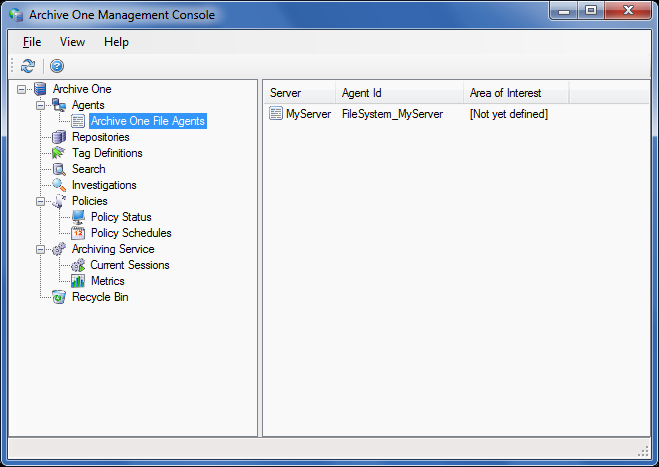
- Expand ArchiveOne, expand Agents, and click ArchiveOne File Agents.
- All agents deployed in your environment display, and the Area of Interest displays as Not yet defined:
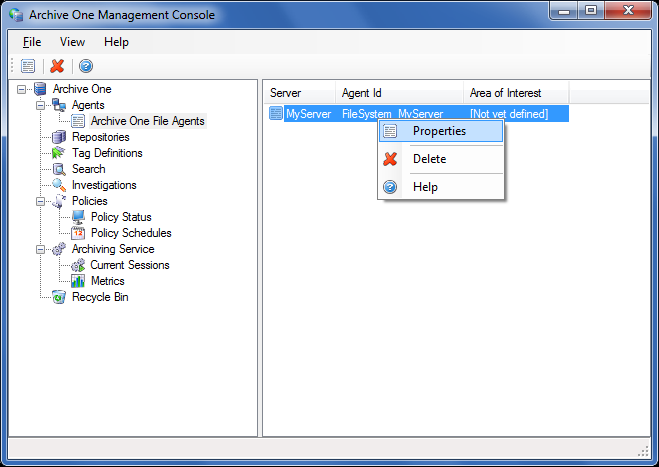
- Right-click the agent you want to configure, and click Properties:
- The Properties dialog box displays the current fixed hard disk drives for the file server where the agent is installed and does not include any mapped network drives:
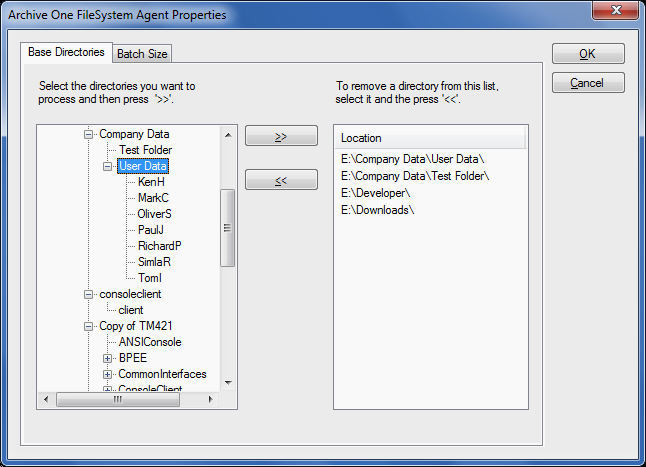
- Navigate through the file hierarchy and select each folder you want the agent to process; the agent automatically includes all subdirectories of the selected directories:

- Click OK to save the Area of Interest.
- Complete steps 4 through 7 for each agent.
Continue with Step 4 - Configure a Repository.