

Once your Barracuda Backup appliance is installed and data sources are set up, data is collected from each data source for the first time during an initial backup period. Once the initial backup is complete, Barracuda Backup checks for changed and new data based on backup schedules you define on the Backup > Schedules page. Any data sources that do not have a schedule defined are, by default, backed up nightly at 8:00PM local time. When Barracuda Backup identifies new or changed information, each file is analyzed at the bit level, and only the new bit sequences in the files themselves are copied and transferred, saving both bandwidth and storage space.
Once you configure computers and data sources, create granular backup schedules. Select specific sets of data to back up and configure multiple schedules for each source, each with different sets of data selected.
Create a Schedule
To create a backup schedule, configure computers and data sources, and then go to the Backup > Schedules page of the Barracuda Backup web interface.
Click Add a Schedule (or click Edit to edit an existing schedule):

Once you are satisfied with your schedule, click Save. The new schedule displays on the Backup > Schedules page:

Schedule Fields
The following table describes the Schedules page fields.
Table 1. Schedules page fields.
Schedule Name | Enter a label to identify the backup schedule:  |
Items to Back Up | In the Items to Back Up section, use the arrows to expand each server/source until you find the desired data or virtual machines to back up. You can select an entire server or select specific directories, databases, or virtual machines (VMs). It is possible to select and create a schedule for as many different items as required. For example, in the image below two schedules have been created for an Exchange source; one for the Exchange database that will repeat throughout the day, and a second for the File System and System State that will back up only once per day: 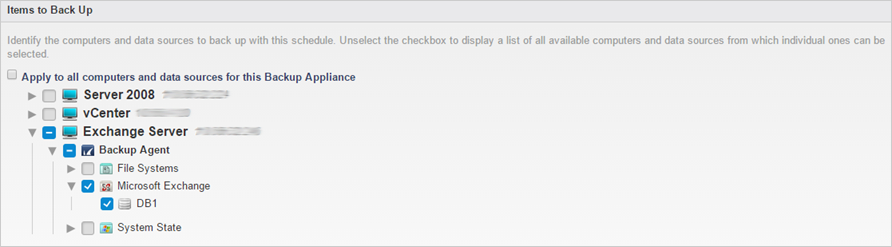 |
Schedule Timeline | Once you have selected data for backup, select the days on which this schedule is to run: 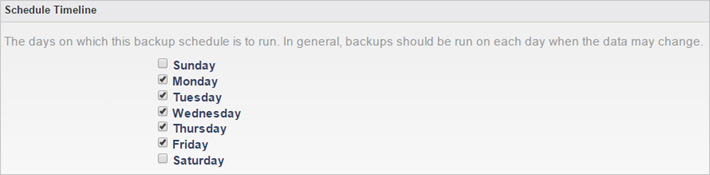 |
Daily Backup Timeline | In the Daily Backup Timeline section, type in a Start time. If you want your backup schedule to repeat throughout a 24-hour period, turn on Repeat, and specify the time period: 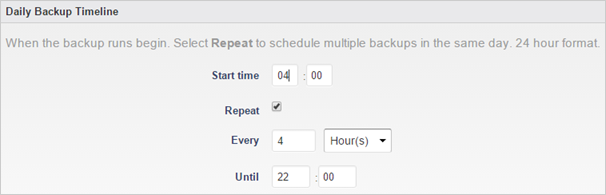 |
SQL/Exchange Backup | If the backup schedule is for Microsoft SQL Server or Microsoft Exchange Server, you must specify the type of backup to run: 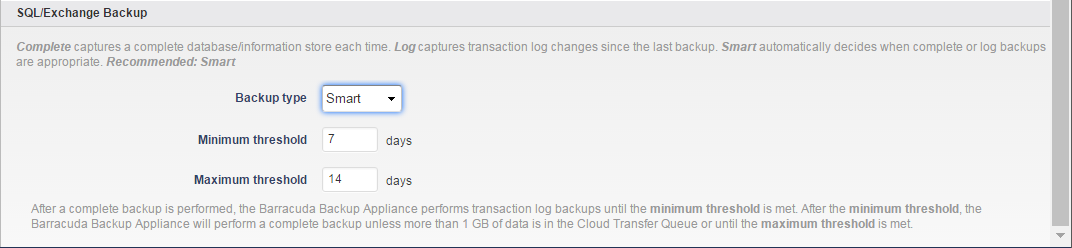
|
Schedule Options
Once you create a backup schedule, you can edit, delete, or immediately run a backup:
Click the Edit link to modify the schedule, and then click Save at the top of the page to save your changes.
Click the Remove link to delete the selected schedule, and click Remove Schedule in the dialog box to verify you want to remove the selected schedule.
If you delete a schedule that a data source was schedule in, that data source does not have a schedule and therefore is not backed up:

Click the Run Backup Now icon to run the scheduled backup process immediately, and click Run Backup Now in the dialog box that follows to verify the selected action. Once the backup starts, allow a few minutes for the report to generate on the Reports > Backup page.
Additional Schedules on a Source
To create additional schedules for the same source, follow the process above selecting different data for the new schedule.