This article refers to version 6.3 and higher, and Microsoft SQL Server 2012 and above databases.
Use the following steps to restore a Microsoft SQL Server 2012 or higher database to a file system:
- Log in to the Barracuda Backup web interface or local UI, go to the Restore > Restore Browser page. Select and expand the SQL server data source in the left pane.
- Click Microsoft SQL in the Contents list, and select the Instance:

-
Click the database to be restored to see the available revisions:

-
Click Restore to the right of the database to restore; the Restore dialog box displays. Set the following options:
- Restore to – Select Original Location
- Database name – Do not change this field
- Instance – Select Original Instance
-
Method – Select Restore to file system to restore a full database to a file (.mdf/.ldf). Enter the restore file path in the associated field, or leave the default value:
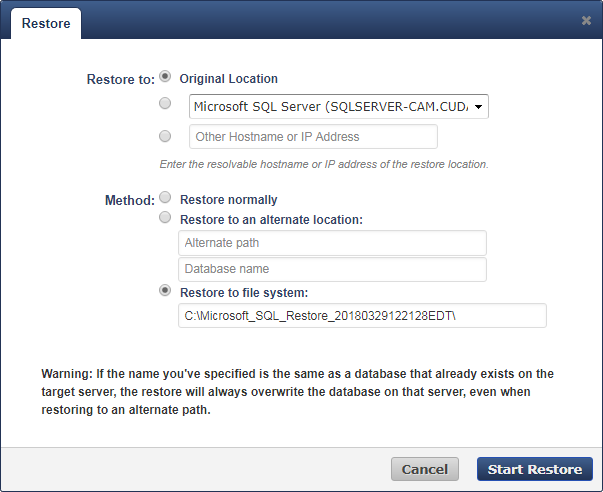
Click Start Restore. Once the restore is complete, the Success dialog displays; click OK to close the dialog box.
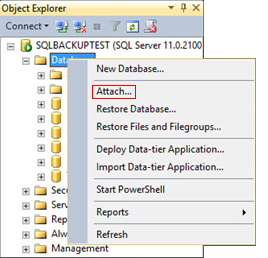
Open Microsoft SQL Server Management Studio, right-click Databases, and click Attach:
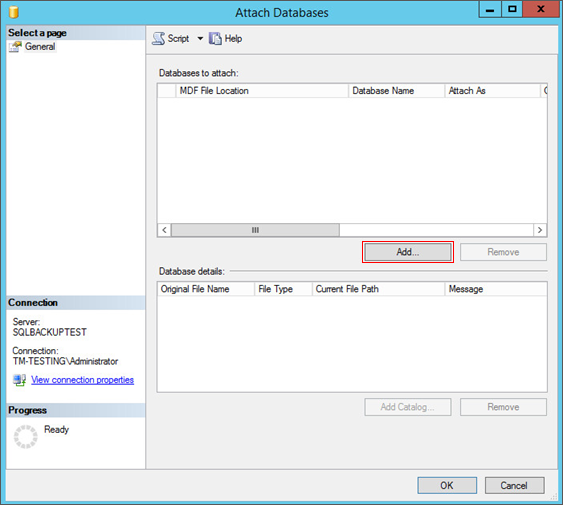
The Attach Databases dialog box displays. Click Add:
Browse to and select the restored .mdf file:
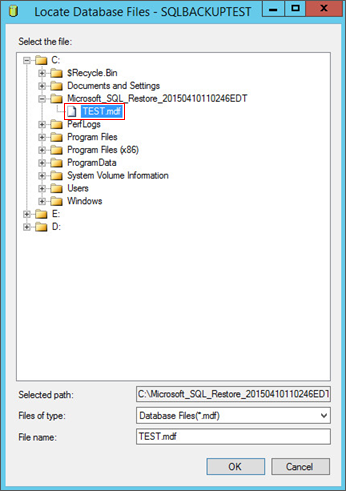
Click OK to attach the database:
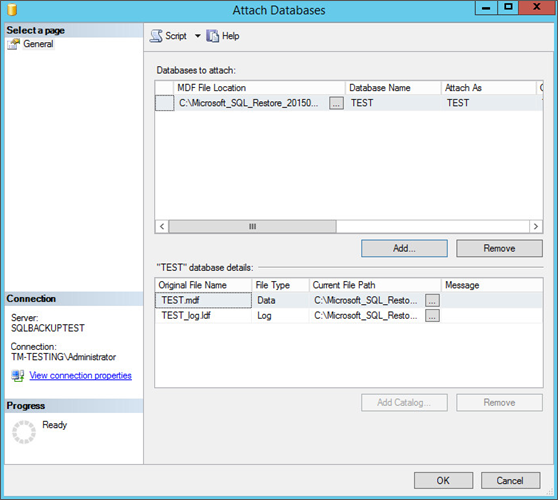
Click OK to close the dialog box.
