

This section of the document provides guidance on designing and deploying Barracuda Backup Virtual Appliance (Vx) on VMware vSphere and Microsoft Hyper-V platforms.
VMware and Hyper-V System Requirements
Barracuda Networks offers the following types of images for a Barracuda Backup Vx deployment. Follow the instructions for your hypervisor below to deploy the Barracuda Backup Vx.
| Image Type | Supported Hypervisors |
|---|---|
| OVF | See Virtual Infrastructure for supported VMware versions. |
| OVD | See Virtual Infrastructure for supported Microsoft Hyper-V versions. |
CPU and RAM System Requirements
The most common mistake when designing an environment for Barracuda Backup Vx is to size only for capacity as opposed to sizing for capacity and performance. Tasks such as backup, offsite replication, data restoration, and purging can use a significant amount of system resources. When considering a Barracuda Backup virtual deployment, it is best to consider the use cases of the Backup Vx in addition to needed storage.
| Backup Volume | Minimum Recommended vCPUs | High Performance Recommended vCPUs |
|---|---|---|
| 0 TO 2 TB | 1 vCPU | 2 vCPUs |
| 2 TO 6 TB | 2 vCPUs | 4 vCPUs |
| 6 TO 16 TB | 4 vCPUs | 8 vCPUs |
| 16 TO 32 TB | 8 vCPUs | 16 vCPUs |
| 32 TO 100 TB | 16 vCPUs | 32+ vCPUs |
| Backup Volume | Minimum Recommended vCPUs | High Performance Recommended vCPUs |
|---|---|---|
| 0 TO 1 TB | 2 GB | 4 GB |
| 1 TO 4 TB | 4 GB | 8 GB |
| 4 TO 12 TB | 8 GB | 16 GB |
| 12 TO 16 TB | 16 GB | 32 GB |
| 16 TO 24 TB | 32 GB | 64 GB |
| 24 TO 48 TB | 64 GB | 128 GB |
| 48 TO 100 TB | 128 GB | 256+ GB |
Storage System Requirements
When deploying a Barracuda Backup Vx, Barracuda Networks recommends the following storage system requirements:
- Any storage infrastructure consisting of Local/Direct Attached Storage (DAS), Storage Area Network (SAN), and Network Attached Storage (NAS).
- Storage with inadequate throughput, read, and write speeds will cause Barracuda Backup Vx performance to suffer.
- Servers with software RAID, slow NAS, and low-RPM drives will yield poor performance.
Technical Best Practices
The following are best practices for a successful Barracuda Backup Vx deployment:
- Barracuda Backup utilizes memory (RAM) for database queries during backup, restore, and offsite replication. Barracuda Networks highly recommends following the recommended minimum resources for memory in the RAM recommendations table above.
- Barracuda Backup uses CPU resources for hashing blocks during deduplication, compression for offsite replication, and rehydration of data during restoration. Barracuda Networks highly recommends following the recommended minimum resources for vCPUs in the vCPU Recommendations table above.
- At minimum, memory resources should be dedicated (reserved). It is also recommended that the CPU be dedicated to Barracuda Backup Vx, and not shared with other virtual machines (VMs) on the host. This aligns with VMware and Microsoft's recommendations for virtualized Microsoft Exchange Server and SQL Server implementations.
- A separate data store is recommended for use with the virtual appliance due to disk I/O constraints or an entirely separate storage server/environment altogether from the production environment.
- Other system components such as network and storage need to be sized accordingly to prevent them from becoming a bottleneck.
- It is important that snapshots are not used on the Barracuda Backup Vx. Even if data is not being replicated to the Barracuda Cloud, configuration data is still sent to Barracuda so that the unit can be managed. Reverting to a previous state using snapshots can potentially cause loss of data and unit corruption. Independent disks are the default selection and highly recommended to avoid snapshots.
- All Barracuda Backup Vx disk, vCPUs, and RAM can be adjusted later by shutting down the system properly and making the necessary changes through the hypervisor.
Deploy VMware vSphere
Use the following steps to deploy the Barracuda Backup Vx to a Nutanix environment running the VMware vSphere hypervisor.
- Download and extract the Barracuda Backup Vx .zip archive to a location that can be accessed from a machine using the vSphere Web Client.
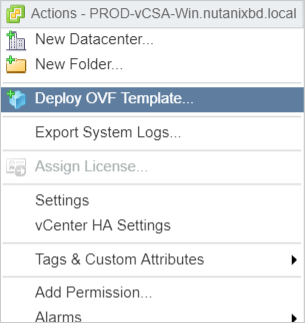
- From the vSphere Web Client, from the Actions drop-down menu, select Deploy OVF Template:
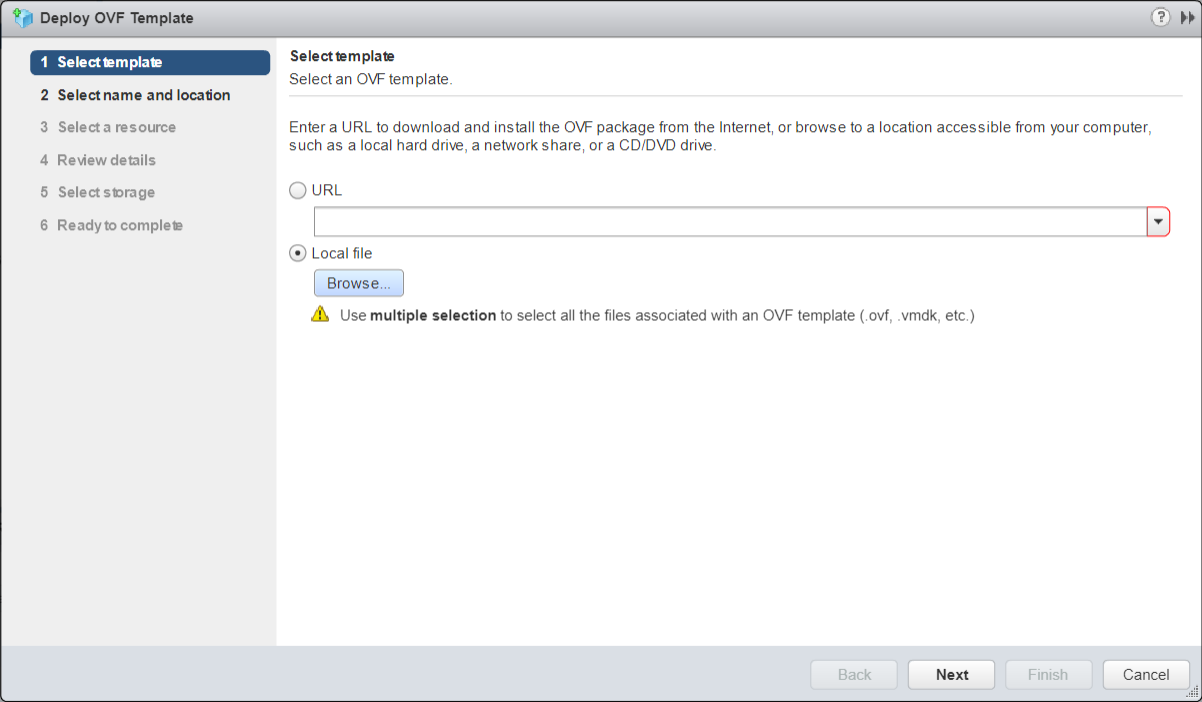
- From the Deploy OVF Template wizard, select Local file, and click Browse:
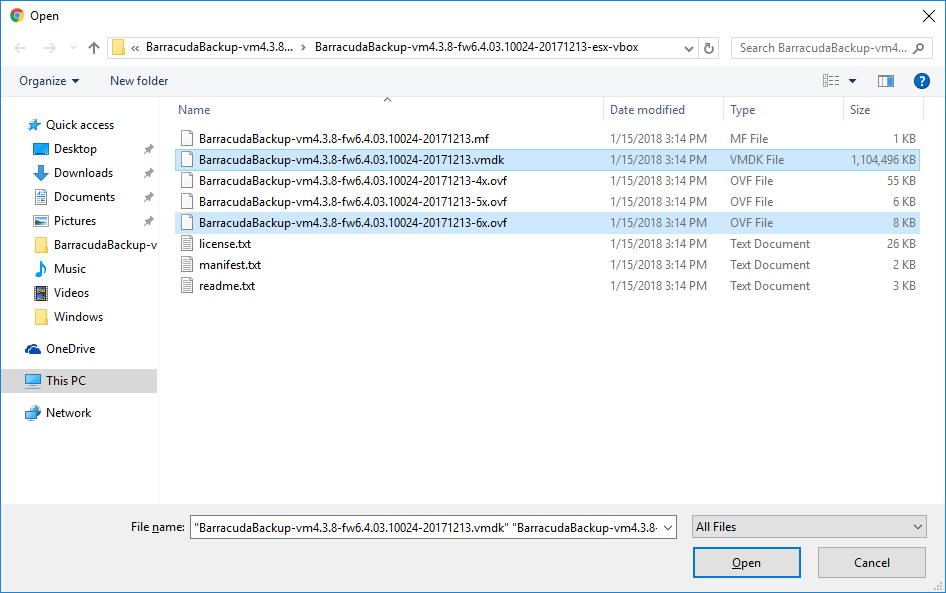
- Navigate to the extracted folder that contains the Barracuda Backup Vx files. Select both the .ovf file and the .vmdk file, and click Open:
- In the Deploy OVF Template wizard, complete the following:
Add the VM name and location.
Enter the Host, cluster, or resource pool.
Add the storage location and settings.
Enter the destination network.
Review your settings and click Finish.
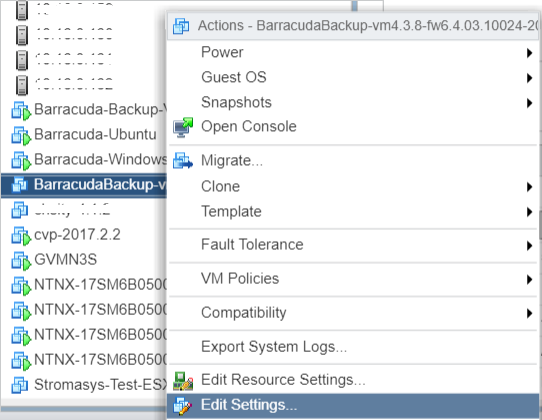
After the template deployment is complete, locate the Barracuda Backup Vx in the list of VMs.
With the Barracuda Backup Vx powered off, right-click the appliance, and click Edit Settings:
Edit the CPU and Memory, using the vCPU and RAM Recommendations tables above for reference.
Edit the Hard disk 1 size.
Change the Disk Mode to Independent - Persistent:
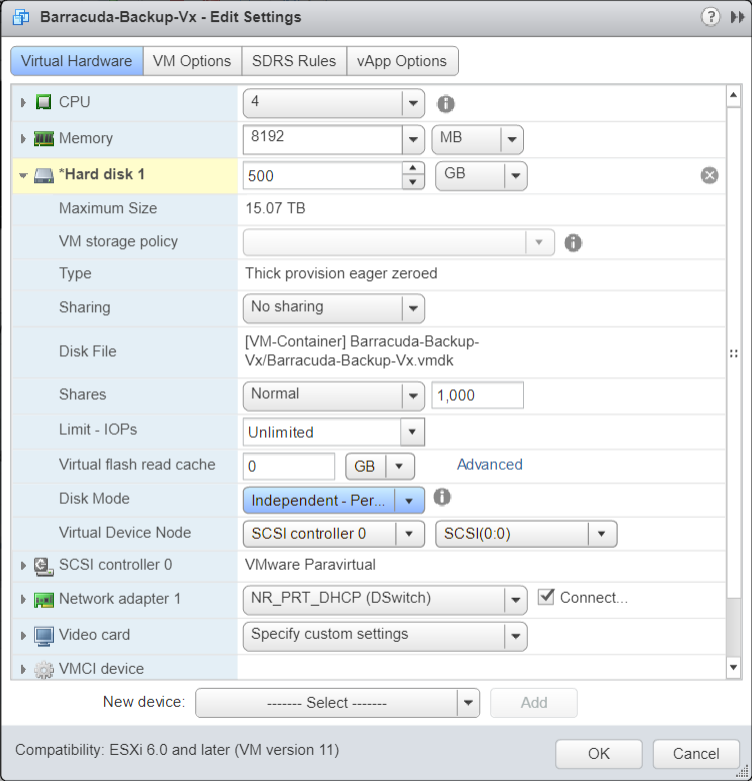
Review your virtual hardware settings carefully, and click OK.
Power ON the Barracuda Backup Vx, then open the VM console:

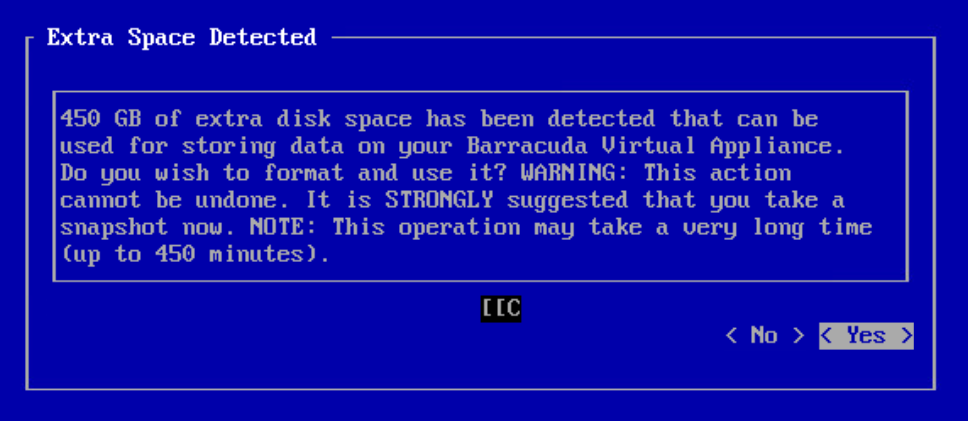
- If you have added additional storage to Hard disk 1 or added a new hard disk, select Yes to format the new disk space. This may take several minutes to complete, depending on the amount of disk space:
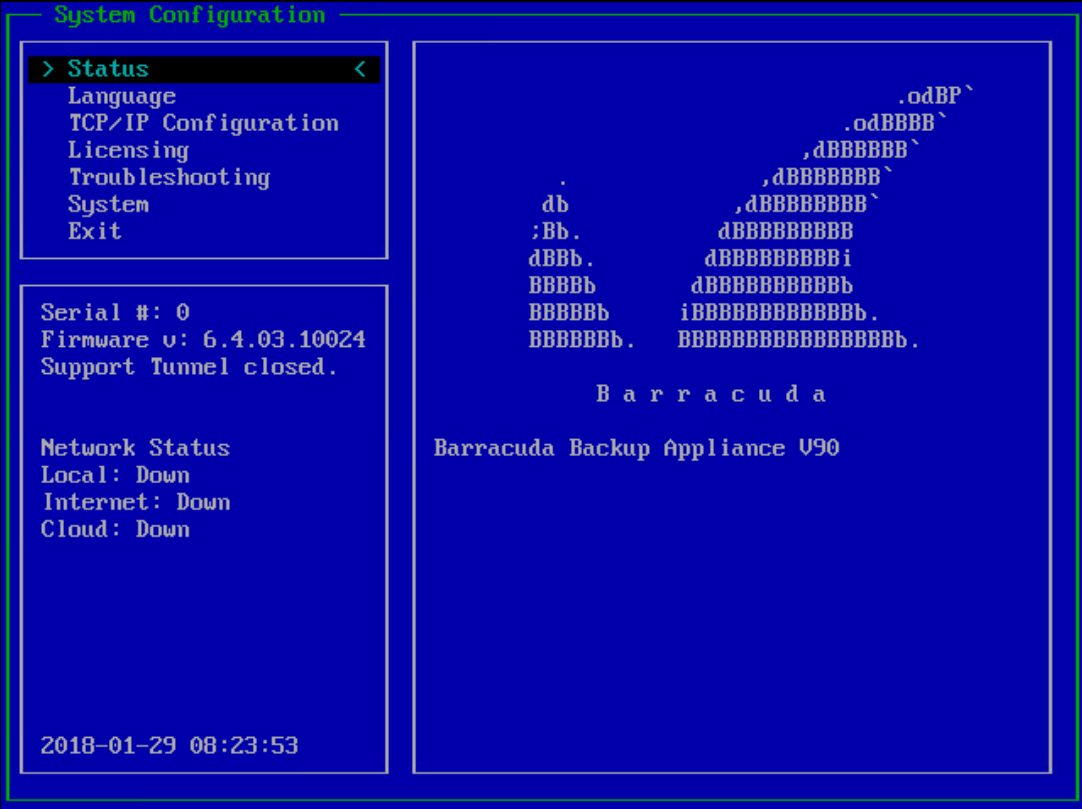
- Once the setup and formatting is complete, the Barracuda Backup Vx reboots and displays the System Configuration page:
To complete your Barracuda Backup Vx configuration and activation, continue with the section Configure the Barracuda Backup Virtual Appliance.
Deploy Microsoft Hyper-V
Use the following steps to deploy the Barracuda Backup Vx to a Nutanix environment running the Microsoft Hyper-V hypervisor.
- Download and extract the Barracuda Backup Vx .zip archive to a location that can be accessed from a machine using SCVMM or Hyper-V Manager.
- Add or Import the Barracuda Backup Vx .vhd to the SCVMM library or use the Import Virtual Machine tool in Hyper-V Manager:
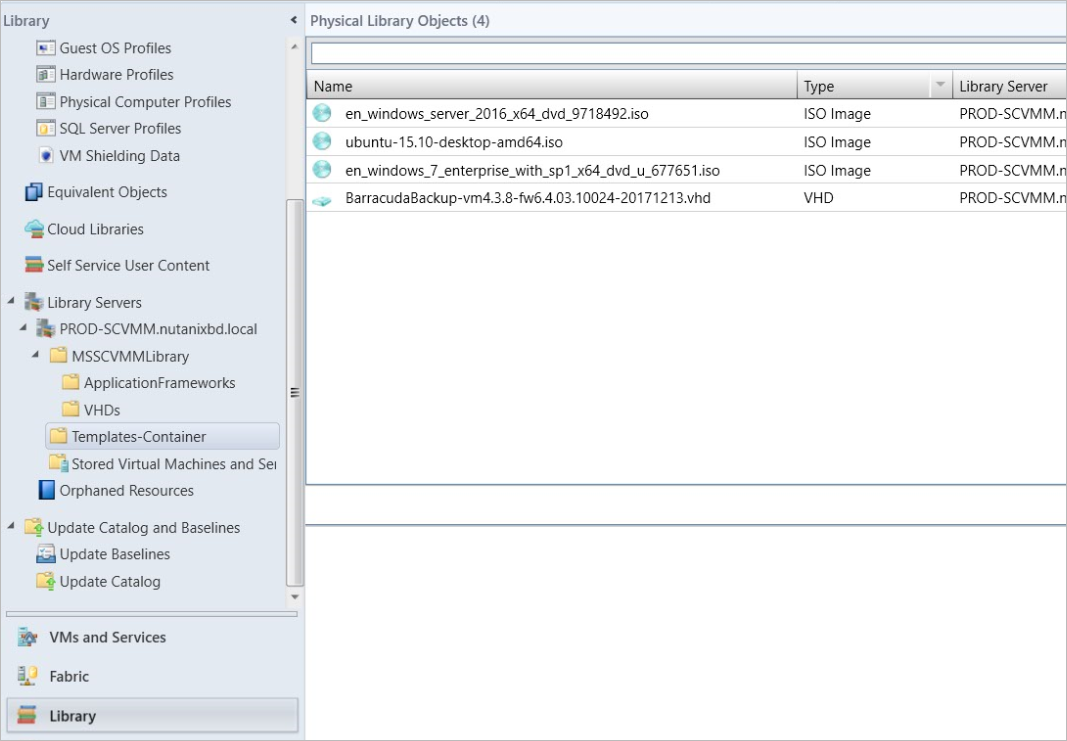
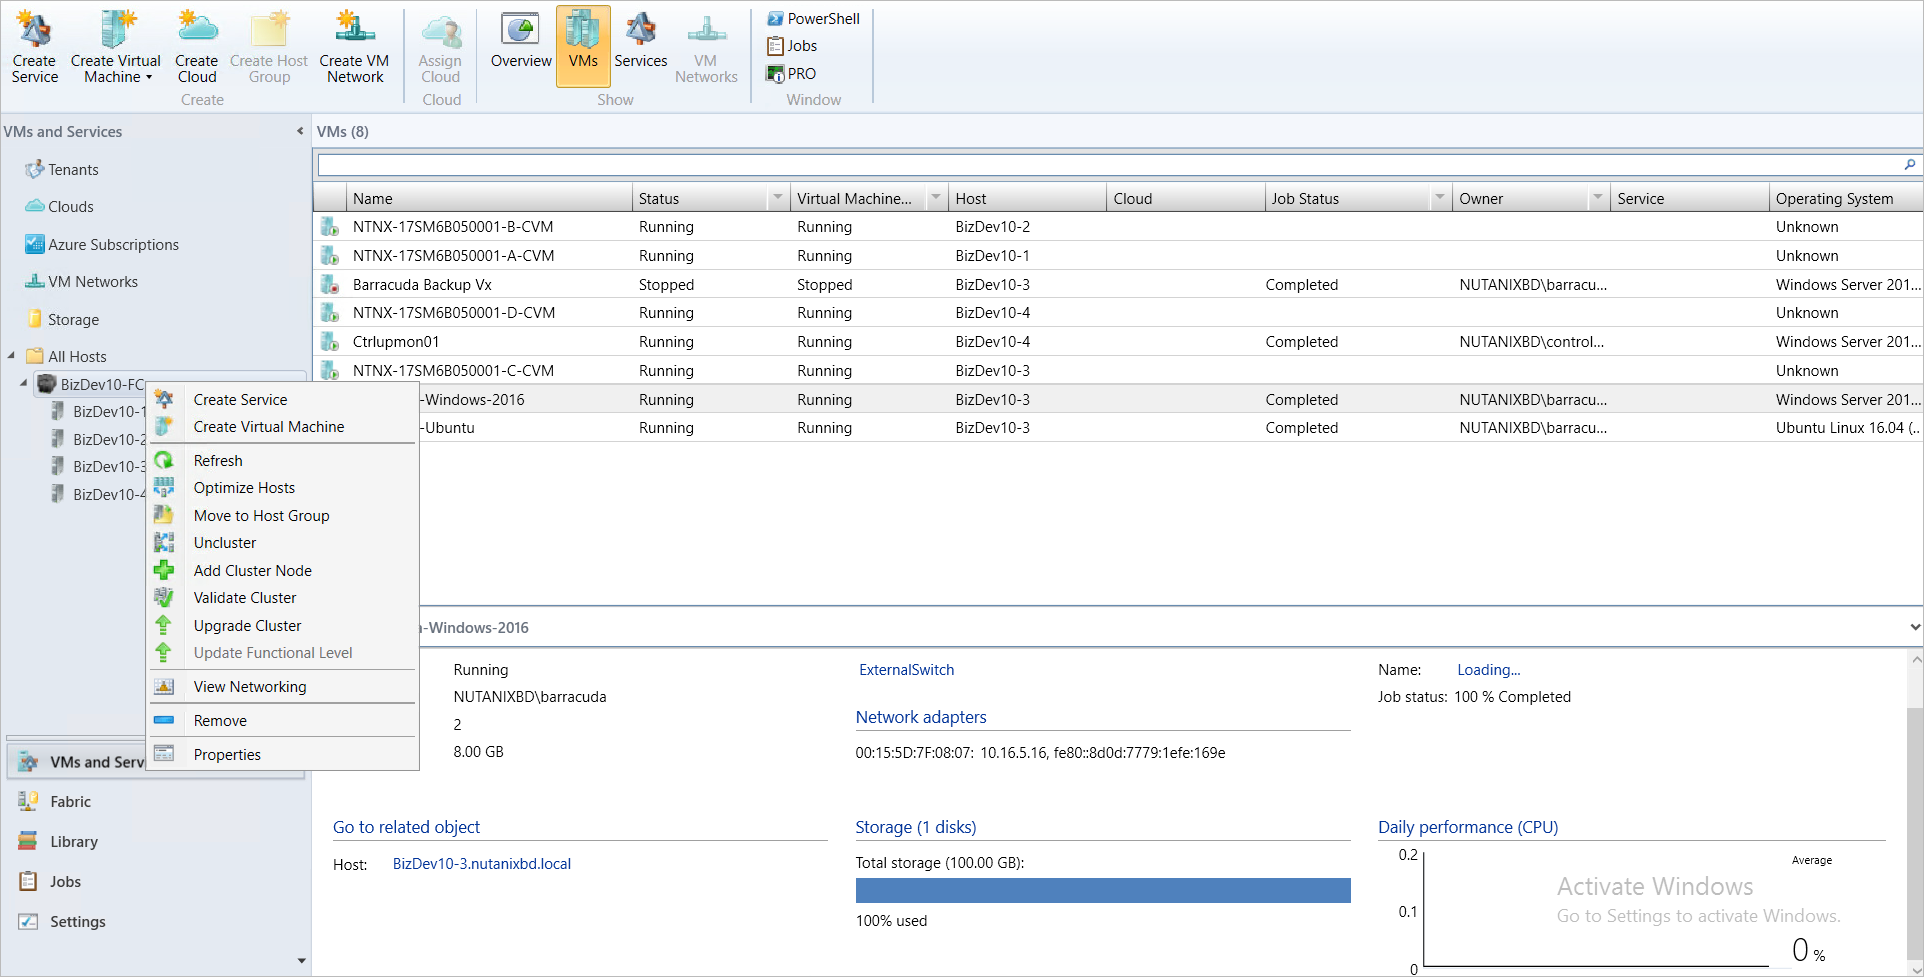
- In SCVMM, select Create Virtual Machine:
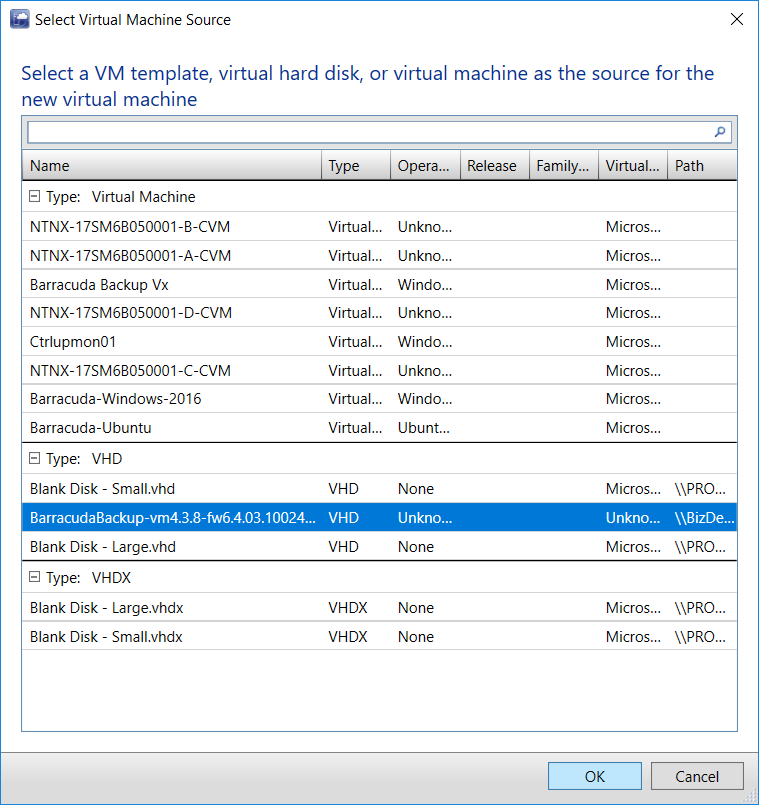
In the Create Virtual Machine wizard, select Use an existing virtual machine, VM template, or virtual hard disk, and click Browse.
Select the Barracuda Backup Vx .vhd from the list, and click OK:
Click Next on the Select Source page of the wizard to continue.
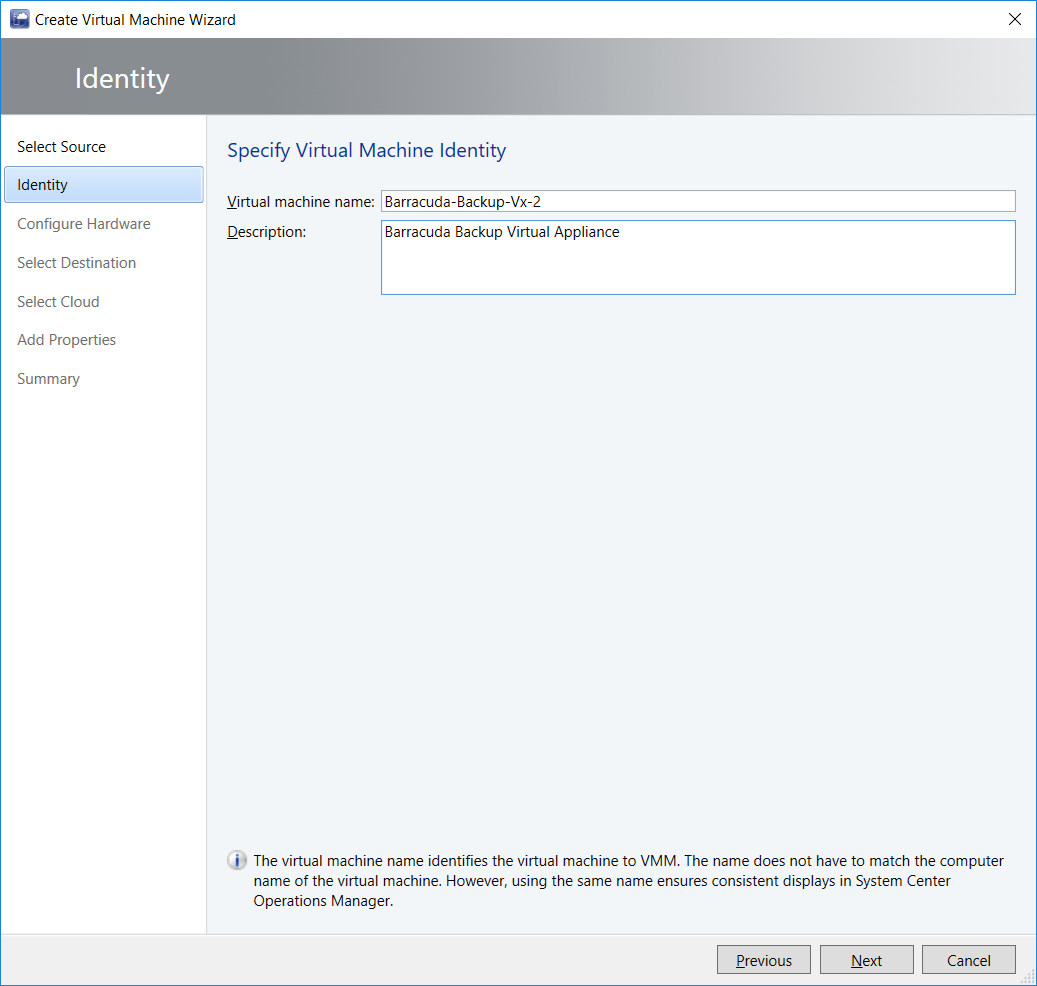
Specify a name and description for the Barracuda Backup Vx on the Specify Virtual Machine Identity page:
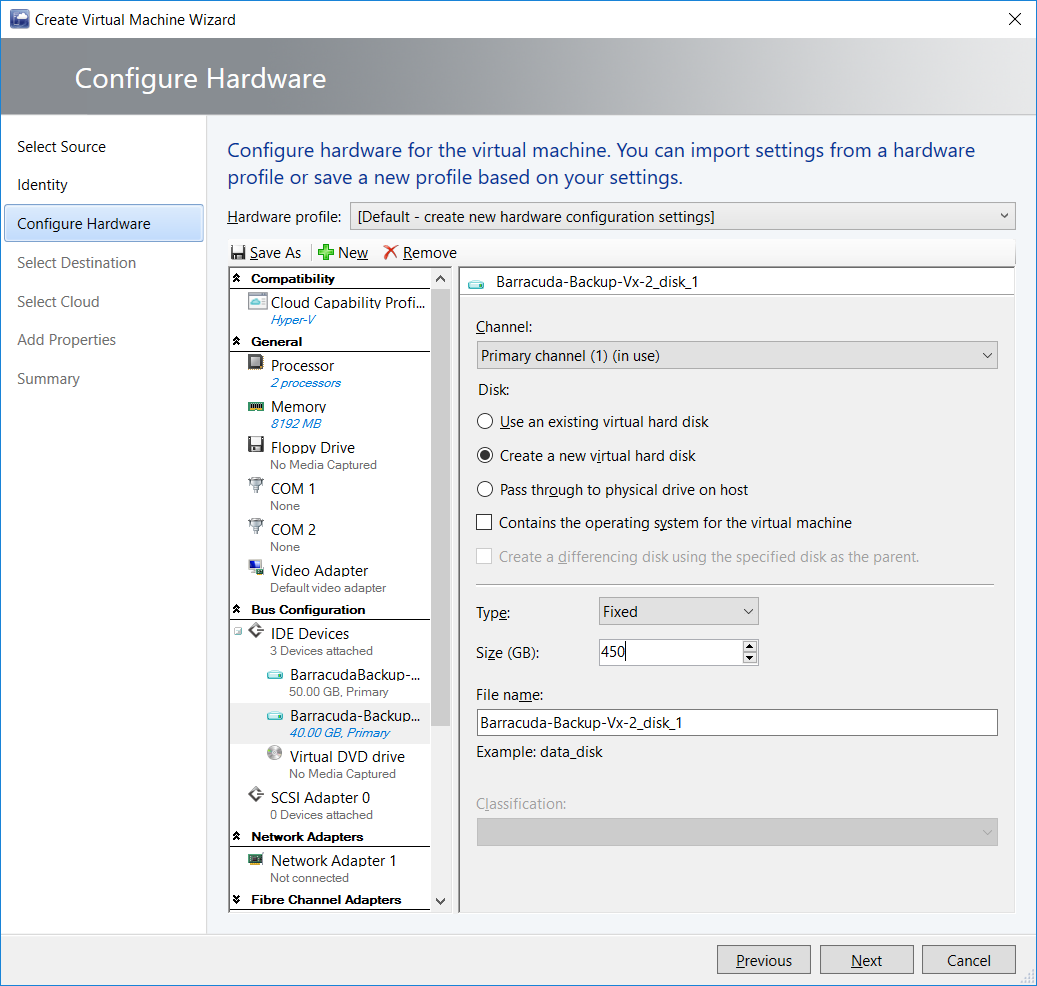
On the Configure Hardware page, specify the CPU and Memory, using the vCPU and RAM Recommendations tables above for reference.
Click New, and from the drop-down menu, select Disk.
In the Disk settings section, choose Create a new virtual hard disk, and specify the preferred disk size:
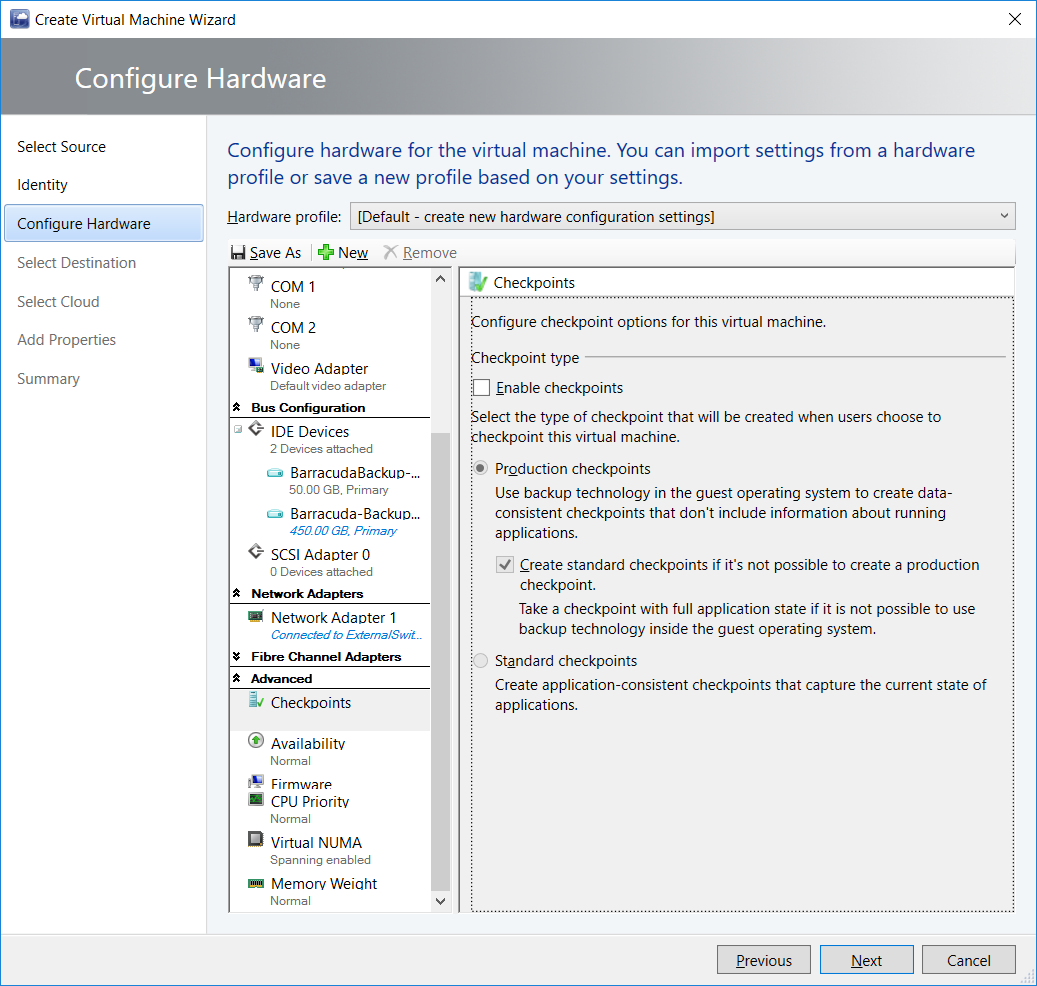
In the Advanced section, select Checkpoints. Verify Enable checkpoints is cleared:
Carefully review your virtual hardware settings, and click Next.
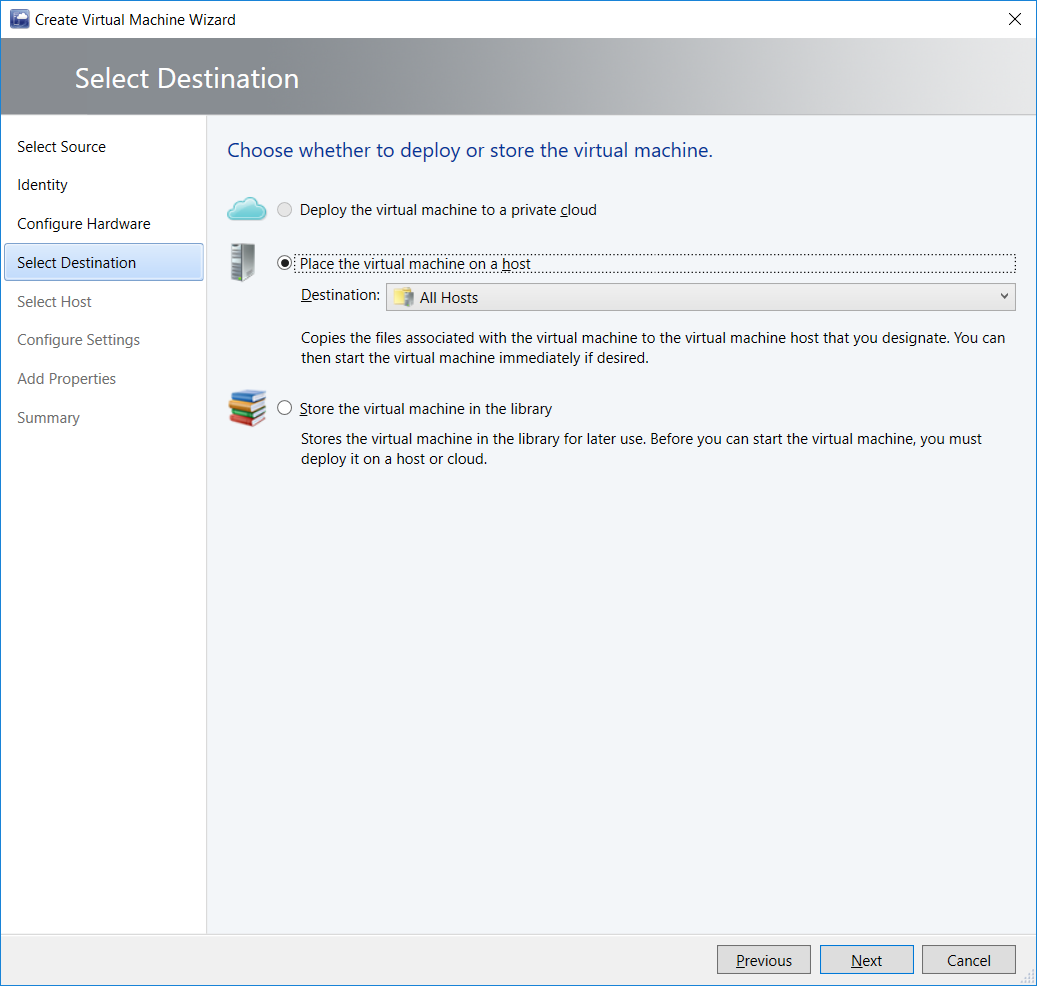
On the Select Destination page, select Place the virtual machine on a host, and click Next:
In the next several sections of the wizard, choose a host where you want to deploy the VM, configure the VM and disk storage location, and choose your startup options.
Carefully review your VM configuration, and click Create.
Power ON the Barracuda Backup Vx, and open the VM console.
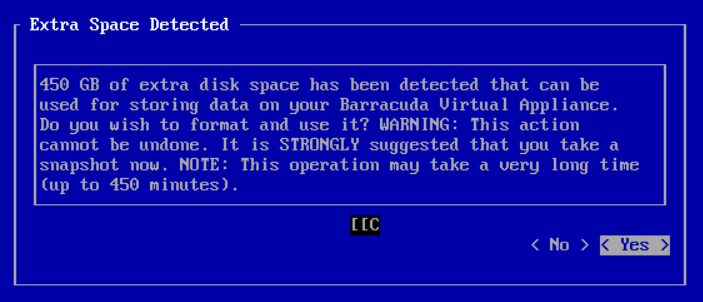
If you have added a new disk or additional storage to a hard disk, select Yes to format the new disk space. This may take several minutes to complete, depending on the amount of disk space:
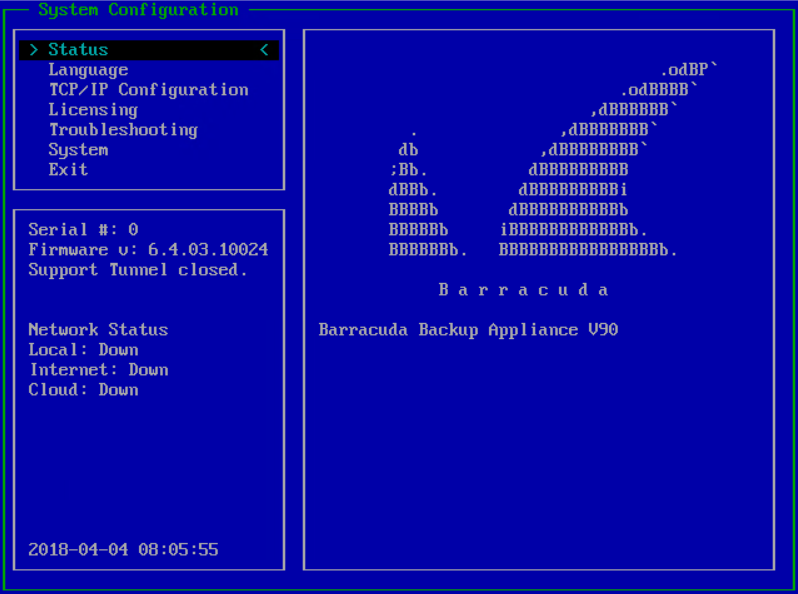
- Once the setup and formatting is complete, the Barracuda Backup Virtual Appliance reboots and displays the System Configuration page:
To complete your Barracuda Backup Vx configuration and activation, continue with the section Configure the Barracuda Backup Virtual Appliance.
Firewall Port Configuration
For security purposes, locate your Barracuda Backup Vx behind a corporate firewall. In this case, verify the ports listed in the following table are open to ensure proper operation of your Barracuda Backup Vx:
| Port | Protocol | Direction | Usage |
|---|---|---|---|
| 80 | TCP/UDP | Outbound | Health monitoring |
| 443 | TCP/UDP | Outbound | Health monitoring |
| 1194 | TCP/UDP | Outbound | Configuration/management |
| 5120 | TCP/UDP | Outbound | Barracuda Backup Agents |
| 5121-5129 | TCP/UDP | Outbound | Offsite replication |
Configure Barracuda Backup Vx
Once you deploy the Barracuda Backup Vx to either VMware vSphere or Microsoft Hyper-V, you must provision it, using the license received via email or from the website when you downloaded the Barracuda Backup Vx images. If you do not have a 15-digit license token, contact your Barracuda sales representative or request an evaluation at https://www.barracuda.com/.
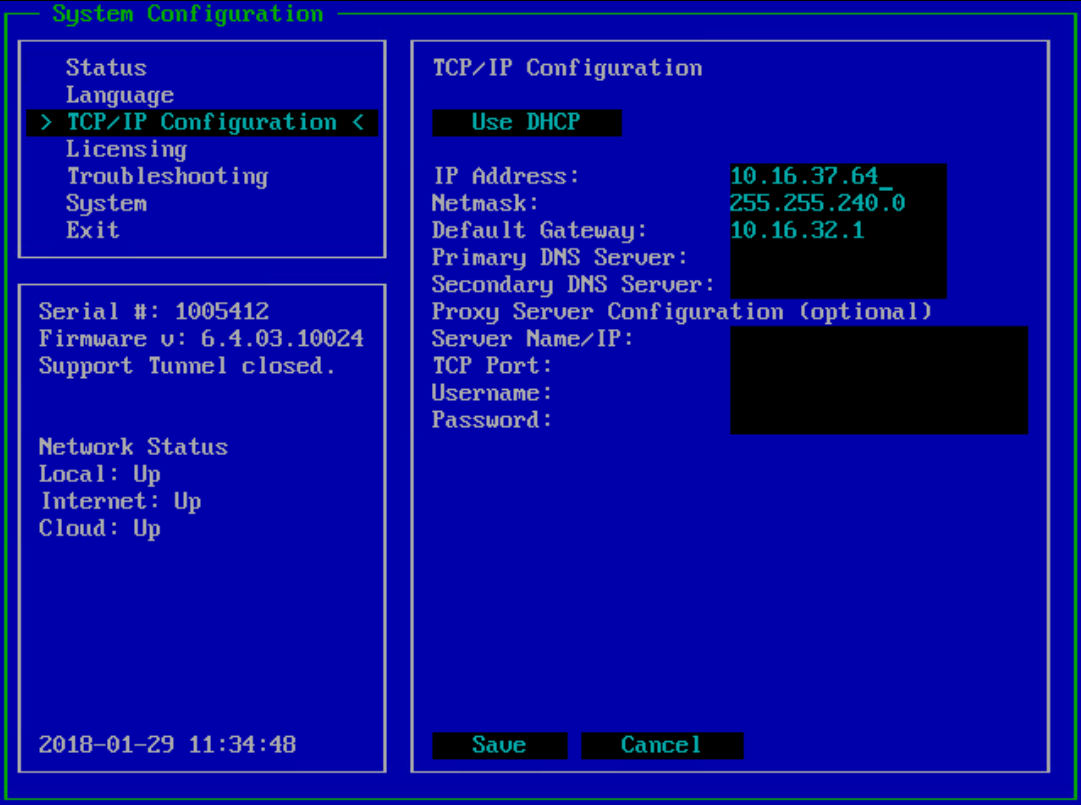
- From the System Configuration screen, use your keyboard arrows to select TCP/IP Configuration.
Specify your network settings, then use your arrows to save the changes. Once the new settings take effect, the Network Status for Local and Internet display with a status of Up. The Cloud status displays as Down until the Barracuda Backup Vx is linked to a Barracuda Cloud Control Account:
Once the Network Status for Local and Internet displays as Up, use the keyboard arrows to select Licensing.
In the Token field, enter the unique token provided to you by Barracuda Networks, then use the keyboard arrows to click Save.
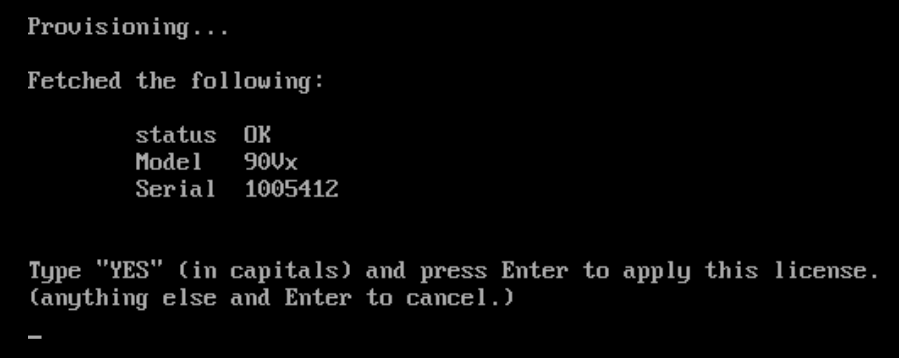
Provided the Barracuda Backup Vx has an Internet connection, it contacts Barracuda Networks and fetches the associated model and serial number. Type YES, and press Enter to apply the license:
- Once applied, the license is installed. When prompted, press Enter to reboot:

Once the Barracuda Backup Vx reboots, the following information displays on the System Configuration screen:
Serial #
Firmware version
Network Status – Local: Up
Network Status – Internet: Up
Network Status – Cloud: DownContinue with the section Activate the Barracuda Backup Vx to link your Barracuda Backup Vx to Barracuda Cloud Control and change the Network Status Cloud to Up.
Activate the Barracuda Backup Vx
To activate your virtual appliance,
- Log in to https://login.barracudanetworks.com. If you do not have an account, click Create a User, follow the account creation instructions, and log in.
- Click Backup in the left pane. If this is your first time activating a Barracuda Backup appliance, click Start Backup Setup; otherwise, go to Admin > Activate Barracuda Backup.
- Enter the Serial number and the Linking code from the sticker on the back of the Quick Start Guide, and click Next.
The wizard launches. In the Your Info page, enter your contact information, and click Continue.
In the Device Info page, enter a Device Name to represent the device in the UI. If you previously defined display groups, select the Display Group to which to add the device to from the drop-down menu.
Select the Time Zone from the drop-down menu.
In the Enter device location section, enter the geographical location.
Select whether to Automatically update device firmware after activation, and click Continue.
- The Terms of Service page displays. Read the Terms and Conditions, and click I have read and agree to complete the linking process. Click Done.
Once your device is linked, click Go to Dashboard.
Once the Barracuda Backup Vx is linked to your Barracuda Cloud Control account, the Network Status - Cloud changes to Up:

Expand the Barracuda Backup Vx Capacity
Throughout the lifecycle of the Barracuda Backup Vx, you will likely need to edit the CPU, RAM, or disk space. Use the following steps to expand the capacity or change the CPU, RAM, or other virtual hardware settings:
- Power down the Barracuda Backup Vx.
- Right-click the Barracuda Backup Vx, and click Edit Settings.
- Edit the CPU, RAM, Hard Disks, or other virtual hardware settings.
- Click OK to apply your changes.
- Power ON the Barracuda Backup Vx.
- If you added additional disk space, the extra space is detected; you are asked if you want to format it now. Click Yes: