

Microsoft Hyper-V hosts and virtual machines (VMs) are protected by the Barracuda Backup Agent for Windows. When installed on a Microsoft Hyper-V Server, the Barracuda Backup Agent for Windows automatically detects the presence of Microsoft Hyper-V based on the Hyper-V VSS Writers. When adding a Hyper-V Server as a data source to Barracuda Backup, a Microsoft Hyper-V container item is present, allowing you to back up the entire Hyper-V instance or individual VMs.
Use the following steps to configure a Hyper-V data source:
- Log in to Barracuda Backup and select the associated Barracuda Backup device in the left pane or in the devices table (for customers with multiple Barracuda Backup devices).
- Install the Barracuda Backup Agent on the Hyper-V host. The Agent is available from the System > Software Downloads page in the Barracuda Backup web interface.
- Go to the Backup > Sources page, and click Add a Computer.
- Complete the following information on the Add a Computer page:
- Computer description
- Computer name
- In the Computer type drop-down menu, select Microsoft Windows.
- Once the Hyper-V data source is configured, click Save.
- The Add Data Source page displays. Finish configuring the backup schedule name, the offsite replication destination, and click Save.
- Once the data source is configured, the Schedules page displays. For more information on backup scheduling, see Backup Scheduling.
Online Backup Mode
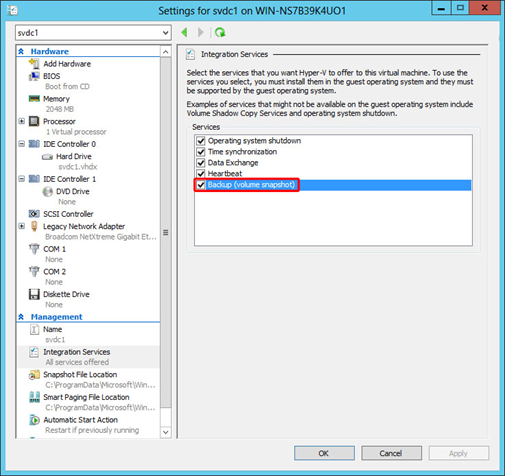
Prior to backing up your Hyper-V VMs, it is recommended that you configure each VM with the Integration Service Backup (volume snapshot) enabled. This performs an online backup, which backs up the VM by building a .avhd snapshot file by using the guests operating system VSS writers to read the files internally without having to pause the system. The default mode, Saved State, uses the host system VSS writers only and pauses the guest system during a backup. Saved State is not recommended as it temporarily stops the VM to back it up, which can cause issues when restoring virtual SQL or Exchange environments.
To enable online backup:
In the Properties dialog of the VM, from either Hyper-V Manager or SCVMM, look on the Integration Services tab and ensure that Backup (volume snapshot) is selected:
Microsoft Hyper-V Clusters
In a Hyper-V cluster, the Barracuda Backup Agent for Windows must be installed on each host. Each host must also be added as a data source to Barracuda Backup. VMs that move between hosts in between backups will report as being both removed and added in the backup report. Despite being recognized as a new VM after moving to a new host, the VM data is still deduplicated against it’s prior backups on the prior host(s).
Backup Scheduling
For proper VM tracking, it is advised that the entire Hyper-V host or Hyper-V container (parent) is selected for backup, as opposed to selecting individual VMs. If only a select few VMs are needed for backup and selecting the entire Hyper-V host or Hyper-V container, grabbing all VMs, is not an option, you can create an exclusion rule in the Barracuda Backup Agent for Windows config.ini file using the steps in the Exclude Hyper-V Virtual Machines section below.
Because of the Microsoft feature Redirected Access, in cases where Cluster Shared Volumes (CSVs) are utilized, you must stagger the backup schedules for each Hyper-V host, or schedule backups for each data source/host at separate times. For more information, refer to the Microsoft TechNet article Event ID 5136 - Cluster Shared Volume Functionality.
Exclude Hyper-V Virtual Machines
In some instances, it may be necessary to exclude certain VMs from backup when implementing a clustered Hyper-V environment. To do so, you must configure the Barracuda Backup Agent for Windows to ignore those VMs you want to exclude from backup.
Use the following instructions to edit the Barracuda Backup Agent on the Hyper-V Server:
- On the Hyper-V Server where you installed the Barracuda Backup Agent, open Services.
- Right-click the service Barracuda Backup Agent, and click Stop. The service is now stopped.
- Open the config.ini file in a text editor such as Notepad; the file is located in the following directory by default:
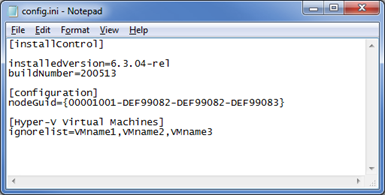
/Program Files/Barracuda/Barracuda Backup Agent/config/config.ini - Add the following lines to the end of the file:
ignorelist=VMname1,VMname2,VMname3
For example:
- Save and close the file.
- Open Services. Right-click on the service Barracuda Backup Agent, and click Start. The Status field displays as Started.