

Back up email archives using Barracuda Backup via CIFS/SMB access to the Barracuda Message Archiver's data partition.
Barracuda Message Archiver Setup
- Log in to the Barracuda Message Archiver as the administrator, and go to the Advanced > Backups page.
- In the Backup of Archives section, set Back Up Archives via SMB to Yes to allow access to the message store as an SMB share.
- Set a workgroup name and password to connect to the SMB share; note that the SMB share username is always smb:

- Click Save to save your settings.
Barracuda Backup Setup
- Log in to Barracuda Backup as the Administrator, and go to the Backup > Sources page.
- Click Add a Computer. In the Add a Computer page, enter a Computer description and enter the IP address or fully qualified domain name of the Barracuda Message Archiver in the Computer Name field.
- From the Computer Type drop-down menu, select Microsoft Windows:
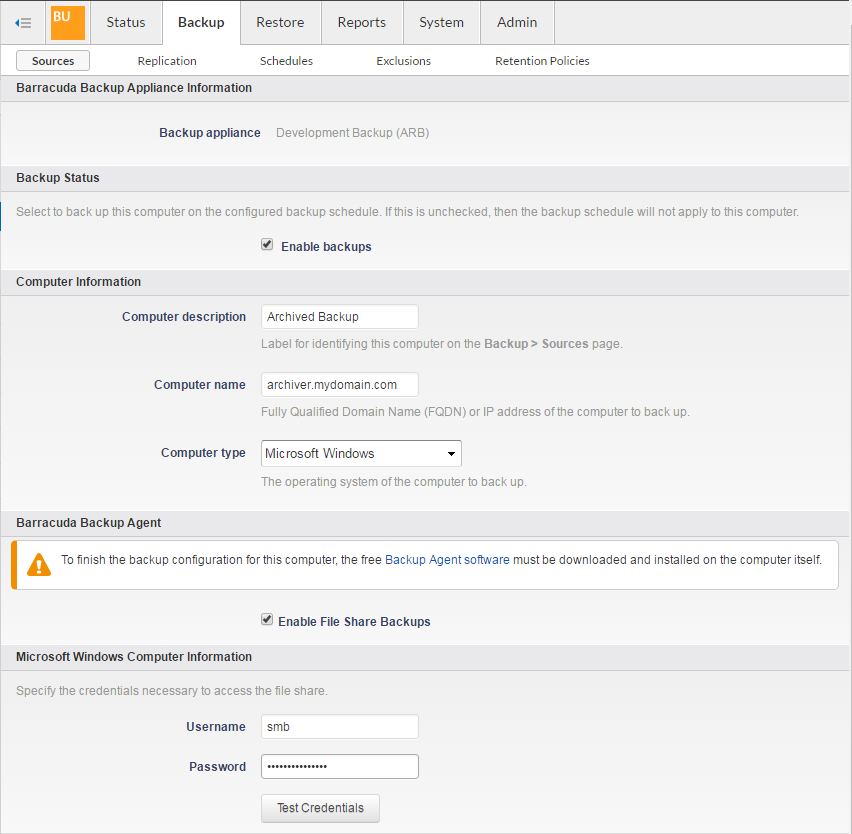
- Select Enable File Share Backups, and enter smb as the Username.
- Enter the password you set up on the Advanced > Backups page in the Barracuda Message Archiver web interface, and click Test Credentials to verify access to the file share.
- Click Save at the top of the page.
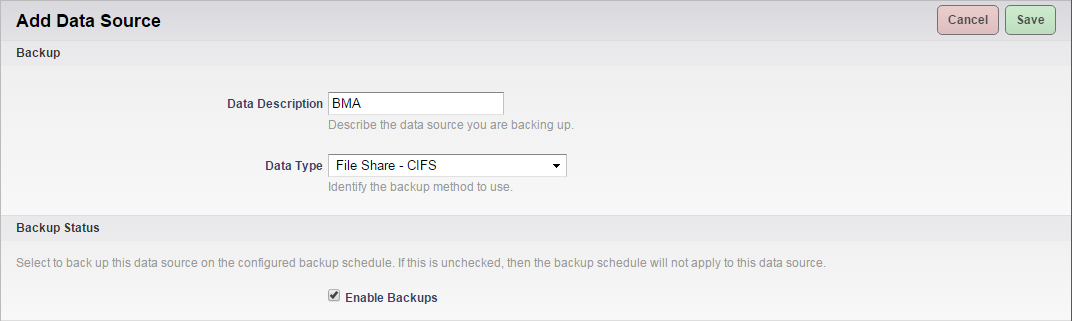
- In the Add Data Source page, from the Data Type drop-down menu, select File Share - CIFS, and verify Enable Backups is selected:
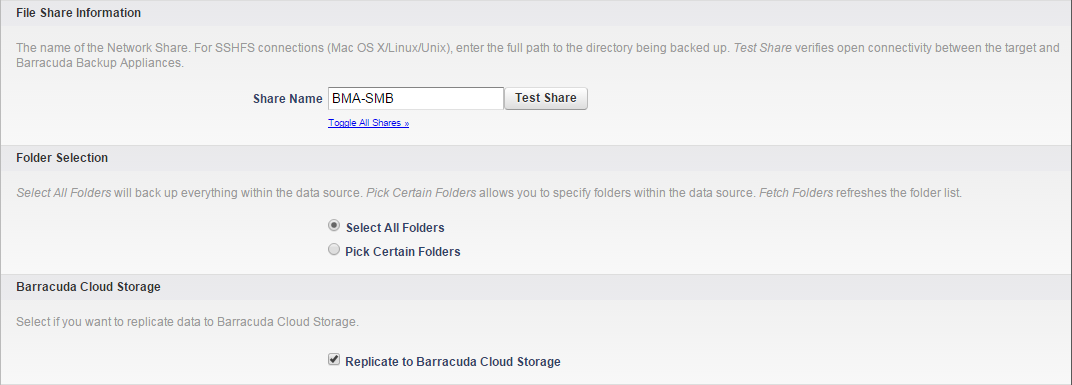
- In the File Share Information section, enter BMA-SMB as the Share Name, and click Test Share.
- In the Folder Selection section, specify which folders you want to back up.
- To replicate to the cloud, turn on Replicate to Barracuda Cloud Storage:
- Select the backup schedule for the SMB share.
- Click Save at the top of the page to save your configuration and add the data source.