

The bare metal recovery method can be used to recover entire Microsoft Windows systems in the event the system has completely failed and no other recovery options are available. With a bare metal recovery, all data, settings, applications, and operating system are installed to a bare metal system (no operating system installed).
To perform a bare metal restore, all system volumes and the system state must be backed up on the data source. Bare metal restore requires that the target system is exact or similar hardware to the originally backed up system (source). The system firmware option on the target system – BIOS or Extensible Firmware Interface (EFI) – must also match the original backed up system (source).
Windows 2016 and 2019 ReFS partitions are currently not supported in a bare metal restore.
Install the Windows ADK and Windows PE Add-On
The Barracuda Backup Bare Metal Recovery (BMR) kit is used to create a bootable ISO based on WinPE. This enables you to perform a physical-to-physical (P2P) or physical-to-virtual (P2V) bare metal restore of your Microsoft Windows Server without installing an operating system first.
Before you build a BMR ISO, you must install the Windows ADK and the Windows PE add-on for the ADK. The scripts included in the Barracuda Backup BMR kit use this software to generate an ISO used for bare metal recovery.
The following files are required to build the BMR ISO:
From Microsoft:
The latest Windows ADK
The latest Windows PE add-on for the ADK
From Barracuda:
The Barracuda Backup Bare Metal Recovery Kit. Within Barracuda Backup, navigate to the System > Software Downloads page and download from the Windows Bare Metal Recovery Kit section.
Install the Windows ADK
Run adksetup.exe from your computer to install the Windows ADK.
Select Install the Windows Assessment and Deployment Kit - Windows 10 to this computer using the default Install Path. Click Next.
Specify whether you want to send your usage data to Microsoft. Click Next.
Click Accept to accept the license agreement.
Keep the default feature settings and click Install.
After the installation has completed successfully, uncheck the Launch the Getting Started Guide check box. Click Close.
Install the Windows PE Add-On for ADK
Run adkwinsetup.exe from your computer to install the Windows PE add-on for the ADK.
Select Install the Windows Assessment and Deployment Kit Windows Preinstallation Environment Add-ons - Windows 10 to this computer using the default Install Path. Click Next.
Specify whether you want to send your usage data to Microsoft. Click Next.
Click Accept to accept the license agreement.
Keep the default feature settings and click Install.
After the installation has completed successfully, click Close.
Prepare Additional Drivers for Inclusion in the BMR ISO (Optional)
If the system you are trying to recover depends on drivers that are not included in Windows PE by default, you can include additional drivers in the BMR ISO.
To include additional drivers in the BMR ISO:
Create a single folder or directory to hold the included drivers (e.g.,
C:\drivers-for-bmr).Download the necessary drivers from the hardware vendor.
Extract the drivers if they are in a self-extracting archive or a ZIP file. Note the location of the extracted folder.
Inspect the extracted files to ensure there is at least one INF file to include in the BMR ISO.
Copy the extracted drivers in the folder from Step 3 into the directory you created in Step 1.
Download and Extract the Barracuda Backup BMR Kit
Within Barracuda Backup, navigate to the System > Software Downloads page and download the Barracuda Backup Bare Metal Recovery Kit.
Unzip the BarracudaBackupBmrKit-X.Y.ZZ.zip archive file. Note the location of the extracted folder.
Open a command prompt and navigate to the BarracudaBackupBmrKit folder where you extracted the archive in Step 2.
Run the
create_bmr_iso.batscript with the following commands that correspond to the ISO you want to create.64-bit ISO without additional drivers:
create_bmr_iso.bat amd64 C:\winpe-workspace C:\bmr.iso
64-bit ISO with additional drivers:
create_bmr_iso.bat amd64 C:\winpe-workspace C:\bmr.iso C:\drivers-for-bmr
32-bit ISO without additional drivers:
create_bmr_iso.bat x86 C:\winpe-workspace C:\bmr.iso
32-bit ISO with additional drivers:
create_bmr_iso.bat x86 C:\winpe-workspace C:\bmr.iso C:\drivers-for-bmrNote that it will take several minutes for the script to build the BMR ISO.
Delete the directory you specified as the workspace (e.g.,
C:\winpe-workspace).
Perform Bare Metal Recovery
To perform a bare metal recovery:
Use the Bare Metal Recovery ISO file you created above to boot the target system.
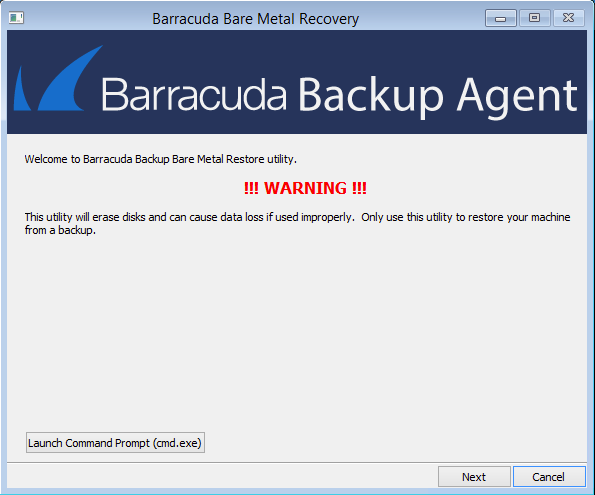
After the target system boots, the Bare Metal Restore Utility welcome/warning screen displays. Ensure that no data is present on the target system, and click Next.
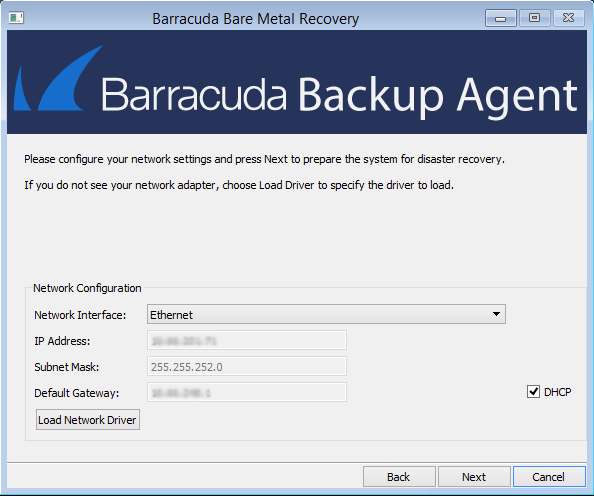
On the Network Configuration screen, choose a Network Interface, and specify an IP Address, Subnet Mask, and Default Gateway. Then click Next.
The Awaiting connection screen displays.
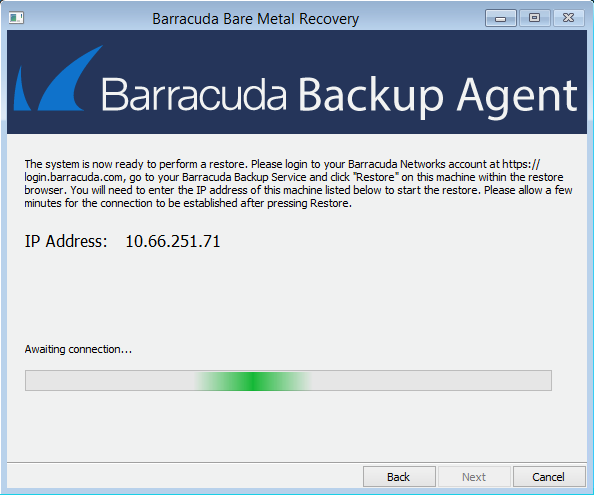
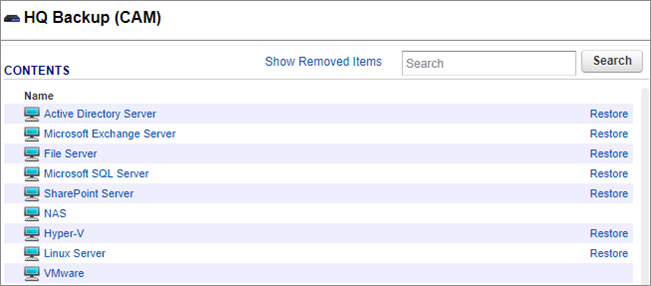
Log into the Barracuda Backup local or cloud interface, and go to the Restore > Restore Browser page.
Click Restore to the right of the Microsoft Windows system you want to restore. If you want to restore to a different backup revision of the system other than the latest, click on the system, and click View all revisions up to: <date>, and click Restore next to the backup revision.
In the Restore dialog box, select Other Hostname or IP Address, and type the IP Address configured for the target system in the Bare Metal Restore Utility.
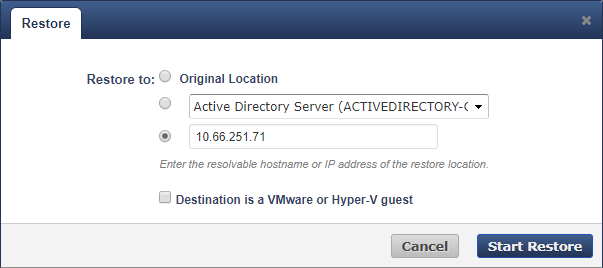
Click Start Restore.
After several minutes, the target system receives the restore job from Barracuda Backup and displays a list of recoverable volumes.
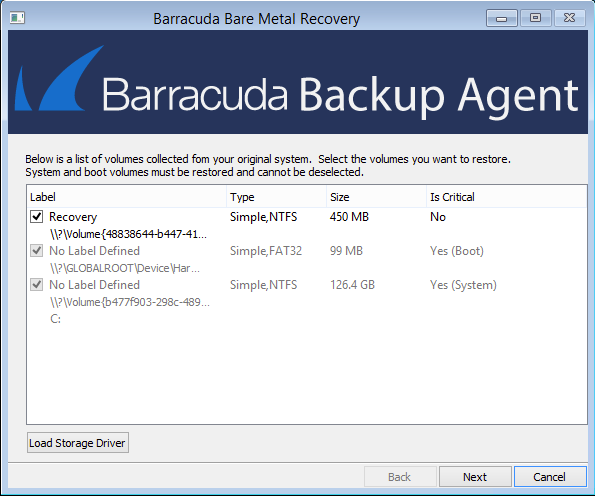
Select the volumes you want to recover.
Click Next to begin the system restore.
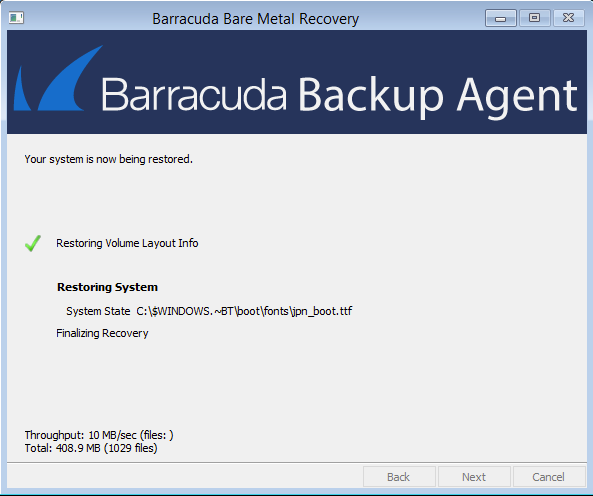
When the restore is complete, click OK in the Confirmation dialog box.
Remove the Bare Metal Recovery ISO and reboot the system.