

This article applies to all Barracuda Vx products offered with Microsoft Hyper-V 2008, 2008 R2, 2012, 2012 R2, 2016 and 2022.
This article assumes you have licensed and deployed your Barracuda virtual appliance.
Use the steps in this article to convert and replace a Barracuda virtual appliance .vhd file with a .vhdx format file.
Step 1. Convert the VHD File to VHDX Format
- Log in to Microsoft Hyper-V, and select the virtual machine (VM) where the VHD file to be converted resides:
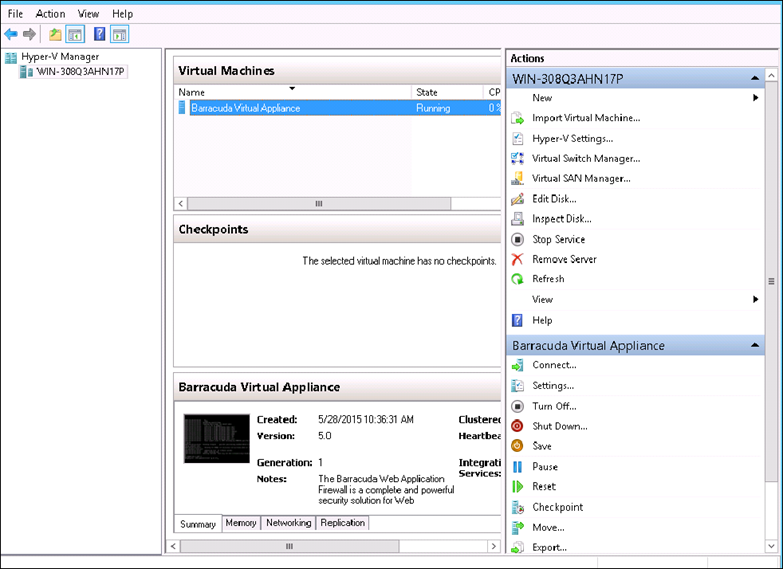
- Right-click the VM, and click Turn Off.
- From the Action menu, click Edit Disk.
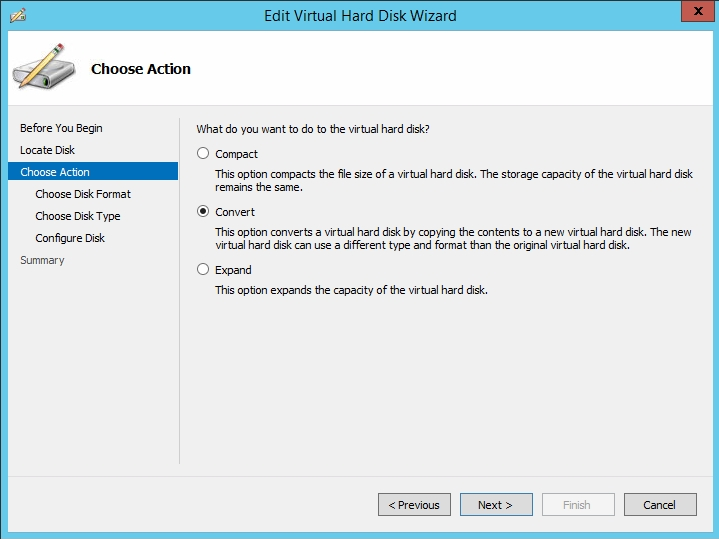
- The Edit Virtual Hard Disk Wizard displays. Click Next, and on the next page click Browse to navigate to and select the disk you want to convert from .vhd format to .vhdx format.
- Click Next. In the Choose Action page, select Convert:
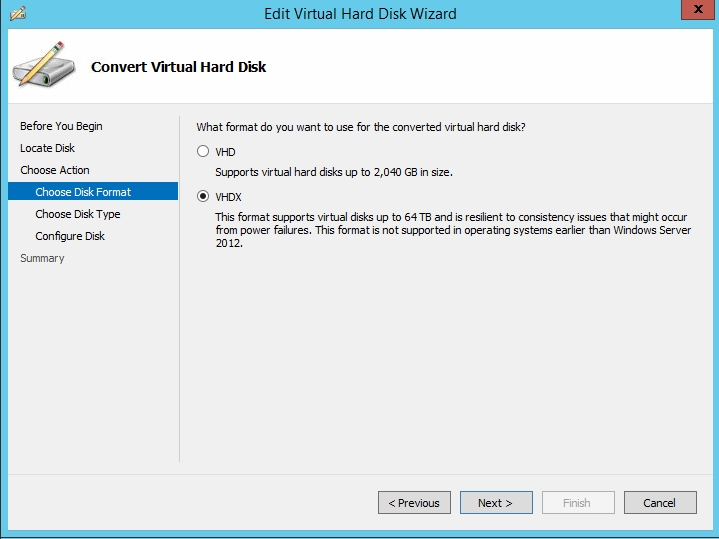
- Click Next. In the Convert Virtual Hard Disk > Choose Disk Format page, select VHDX to convert the .vhd to .vhdx format:
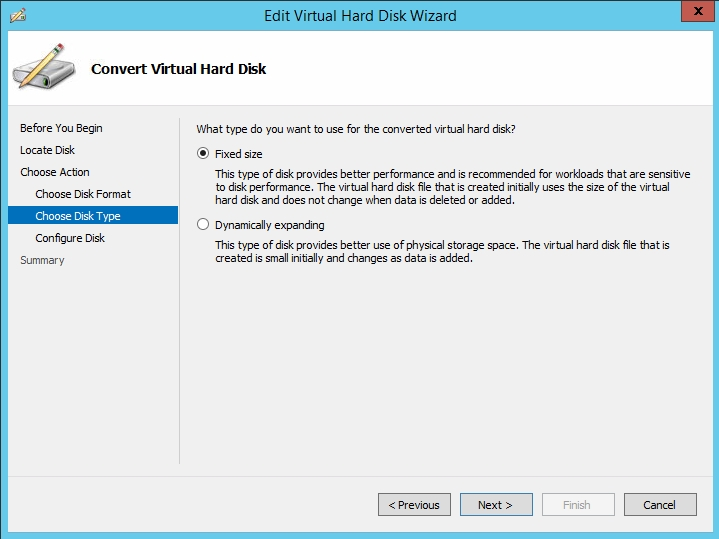
Click Next. In the Convert Virtual Hard Disk > Choose Disk Type page, select the type of disk to use for the converted virtual hard disk:
Click Next. In the Configure Disk page, specify the name and location for the VHDX to be saved, and then click Next.
The Summary page displays a summary of the operation; verify all fields are correct, and then click Finish. Allow the operation to complete before proceeding.
Step 2. Replace the VHD File with the VHDX Format
- Right-click the VM, and click Settings. In the Settings window, click Hard Drive in the left pane.
- In the right pane, select Virtual hard disk, and then click Browse to navigate to and select the .vhdx file created in Step 1. Convert the VHD File:
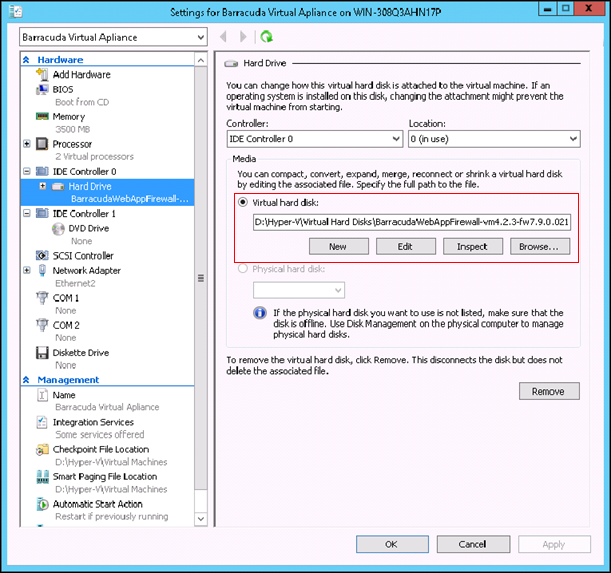
- Click OK to save your changes.
Start the VM.