

This document explains how to install a Bullet Camera into an outdoor enclosure.
Step 1: Install the Wi-Fi Antenna (Optional)
If you will be installing a Wi-Fi antenna, complete the steps in this section.
Otherwise, proceed to the next section, Ethernet Cable Installation.
- Open the enclosure.
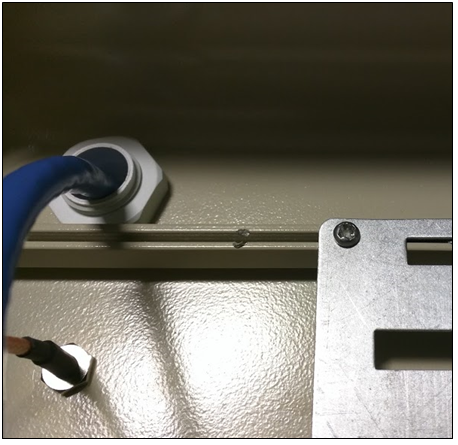
- Drill a ¼" hole toward the back of the enclosure. Remove all burrs and cuttings.
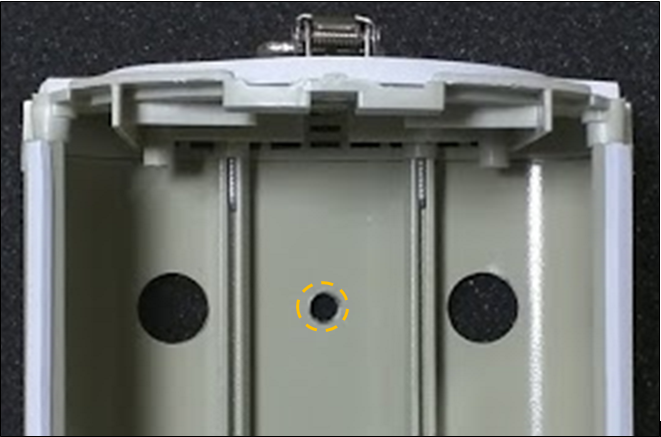
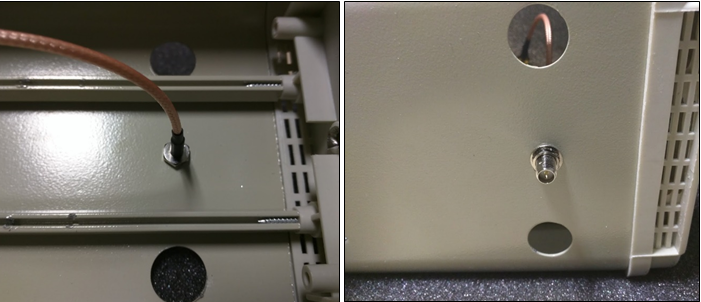
- Install the RP-SMA extension cable into the hole in the back, using the supplied lock washer and nut.
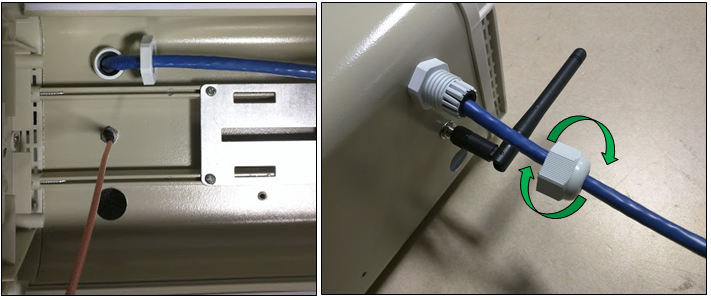
This figure shows a completed antenna.
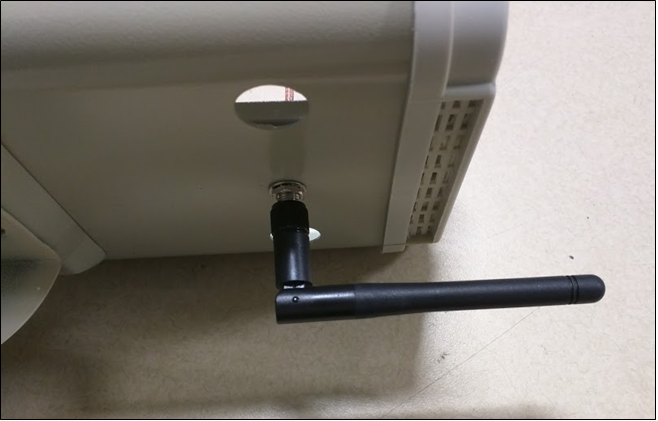
Note: Point antenna straight down (vertically), for best results. Do not position antenna horizontally, as shown.
Step 2: Install Ethernet Cable
Ethernet cable provides power to the camera, regardless of whether Wi-Fi is used to transmit data.
Use the following recommendations:
- Power over Ethernet (PoE) – either an 802.3af PoE supply or a 48VDC power supply
- Current – 125mA, about 6 watts
- Ethernet cable – either outdoor rated (described here) or a flexible conduit with indoor rated cable inside.
- Place the PoE power supply in a location suitable for the device. Ensure that you will power the supply in accordance with all applicable safety and electrical codes.
- Run a CAT5 or better Ethernet cable from the output of the supply.
- Locate the cable gland in the enclosed parts bag.
Note that the supplied gland may be designed for a substantially larger cable than what you are using. The purpose of the gland is to provide strain relief. If the cable gland is too large for your cable, you can wrap a section of the cable in electrical tape to increase its girth.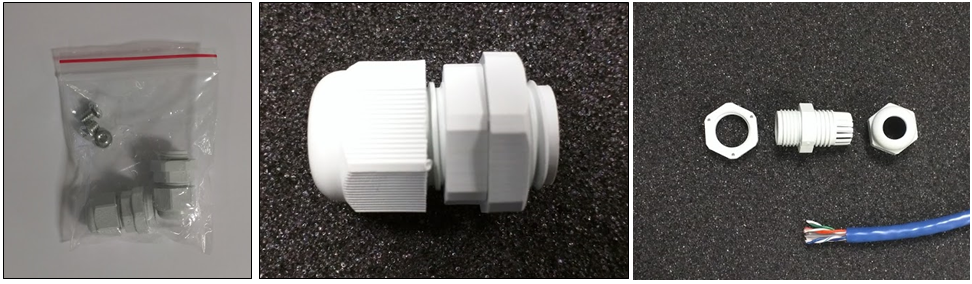
- Install the cable gland or flexible conduit fitting in the camera enclosure, using the provided hole at the rear of the enclosure.
- Route the cable into the enclosure through the cable gland.
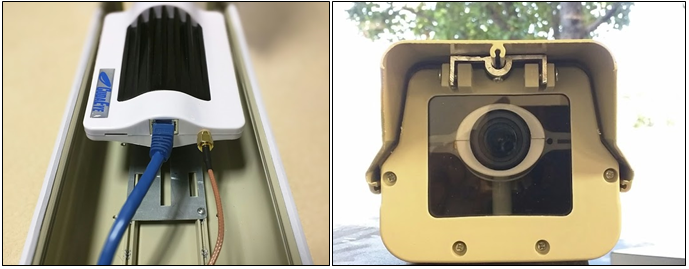
- Terminate the cable with an RJ-45 connector so it can be connected to the camera, as shown below.
Continue with the following section, Camera Installation.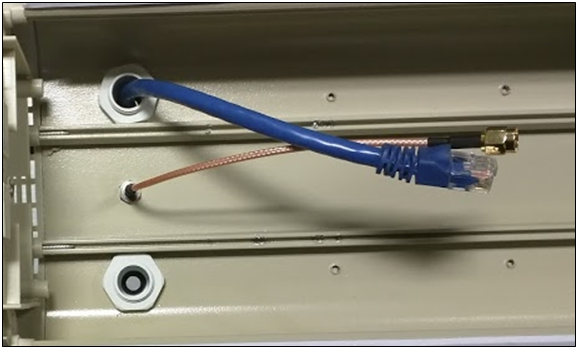
Step 3: Install the Camera
To install the camera:
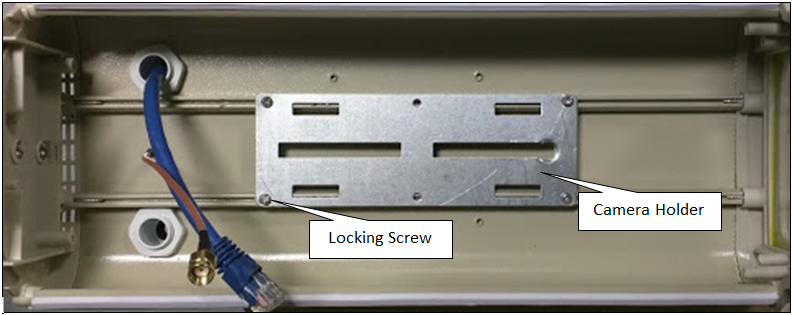
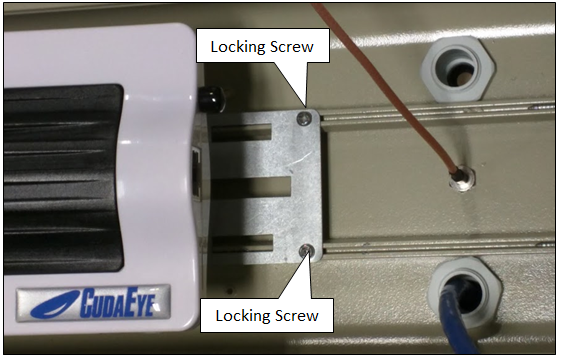
- Remove the locking screws that keep the camera holder in place. Remove the camera holder.
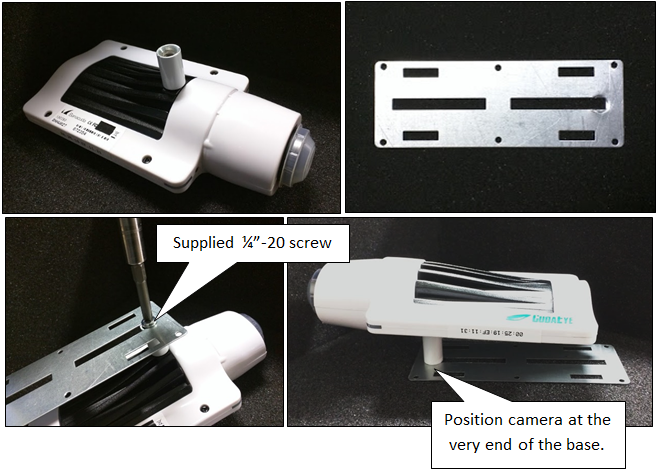
- In the original camera packaging, locate one of the white metallic spacers.
- Mount the camera to the holder as shown, using the ¼"-20 screw that came in the parts bag and the white metallic spacer from the original camera packaging.
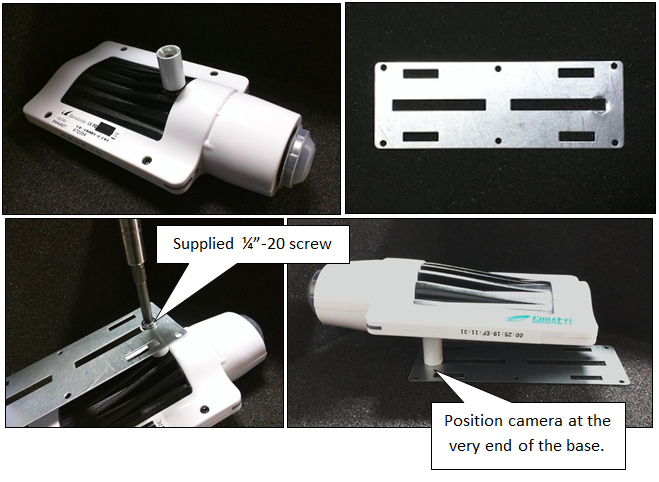
- Snap the camera and holder back into the enclosure. Position the camera so the lens is about ¼" - ½" behind the front glass. If the lens is too close, the zoom mechanism will hit the glass. If the lens is too far, the wide angle of the lens will see the edges of the enclosure. Replace the locking screws to fix the camera holder in place.
- Connect the Ethernet cable to the camera. If you are using Wi-Fi, connect the RP-SMA extension cable to the camera.
- Mount the enclosure in a suitable location.
Step 4: Assemble the Mount
To assemble the mount:
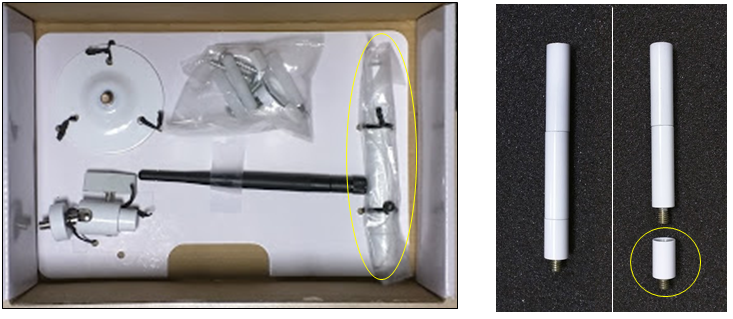
- Disassemble the highlighted section of the arm mount.
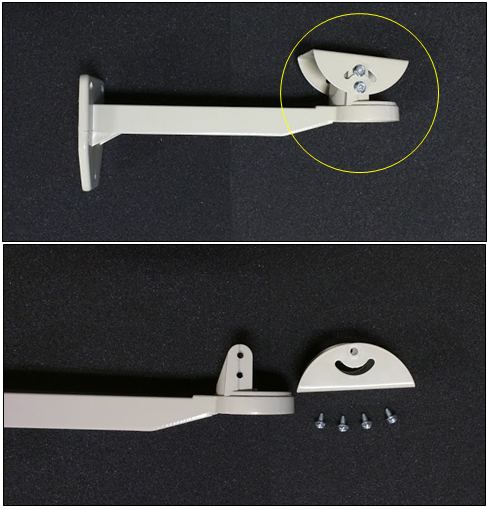
- Remove the base from the bottom of the case.
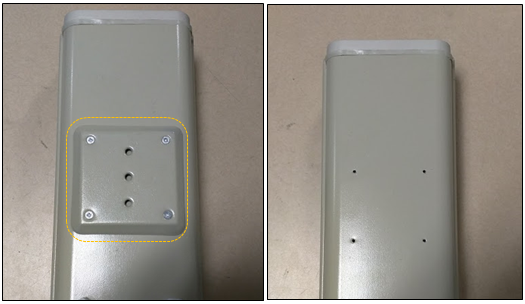
- Attach both bases together using the supplied screws, then install it back to the arm mount.
- Install the full arm on the camera case, and adjust the angles as needed.
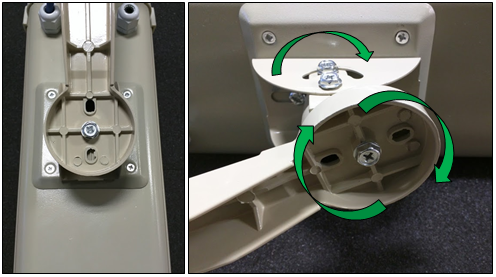
This figure shows a completed arm mount installation.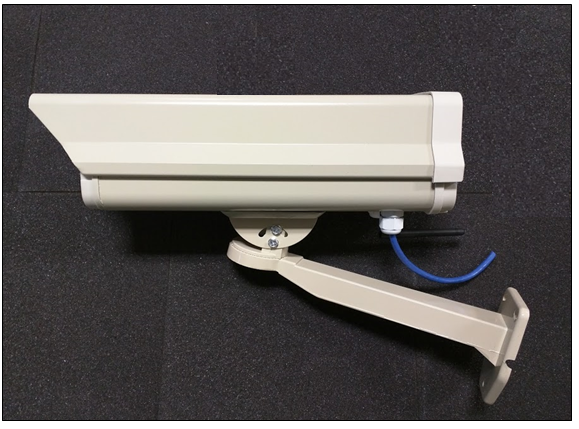
The unit is now ready to be installed in the location you have chosen.