

The Barracuda Cloud Archiving Service web interface includes the Search page from which you can search and browse your archived messages. Additionally, you can manage various message actions based on features enabled for your account by the administrator.
Log into the Barracuda Cloud Archiving Service
To access your user account, log into Barracuda Cloud Control https://login.barracudanetworks.com/ using your Barracuda Cloud Control account credentials.
Select the Cloud Archiving Service from the left pane.
The Basic > Search page will be shown.
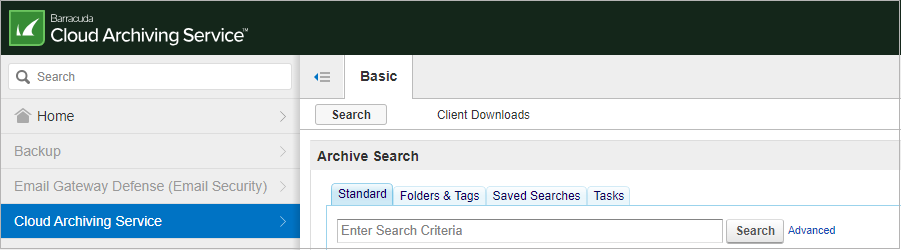
Use the following tabs to manage your messages.
Standard – Archived messages accessible by you for searching and browsing.
Folders & Tags – Folders, tags, and PST files viewable by you.
Saved Searches – Searches created and saved. See How to Set Up Saved Searches.
Tasks – List of actions initiated by you from the Archive Search page, such as tagging or forwarding messages.
Use the Basic > Client Downloads page to download the Microsoft Outlook Add-In and Stand-Alone Search Utility tools and add-ins.
Search
The Basic > Search page initially displays a list of the archived messages that are accessible to the viewing account.
The Search page displays basic information about a message such as senders and recipients, date, subject, and size.
For more information on search options, see the following:
Barracuda Archive Search for Outlook Add-In
Alternatively, you can use the Barracuda Archive Search in the Outlook Add-In to access your archived messages.
In Outlook, click on the Search Archive option in the ribbon menu at the top.
Enter your search criteria. For more information on search options, see How to Search and Archive Messages Using Barracuda Archive Search for Outlook.
Double click the message item you want to view. The standard Outlook functionalities, such as replying and forwarding the message, are available for use.
Select and View Messages
The standard selection controls apply when selecting messages in the list view:
To select one message – Single-click on the desired message.
To select multiple consecutive messages – Single-click on a message, and Shift-click on another message to select both messages along with all messages listed between those two in the Message List.
To select multiple individual messages – Single-click on one message, and Ctrl-click on every other message you want to select.
You can view the contents of a message in one of two ways:
the Preview Pane
the Message Details window
A single click on any message in the Search results sends it to the embedded Preview Pane for viewing. Double-click on a message to view it in a separate Message Details pop-up window. Both methods offer the ability to view the message as the sender intended for it to be viewed, as well as the underlying message source code. You can download each viewable message to your desktop as an .eml file.
Click on View located at the top of the message list to select different view options.
Resend to Me
To redeliver selected messages to your mailbox, select one or more messages, and then click Resend to Me located at the top of the message list.
Export Messages
Once a search is executed and the results are listed in the Basic > Search page, you can choose to export one or more of these messages as a .pst or .zip file.
To export one or more messages, select the desired item(s) from the message list using Shift- or Ctrl-click to select multiple messages. Click the Tools menu at the top of the message list, and click Export Messages. In the window select the desired action and export method. The desired messages are gathered into a single .pst or .zip file.
Forward Messages
Once you execute a search and the results display in the Basic > Search page, you can specify one or more of these messages to be forwarded to a desired list of recipients.
To forward one or more messages, select the desired item(s) from the message list using Shift- or Ctrl-click to select multiple messages. Click on Tools located at the top of the message list, and select the desired action. A pop-up dialog prompts you for the email addresses of those users that are to receive the selected messages; use semi-colons to separate multiple email addresses.
Tag Messages
Tag messages to easily identify any messages for future use. Tags can be any text, and can be accessed only by the account that created them.
To tag one or more messages, execute a search in the Basic > Search page, and select the desired item(s) from the message list using Shift- or Ctrl-click to select multiple messages. Click on Tools located at the top of the message list, and select the desired Tag action. A pop-up dialog prompts you for the tag text. Tags can then be used as search criteria, allowing you to easily retrieve these messages at a later time.