You can add a custom tile to the Microsoft 365 App Launcher for your users to gain quick and easy access to the Barracuda Cloud Archiving Service web interface.
Add a Custom Tile to the App Launcher
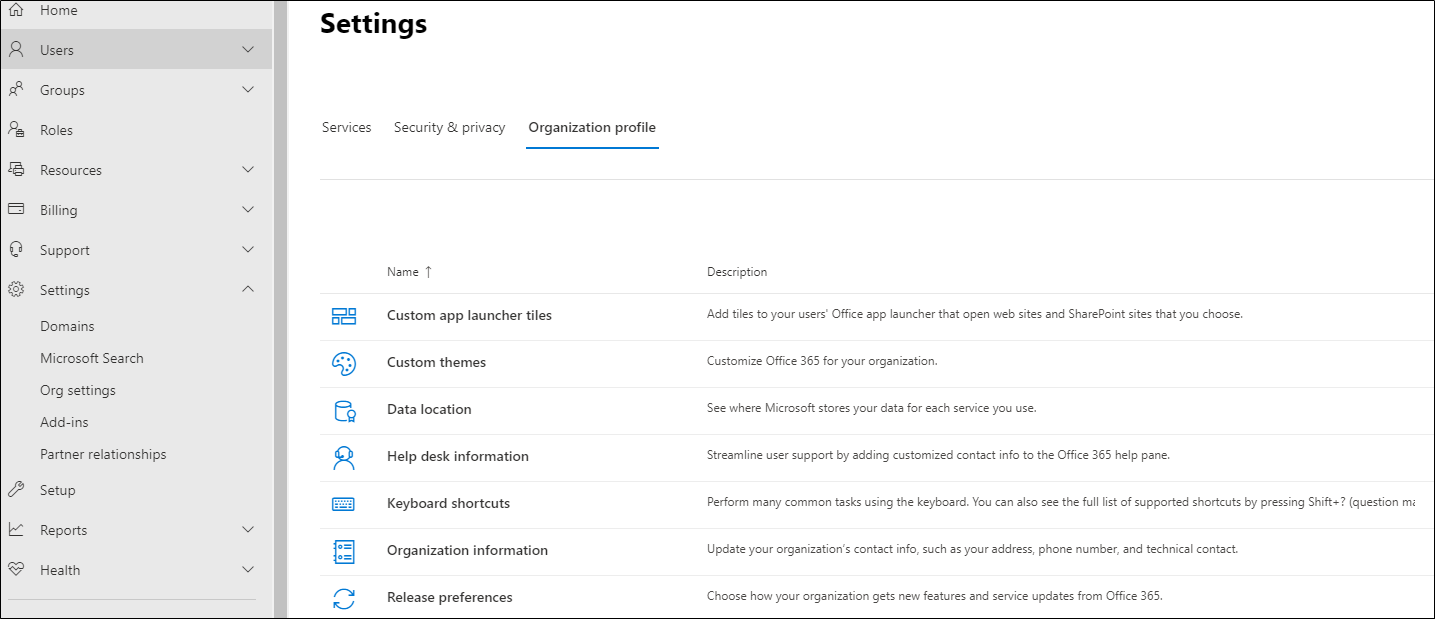
- Sign into the admin center and go to Settings > Org Settings on the left-hand navigation menu.
- On the Organization profile tab, select Custom app launcher tiles.

- Select Add a custom tile.
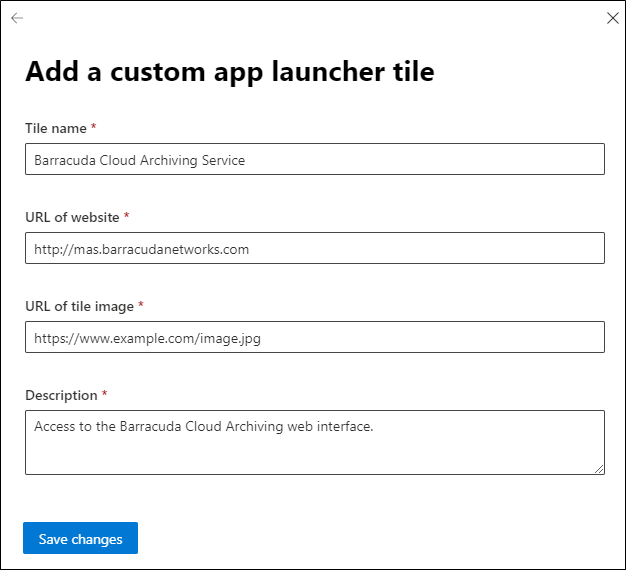
- Enter the details for the custom tile.
- Tile name – Add a name for the tile. For example, “Barracuda Cloud Archiving Service.”
- URL of website – URL location of where the tile points to. See Data Centers by Region for a list of region-specific MAS hostnames. For example, "mas.barracudanetworks.com."
- URL of the image – Image that appears on the tile. Download one of the following 60x60 pixel logos for your custom tile.
 Download Barracuda Cloud Archiving Service Logo.
 Download Barracuda Logo.
 - Description – Description that displays when you select the tile on the App Launcher. For example, “Access to the Barracuda Cloud Archiving Service web interface.”

- Select Save changes to create the custom tile.
Promote the Custom Tile to the App Launcher
- Log into Microsoft 365.
- Open the App Launcher, and click All Apps.
- Locate the custom tile you added, and click on the ellipsis (3 dots). Choose Pin to launcher.
You can now see the Barracuda Cloud Archiving Service custom tile in the App Launcher.
For more information, see Add custom tiles to the app launcher on the Microsoft website.
