

You can configure Barracuda Cloud Control to synchronize users with LDAP Active Directory or Microsoft Entra ID (formerly Azure Active Directory) as described in the sections that follow.
View Existing Directories and Groups
Complete the following steps to view existing directories and groups in Barracuda Cloud Control:
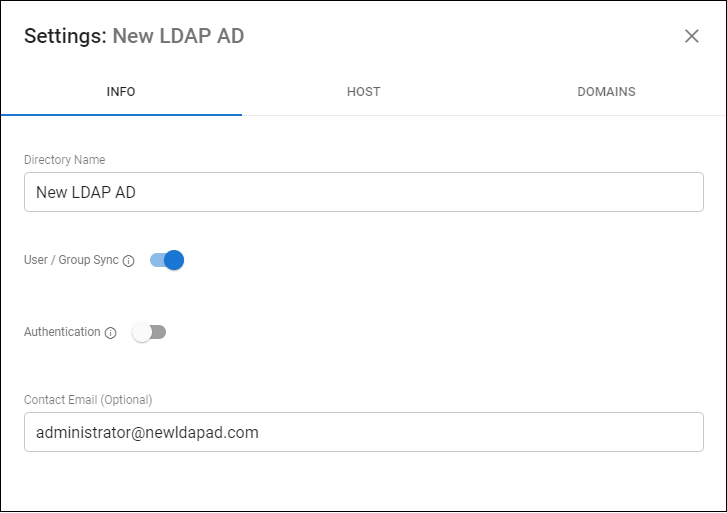
From the Admin tab in Barracuda Cloud Control, click Directories. The Directories table includes a row indicating whether or not Authentication has been set to On or Off.
Click View groups to display the groups associated with a configured directory.
- You can synchronize the listed groups to ensure that user information is up-to-date by clicking Sync groups.
- Click Edit for a specified group to modify the settings for the host or domain. When you have finished making changes, click SAVE.
Create a Barracuda Cloud Control Directory
- Log into https://login.barracudanetworks.com/ as the account administrator, and go to Home > Admin > Directories.
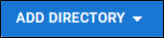
- Click the Add Directory button.
- Select one of the following sections to add a new LDAP or Microsoft Entra ID.
Add a New LDAP Active Directory
- Select LDAP Active Directory.
- On the INFO tab, specify a new Directory Name.
Activate the Authentication option to have users authenticate using their LDAP credentials. If you disable this option, users authenticate with Barracuda Cloud Control.
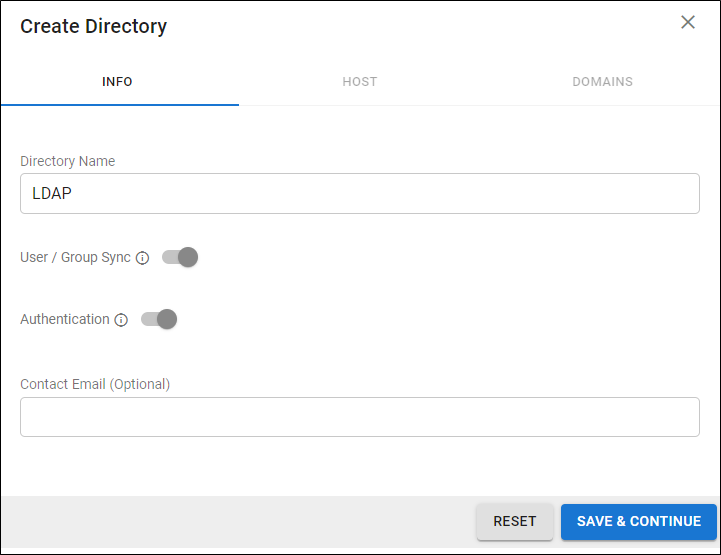
- Click SAVE AND CONTINUE.
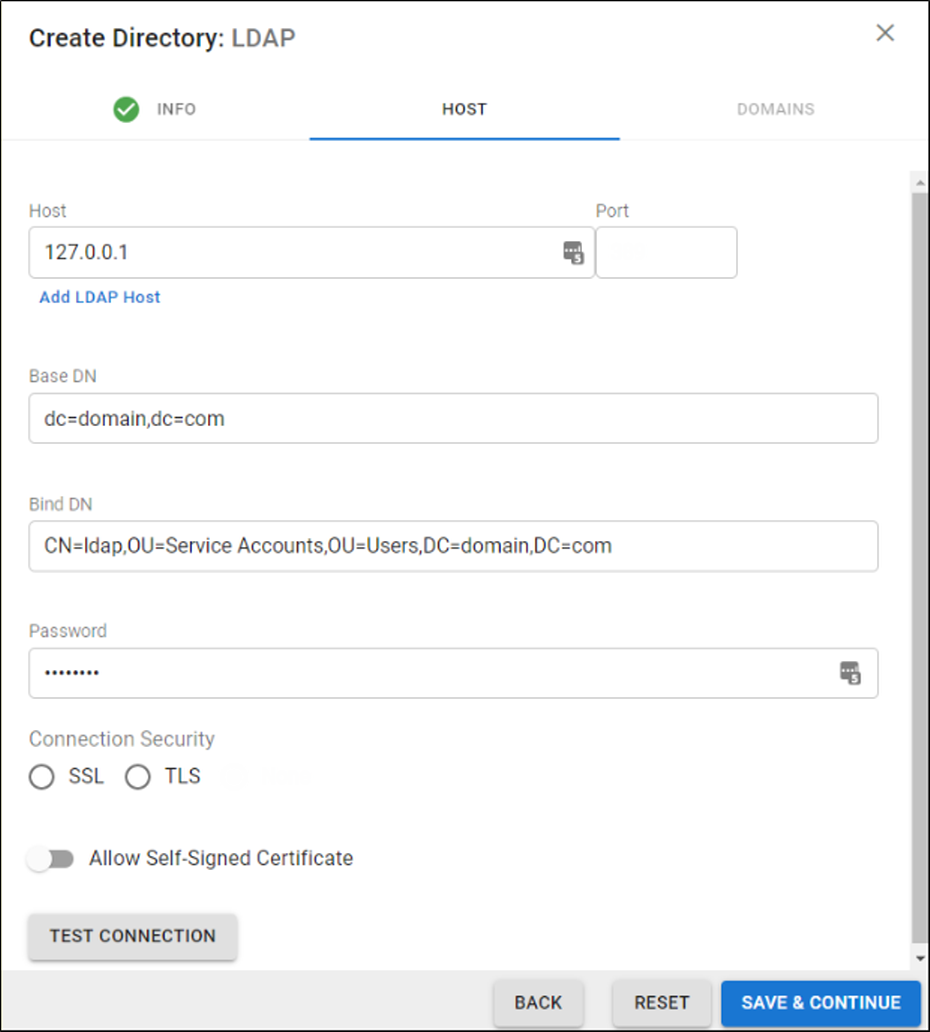
- On the HOST tab, specify the following for the LDAP host:
- LDAP Host IP address
- Base Domain Name (DN) – Any user or group that exists with the search base that will sync to Barracuda Networks. For example,
DC=domain,DC=com. - Bind DN – Enter the bind domain name for a service account with read permissions to the active directory.
- Password – Password associated with the service account.
- Connection Security – Select SSL or TLS. For more information, see New Requirements for LDAP Authentication.
- (Optional) To add additional servers, click Add LDAP Host.
- If your LDAP server uses a self-signed certificate, toggle on the Allow Self-Signed Certificate setting.
- Click TEST CONNECTION to check connectivity to the host. If the connection fails, verify your settings are correct and that you have allowed the Barracuda Networks IP in your firewall. Contact Barracuda Networks Technical Support for additional troubleshooting.
- If the connection succeeds, it displays as Connected. Click SAVE AND CONTINUE.
- On the DOMAINS tab, add the domains associated with your users.
- For each domain that you add, click Verify and following the instructions to verify the domain.
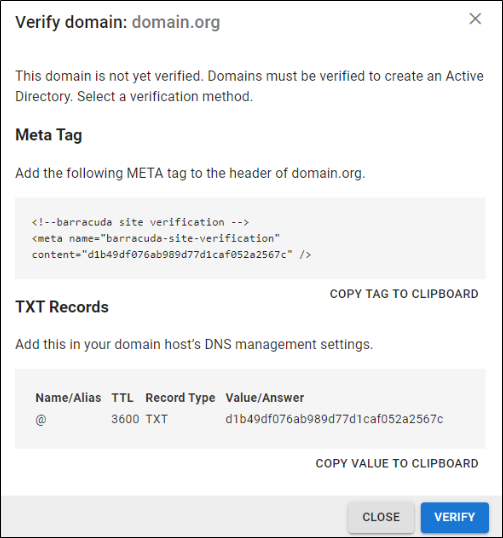
- After each domain is verified, you can sync your users and groups to the Barracuda Cloud Control.
Add a New Microsoft Entra ID
- Select Microsoft Entra ID.
- On the INFO tab, specify a new Directory Name. For example, "Office 365".
- Click CONNECT TO MICROSOFT to sign into Microsoft and authorize Barracuda Cloud Control to connect to your Microsoft Entra ID.
- Log in with your Microsoft 365 administrator credentials.
- Accept the credentials for the application request.
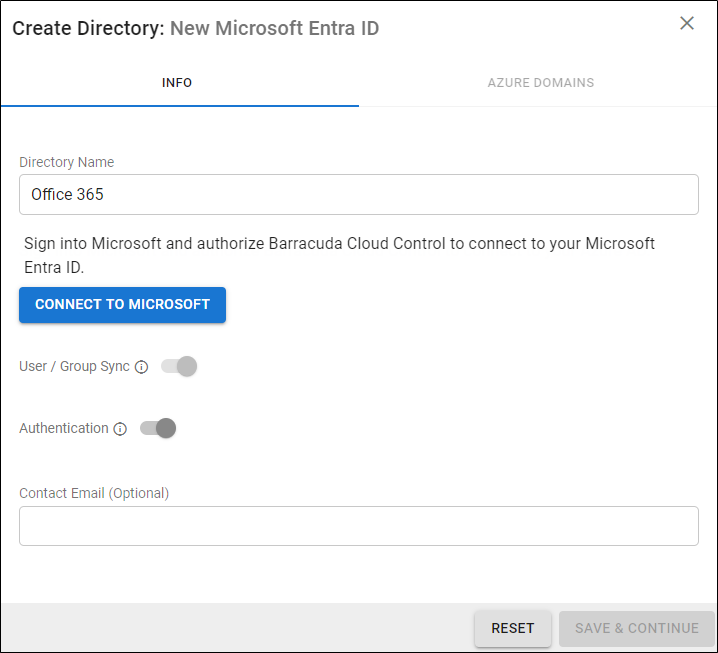
Activate the Authentication option to have users authenticate using their Microsoft Entra ID credentials. If you disable this option, users authenticate with Barracuda Cloud Control.
- After you are redirected back to the Barracuda Cloud Control, click Save.
Re-authorize a Microsoft Entra ID
Complete the following steps to reauthorize an existing Microsoft Entra ID:
- Click the Edit option for the Microsoft Entra ID you need to reauthorize from the Admin > Directories page.
- Click RE-AUTHORIZE.
- If Barracuda Networks' permissions were revoked from the LDAP account, you can use re-authorization to authenticate the linked Microsoft Entra ID account and grant the permissions again.
If the list of domains on Microsoft Entra ID has been updated, you can use re-authorization to update the corresponding list of domains in AuthDB.