

When to Use this Feature
With multi-tenant enrollment, MSPs can associate each customer with a tenant, and then log into the CloudGen Access app as a user. In this way the user can access resources associated with each tenant as needed to accomplish certain tasks, easily switching between tenants in the app.
If your organization has multiple groups of users who log in using different authentication systems - Microsoft Entra ID, Google, etc. – each group may have access to different sets of resources. For example, you may have contractors who authenticate with a separate system and have access to different resources than internal employees. So each tenant has access to different resources, and users can switch tenants, depending on what resources they need to access.
Each CloudGen Access tenant is typically associated with one organization. One CloudGen Access account can be associated with multiple tenants. With this feature, users can enroll a device with multiple tenants. Once a device is enrolled with more than 1 tenant, the device is only active with 1 tenant at a time, and the user can switch between tenants for that device. The policies and resources associated with that tenant will then be applied to the device.
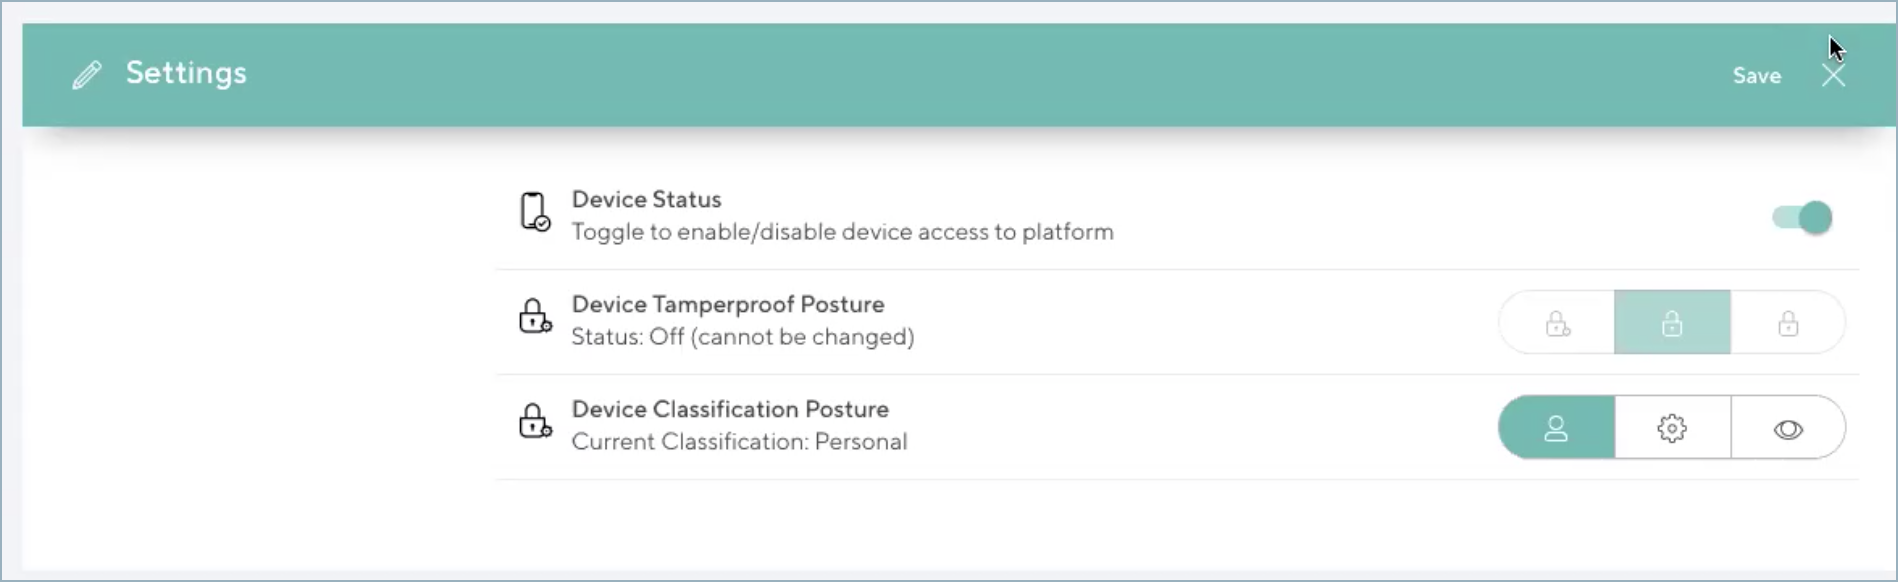
Note that on the Devices > Settings page, the Device TamperProof Posture can only be updated for Supervised devices. The Tamperproof posture is device specific and applies to all tenants associated with a device.
How to Enroll a Device With Multiple Tenants
(see also How to Unenroll a Device From a Tenant)
- From the console, choose a tenant.
- Go to Identity > Users and choose a user or create a new user.
- On the User page, scroll down to Enrollment. Click Generate Enrollment Link and select the Device Classification (Supervised, Managed, or Personal).
- Click on the link for that classification type. The number of slots for that classification type should decrease by 1.
- Launch the CloudGen Access app on the user's device.
- Select the tenant on the Enrollments screen in the app, and then click the + in the upper right of the screen.
- Paste the enrollment link you copied from the console into the Enrollment link text area, then click Enroll.
- Repeat this process with other tenants as needed.
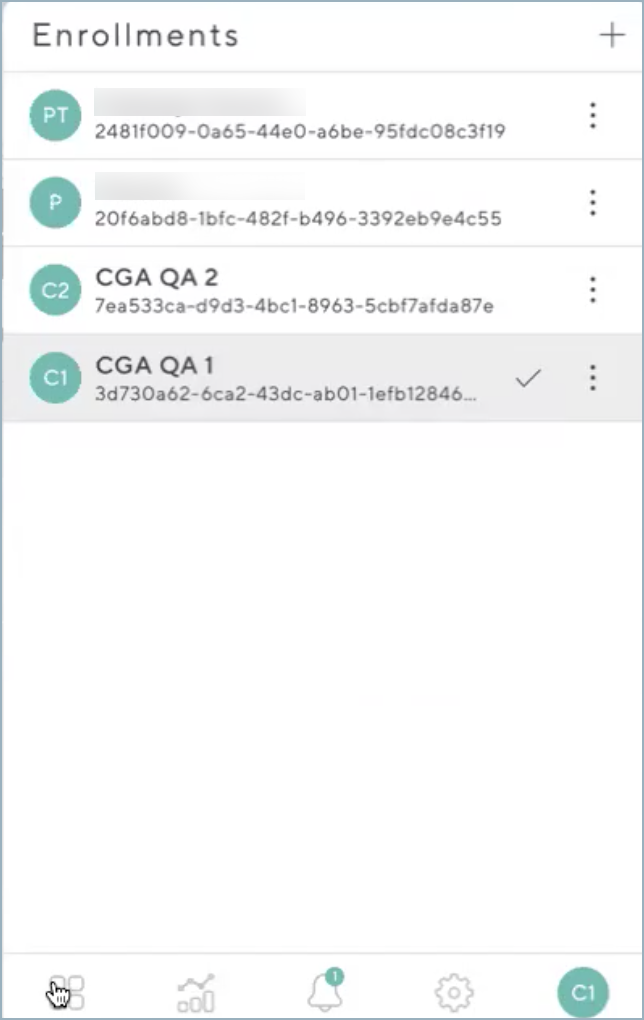
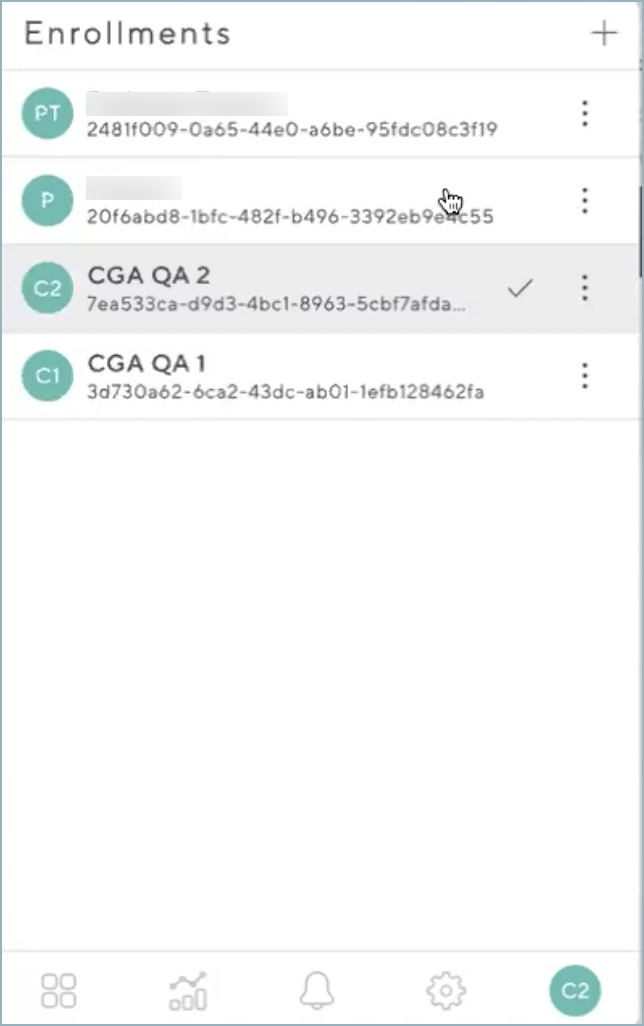
The Enrollments screen shows each tenant to which the device has been enrolled. However, the device is only active with one tenant at a time, so that only the resources from that tenant are available and the policies configured in that tenant are applied to the device. After the device has been enrolled with more than one tenant, the user can switch tenants using the Enrollments screen.
In the app, to see the App Catalog for the current tenant with which the device is active, click the icon on the bottom left of the Enrollments screen as shown below. Click the next icon to the right to see a graph of the activity (blocked/allowed) for that tenant. Click on the next icon (the bell) to the right for the Notifications tab.
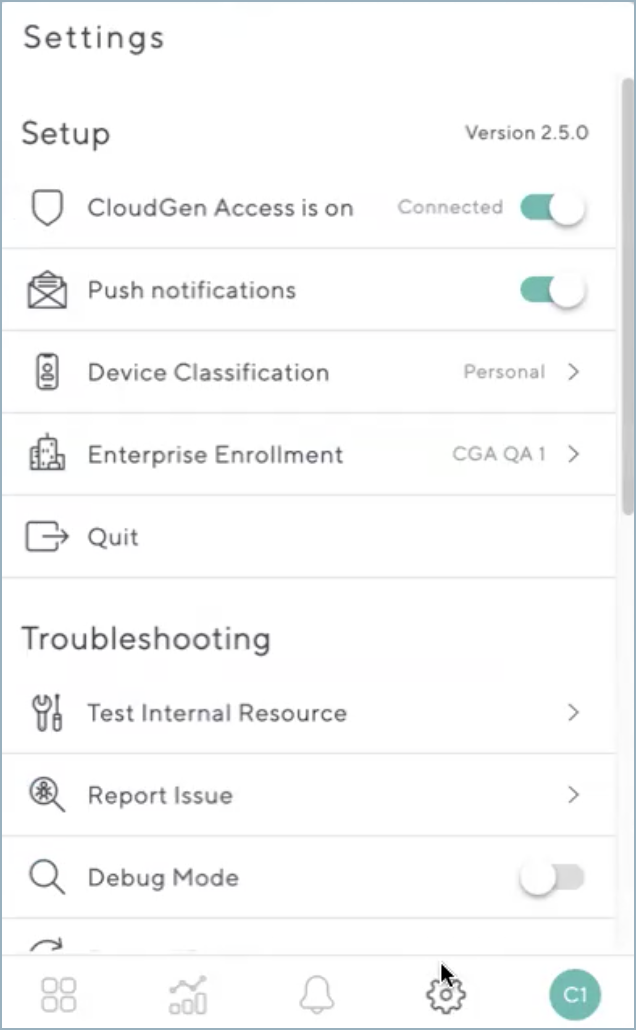
Click on the next icon to the right for the Settings tab:
Click the green circle icon that represents the current tenant to return to the Enrollments screen.
Which Web Policies Are Applied to the Device
To see which policies are currently applied to the device, go to the CloudGen Access console and select the tenant with which the device is currently active. Next, click the Web Policies icon (the shield). The policies shown here are currently applied to the device.
How to Switch Tenants for the Device
- On the app, on the Enrollments screen, click on the tenant you want to switch to for the device. Note that the device is currently active with the tenant that shows a check mark to the right, which, in this case, is CGA QA 1. In this example, you would click on CGA QA2 to switch to that tenant.
- On the Details screen for that tenant, click the check mark in the upper right, as shown below, to switch to that tenant for the device.
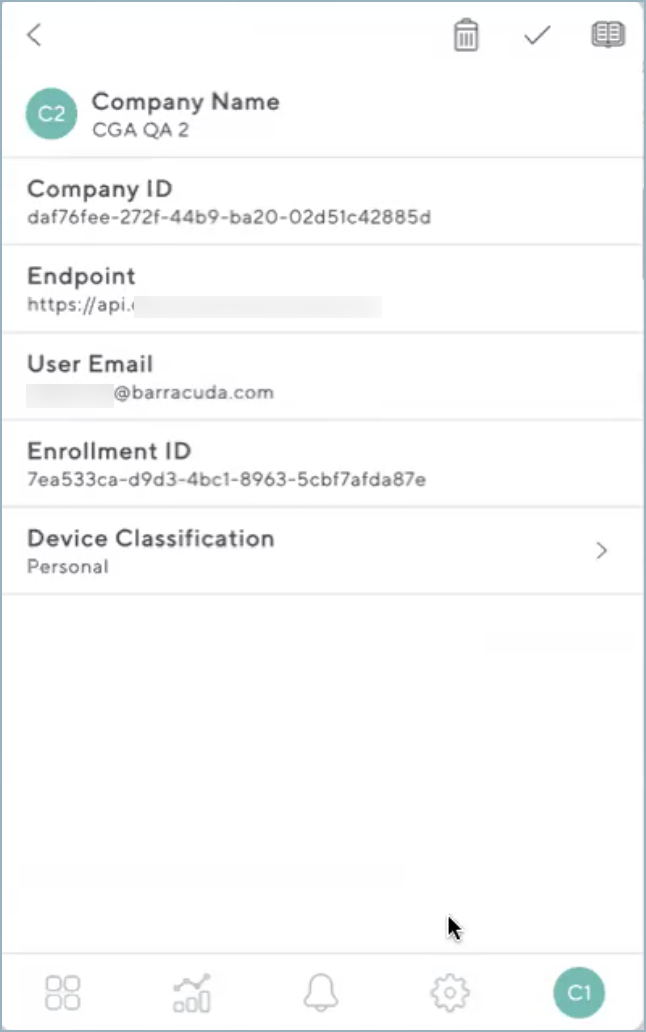
A message is displayed at the bottom of the screen indicating that the device is now using that tenant.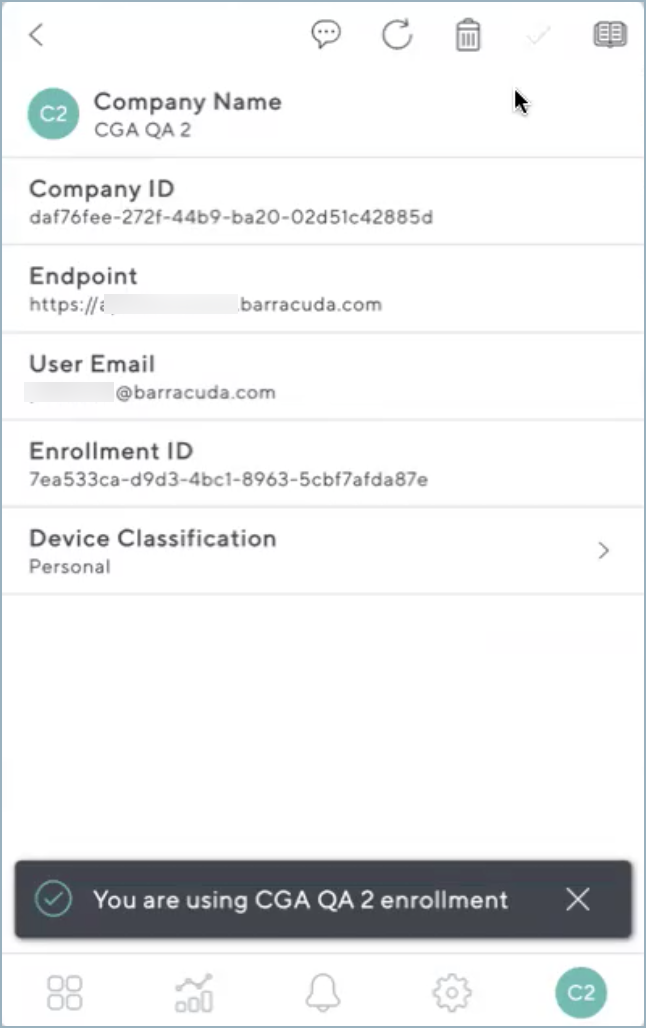
- Click the back arrow on the upper left of that screen to return to the Enrollments screen. Now you see the check mark next to the tenant you switched to:
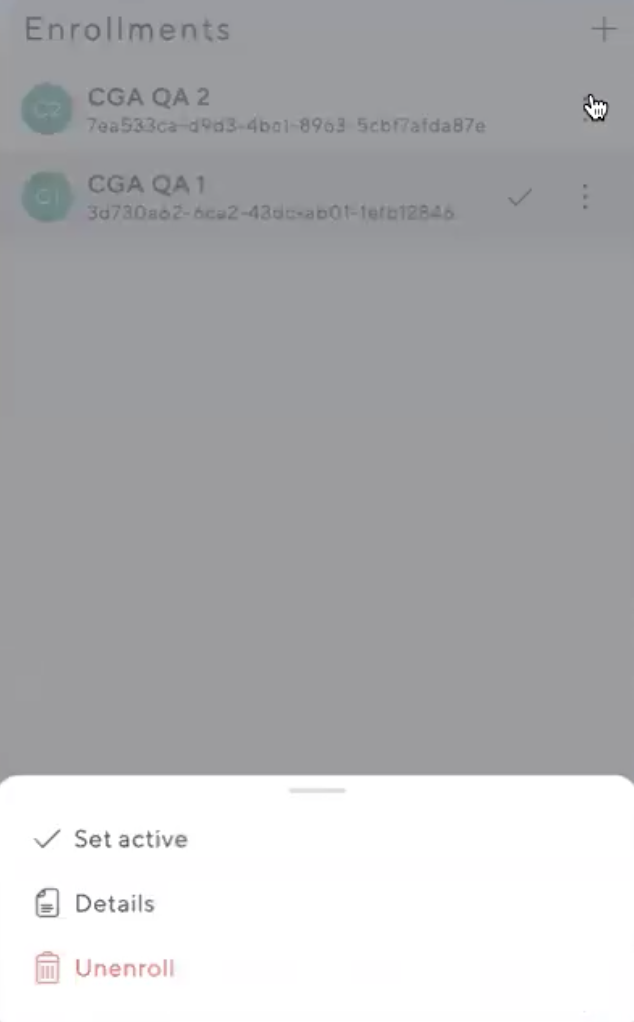
Alternative Way to Switch Tenants
Another way to switch tenants is to click on the 3 dots to the right of that tenant name.
Click on Set Active as shown in the screen below.
See also How to Unenroll a Device.