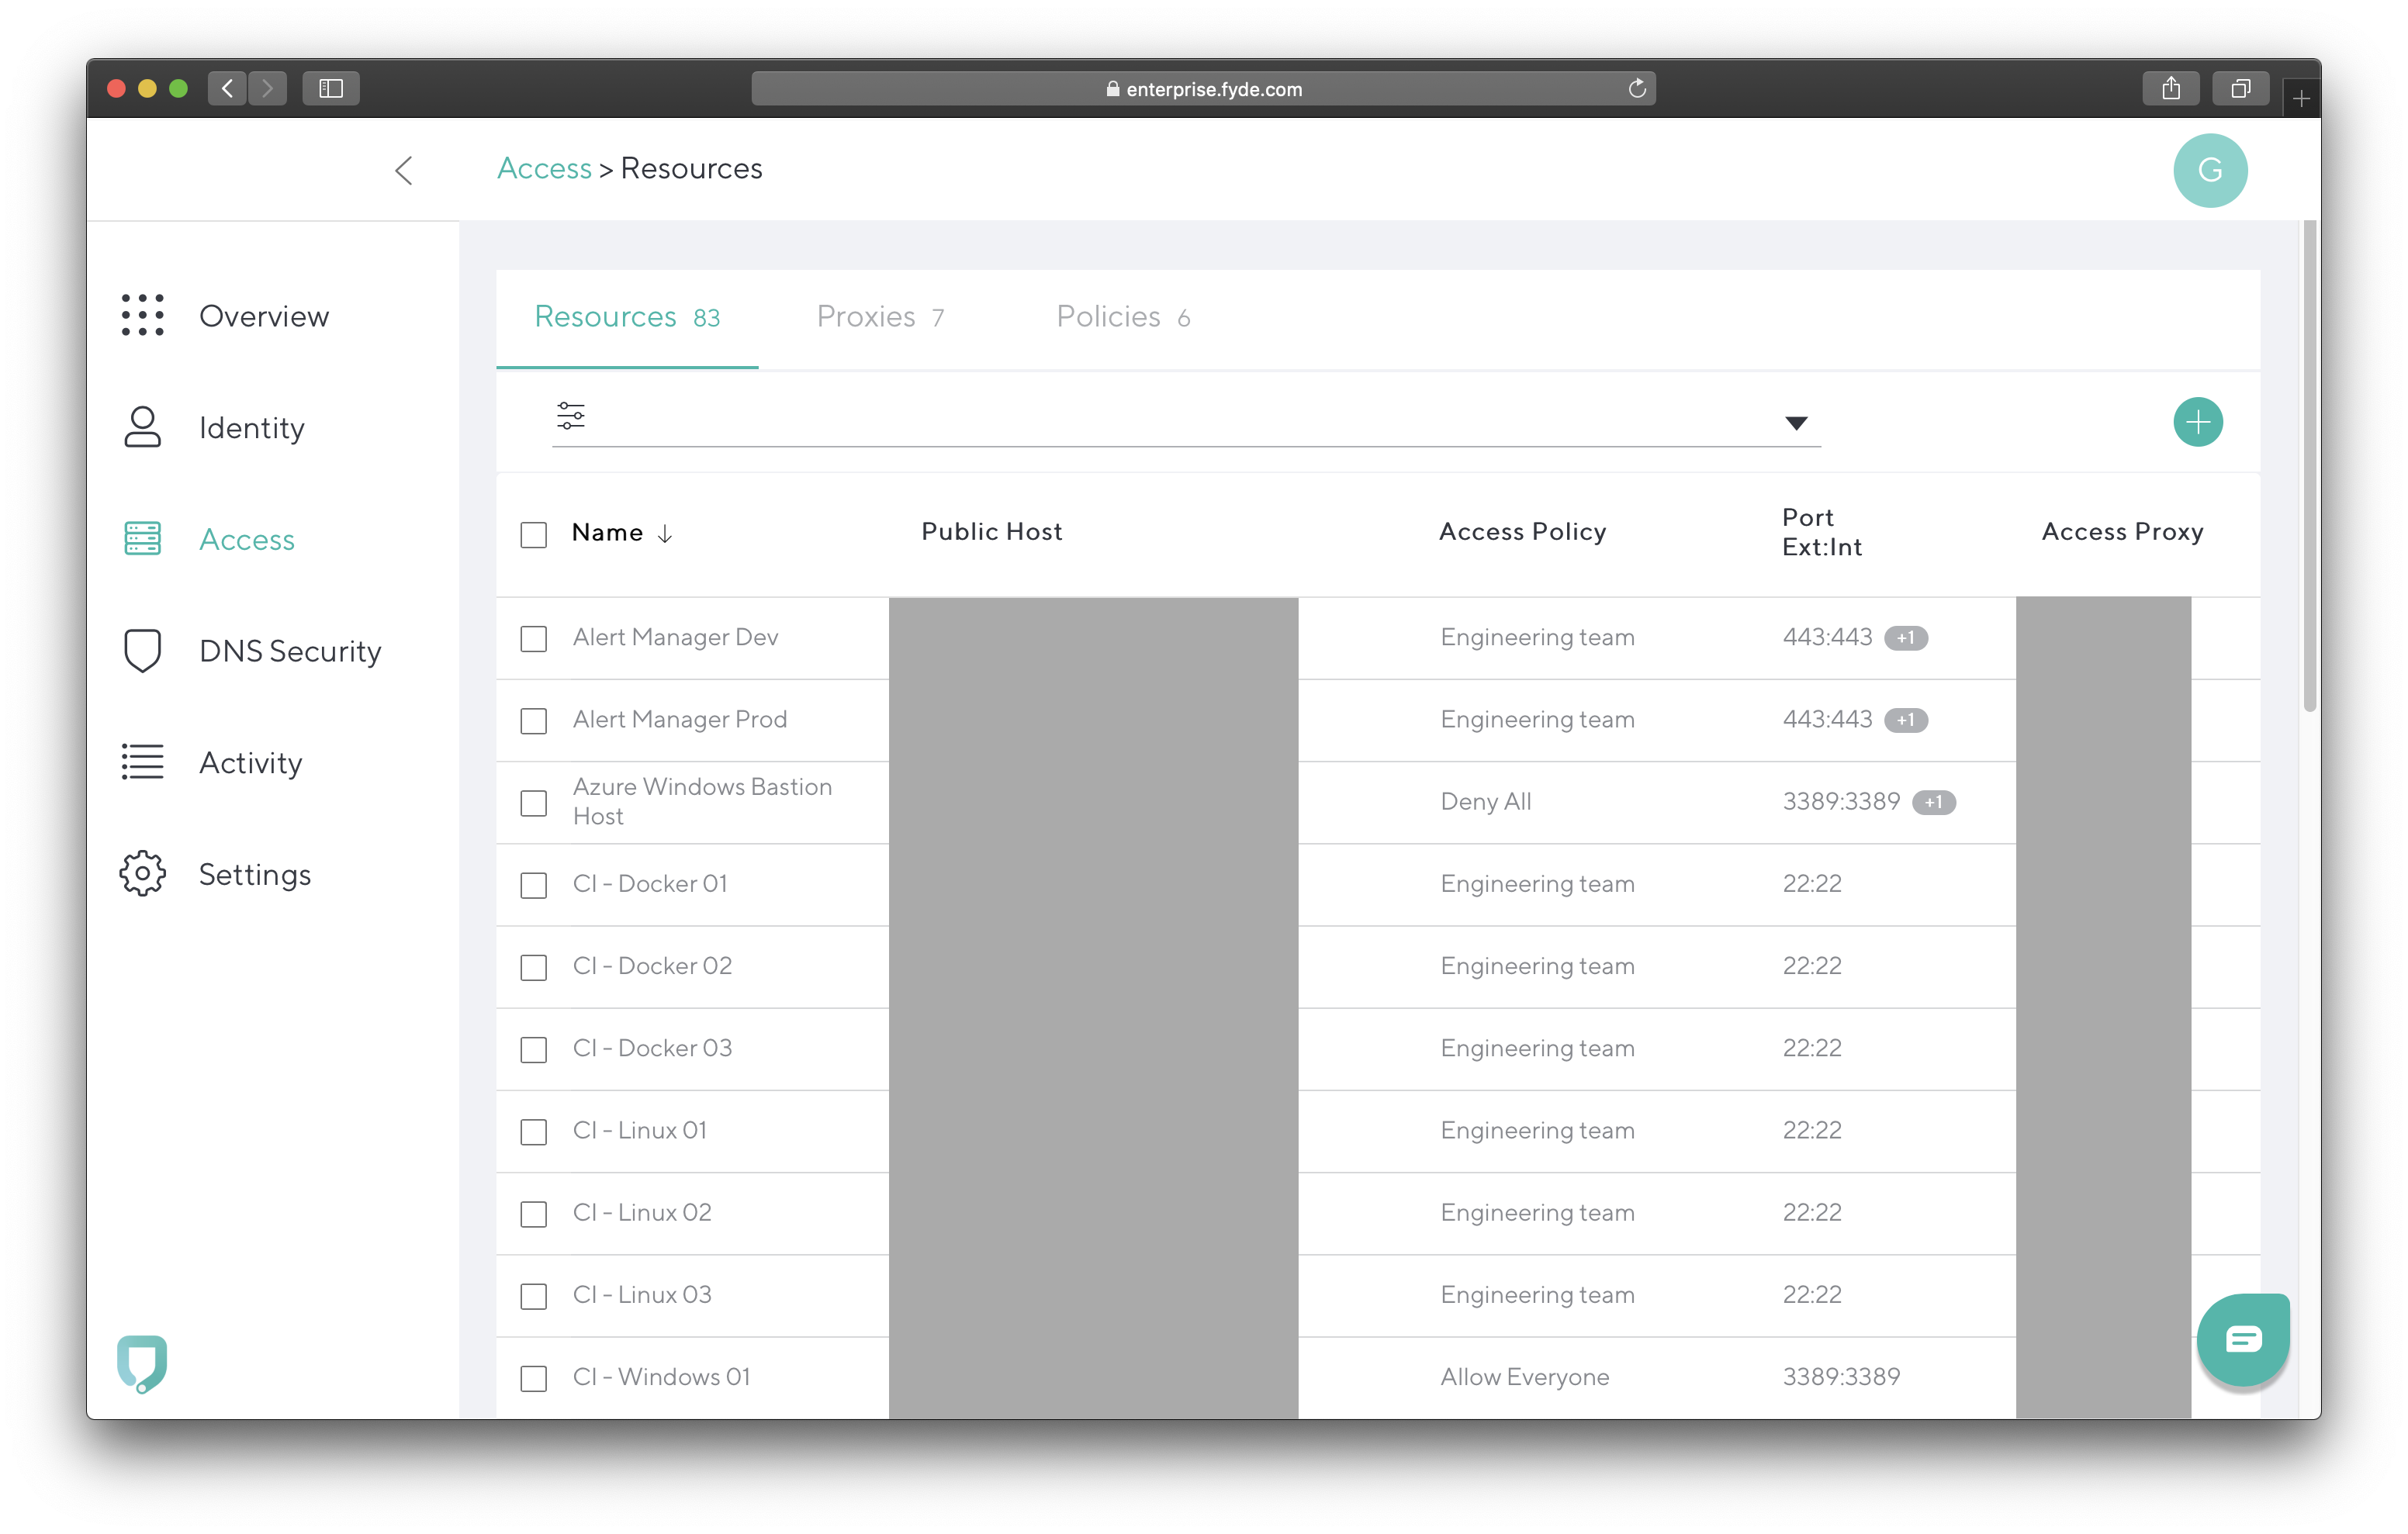
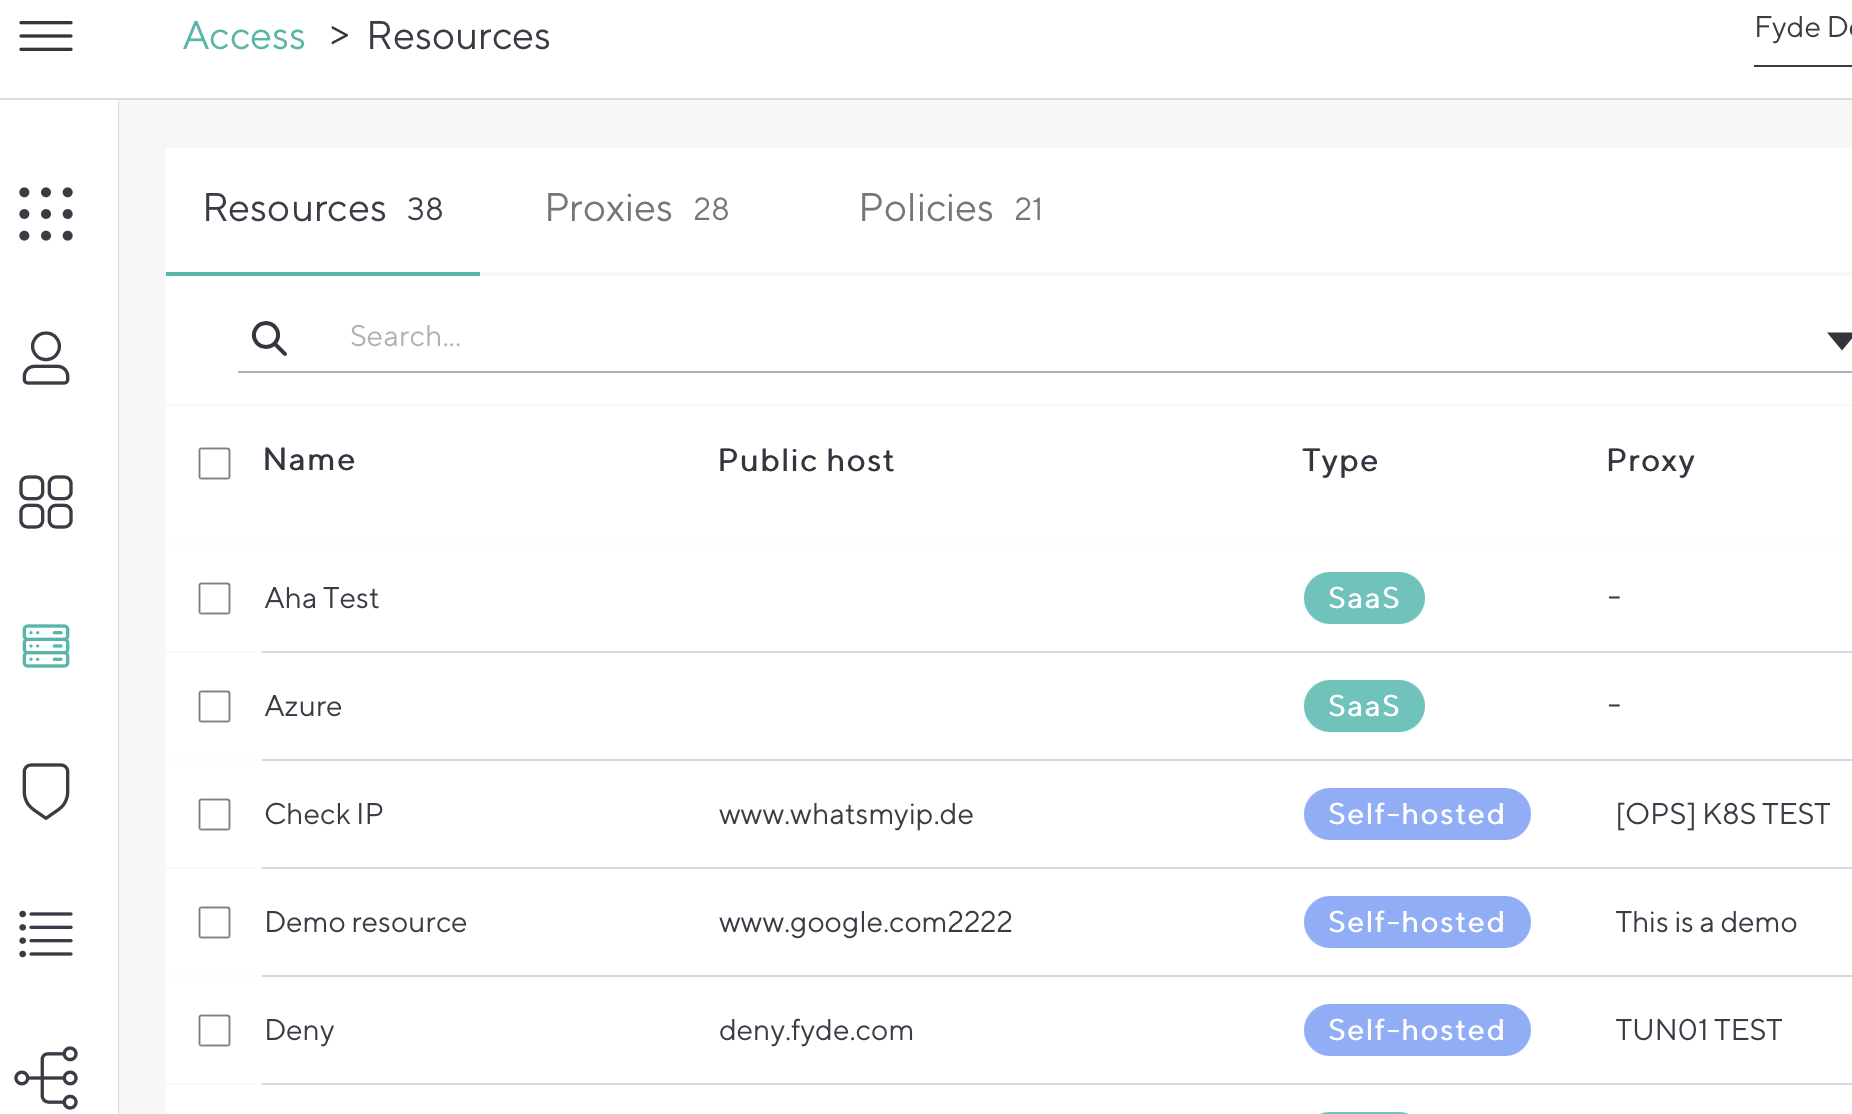
Add resources you want your users to be able to access, using either:
- SaaS – Application/website that is hosted by a third party vendor. Examples are Jira Cloud, Salesforce, Slack, etc.
- Self-hosted – Application/website that is hosted by your organization. You need to deploy a CloudGen Access Proxy to facilitate the access to this resource.
Security Assertion Markup Language (SAML) is a standard protocol that gives identity providers (IdP) such as Barracuda CloudGen Access a secure way to let users access a service provider (SP) such as Jira Cloud, Slack, and others.
Note that, while you can configure role based access control (RBAC) on the CloudGen Access agent, you need to pay attention to how each resource/website handles RBAC when using SaaS.
To add a new resource:
- Go to Access > Resources and click the + icon in the top right.
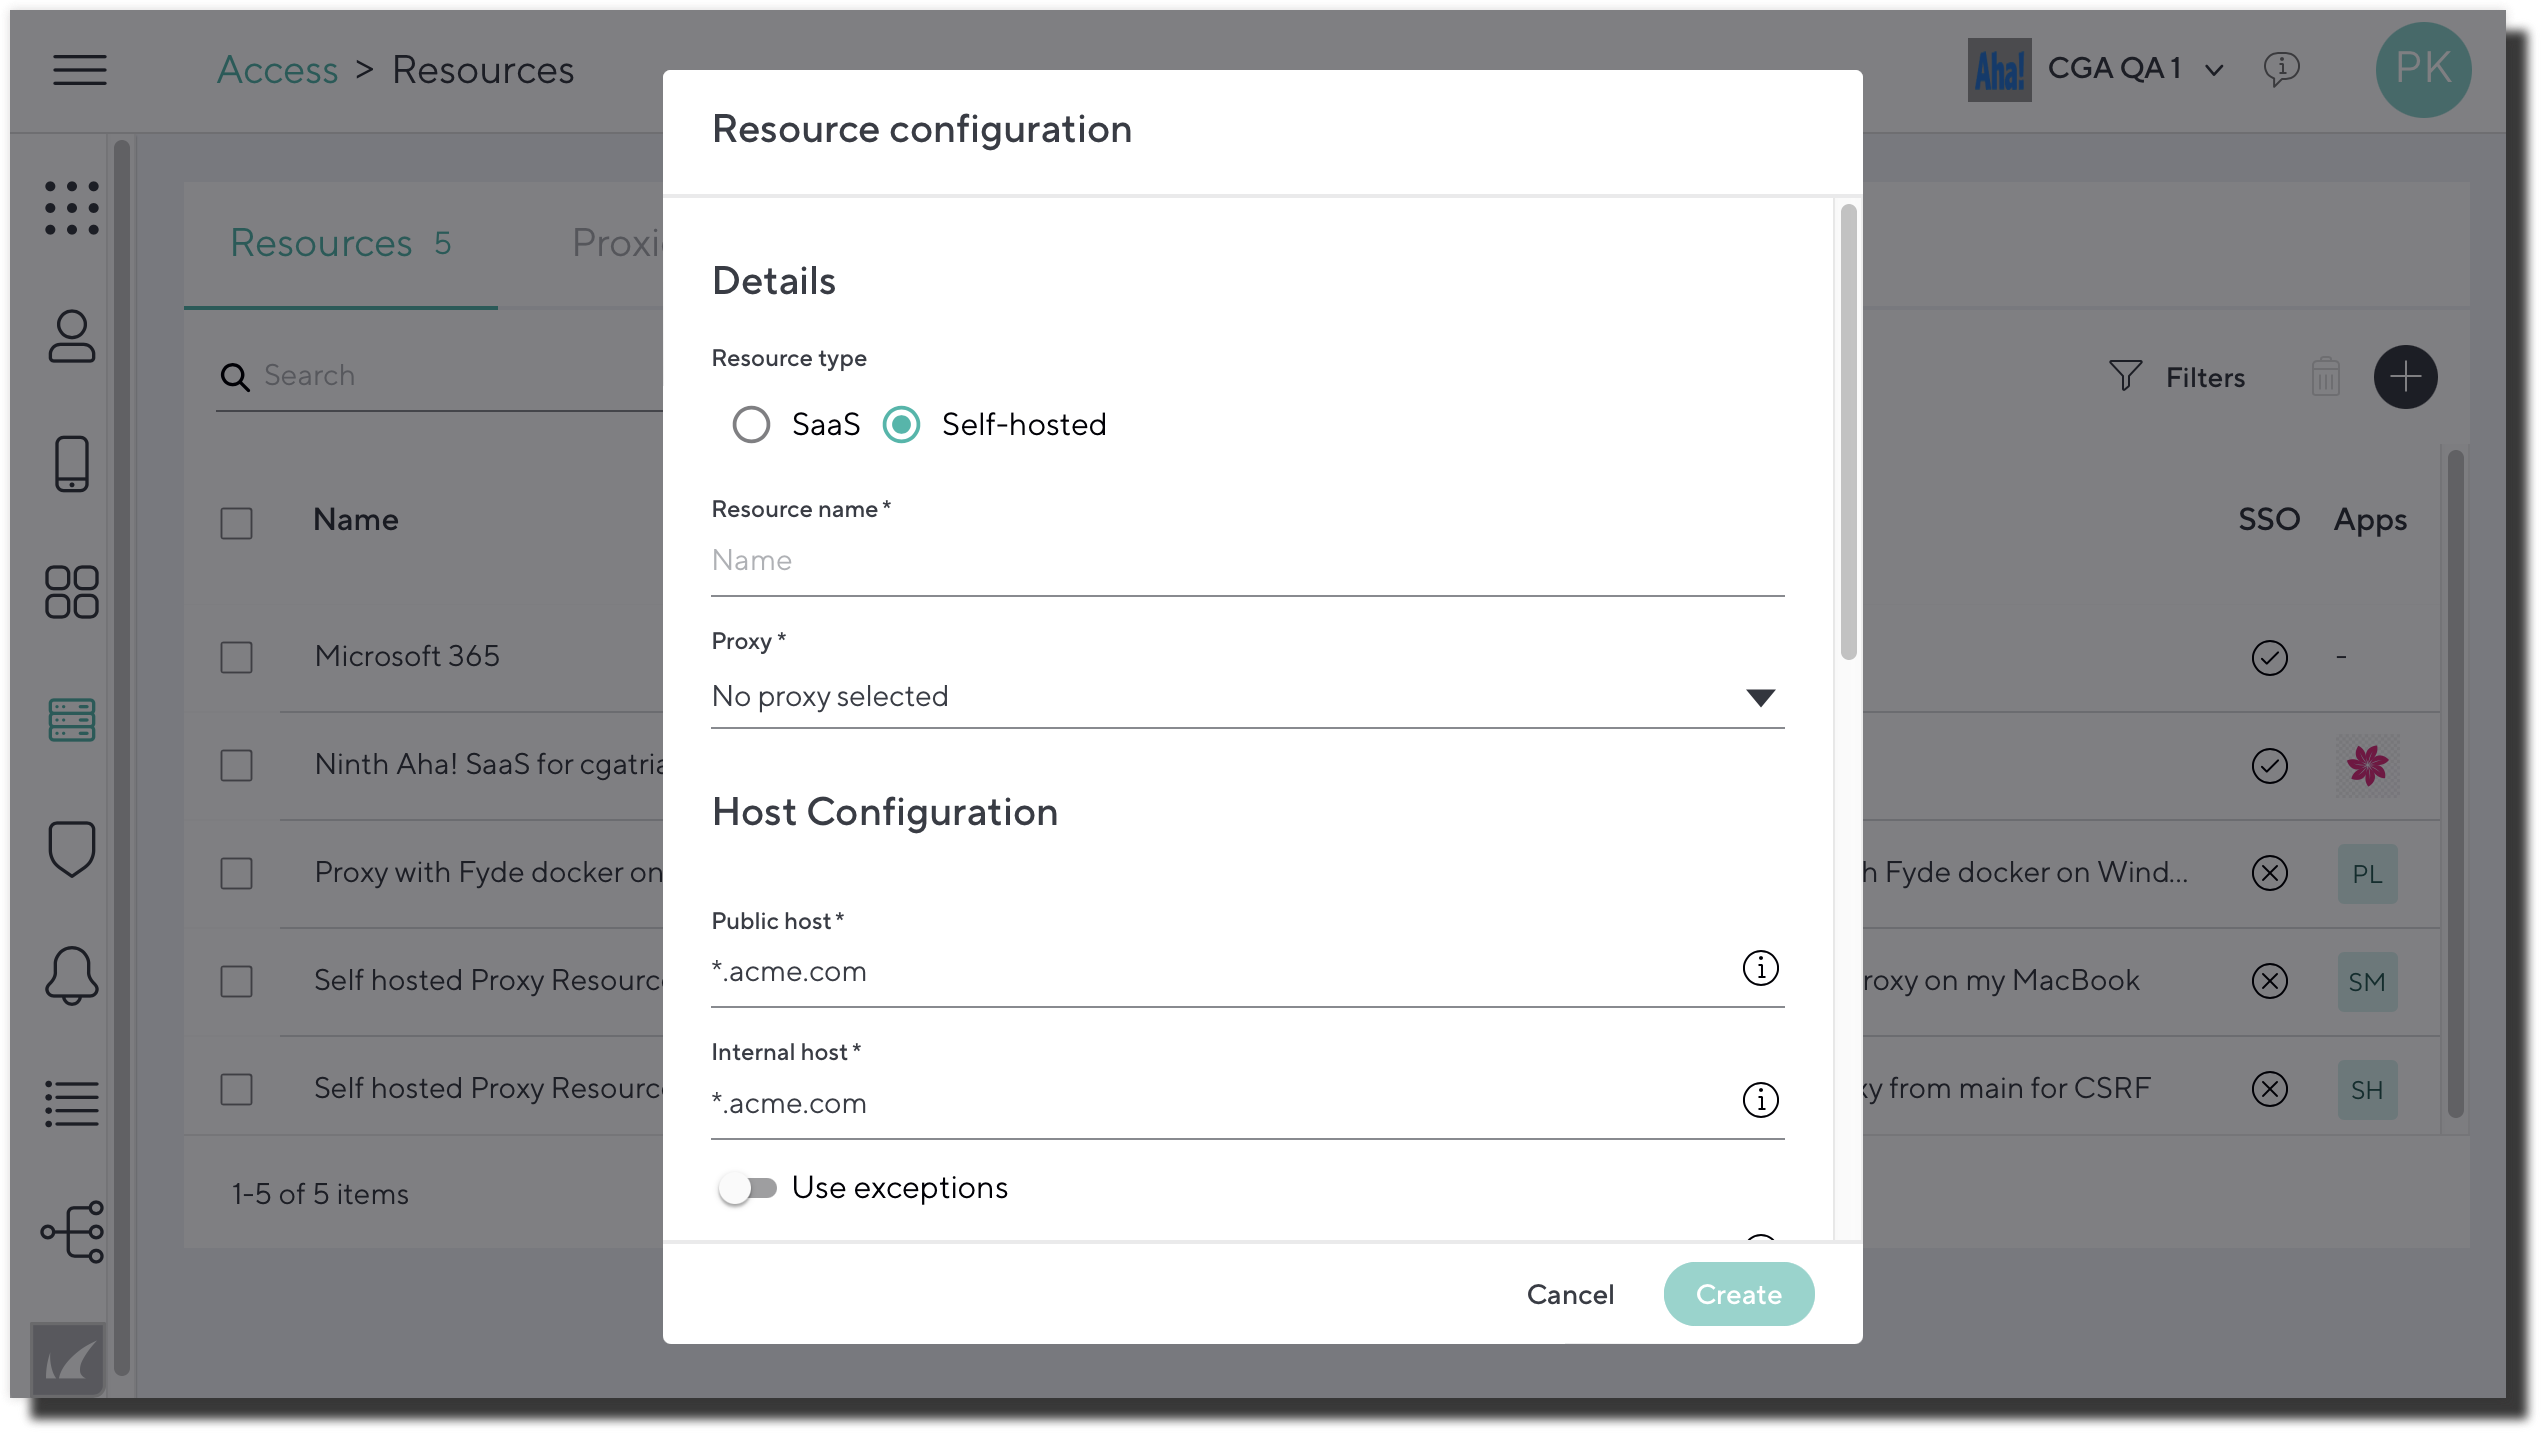
- In the Details section, select either SaaS, or Self-hosted if you are hosting the resource..
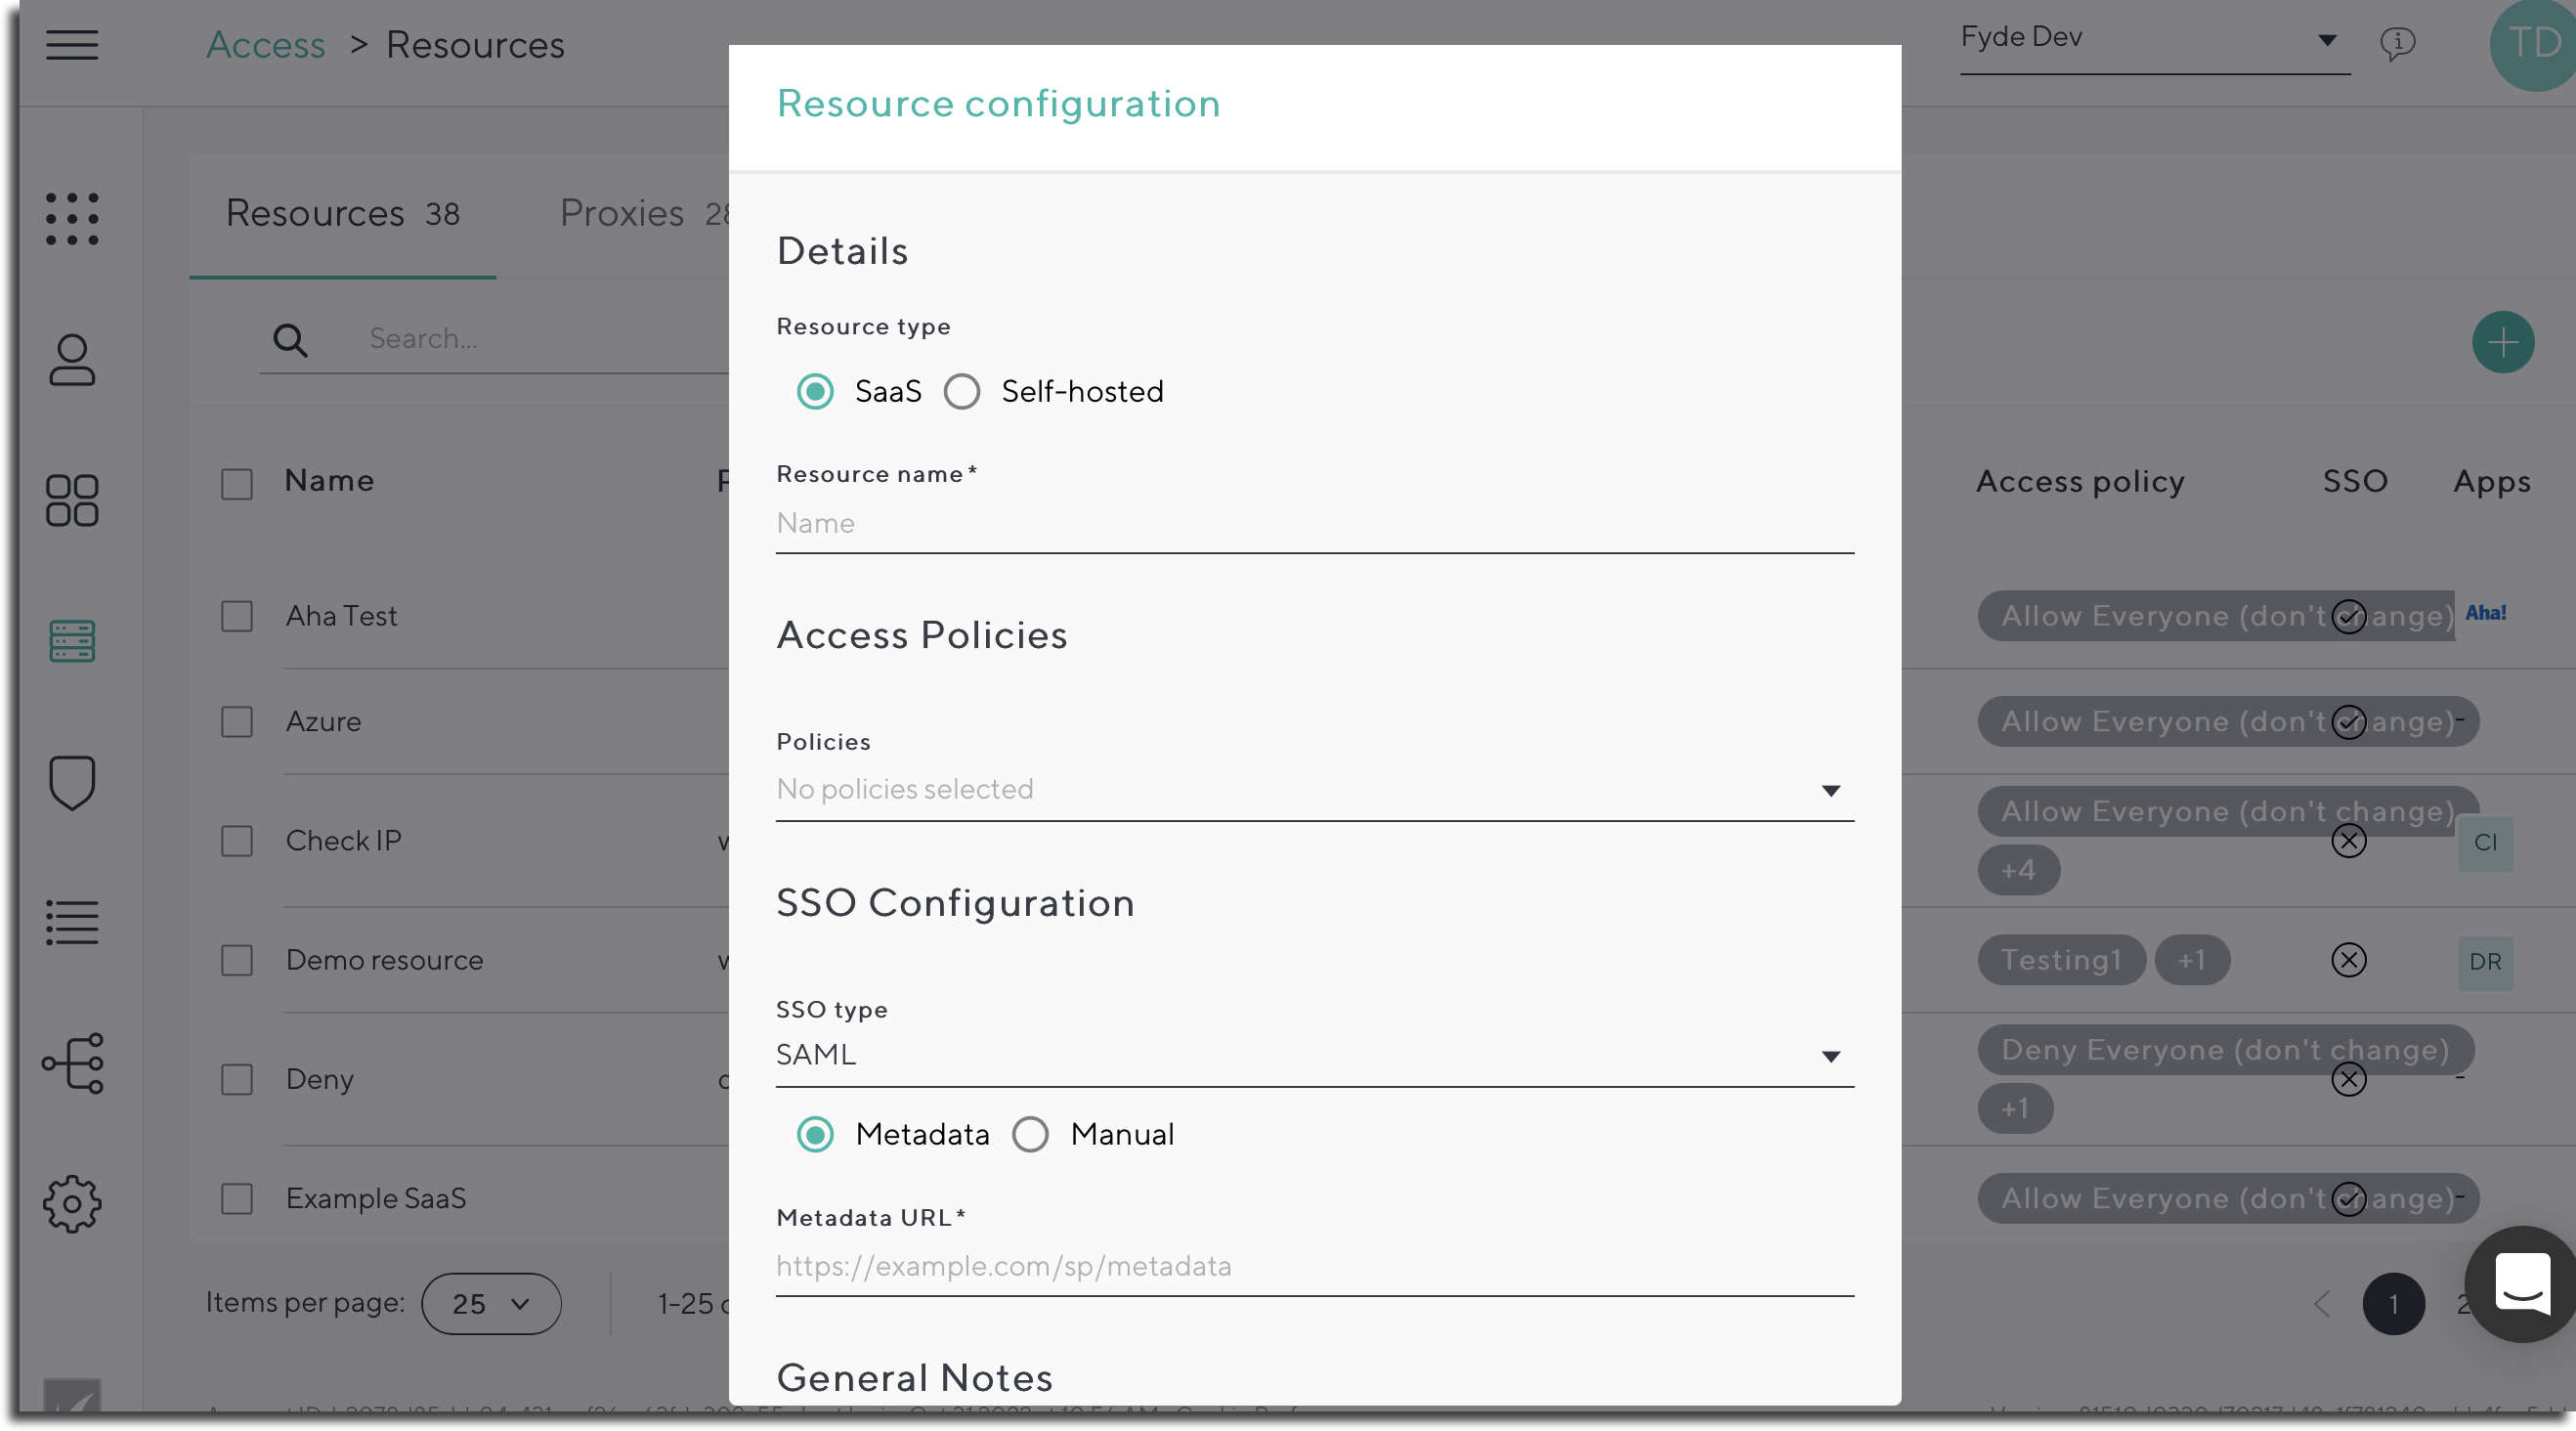
- Resource Type – Saas:
- Resource Name – Simple identifier for the resource in the CloudGen Access Enterprise Console.
- Access Policies – Assign an existing policy to allow specific users or groups to log into this resource.
SSO Configuration – Secure the way you authenticate with this resource. When enabled, CloudGen Access acts as an Identity Provider for the resource, performing a complete policy validation against the configured attributes. The website/resource (SaaS application) you want users to access must support SSO through SAML.
See the Website configuration under Website Security and SSO settings: Copy the data for Identifier (entity ID), Assertion consumer service URL, and Metadata URL (metadata URL) fields and paste in Resource configuration.
If you select Metadata for SAML SSO Type in Resource configuration, you only need to paste the Metadata URL.
If you select Manual, paste the Identifier (entity ID) and the Assertion consumer service URL. Then from the Name ID Format dropdown select Email Address or Persistent.
After you click Create, you will see the SAML popup with information to paste into your website application SSO settings. These items are Metadata URL, Issuer/ Entity ID, Login/SSO URL, Logout URL, Certificate, and Certificate Fingerprint (SHA256 or SHA512). The names of the corresponding fields will vary between websites/applications. For example, some websites may use "Single Sign-on Endpoint" for the Login/SSO URL. You may need to supply the certificate fingerprint to the website (you would also need to specify the certificate fingerprint algorithm – SHA256 or SHA512).
Notes – Can be used to add extra information regarding the resource.
Barracuda Networks recommends adding an application to the Apps Catalog – this would just be a shortcut to run that app.User experience with SSO:
Once configured, users can authenticate with the following process:
- The user navigates to the application and sees the Log In screen.
- The application usually presents the user with an additional login option (e.g. "Log In With [your SAML configuration Name].) For example, if you named your SAML configuration 'CGA', the user would see Log In With CGA on the log in screen.
- If the user clicks to log in, their browser will be redirected to the CloudGen Access authentication page.
- The CloudGen Access authentication page will attempt to communicate with the CloudGen Access app.
- When authorizing the user, CloudGen Access validates the policy attached to the configured resource.
- Once authenticated, the browser is redirected to the original application, already logged in.
To configure your Microsoft 365 domain to use federation with SAML 2.0, click here.
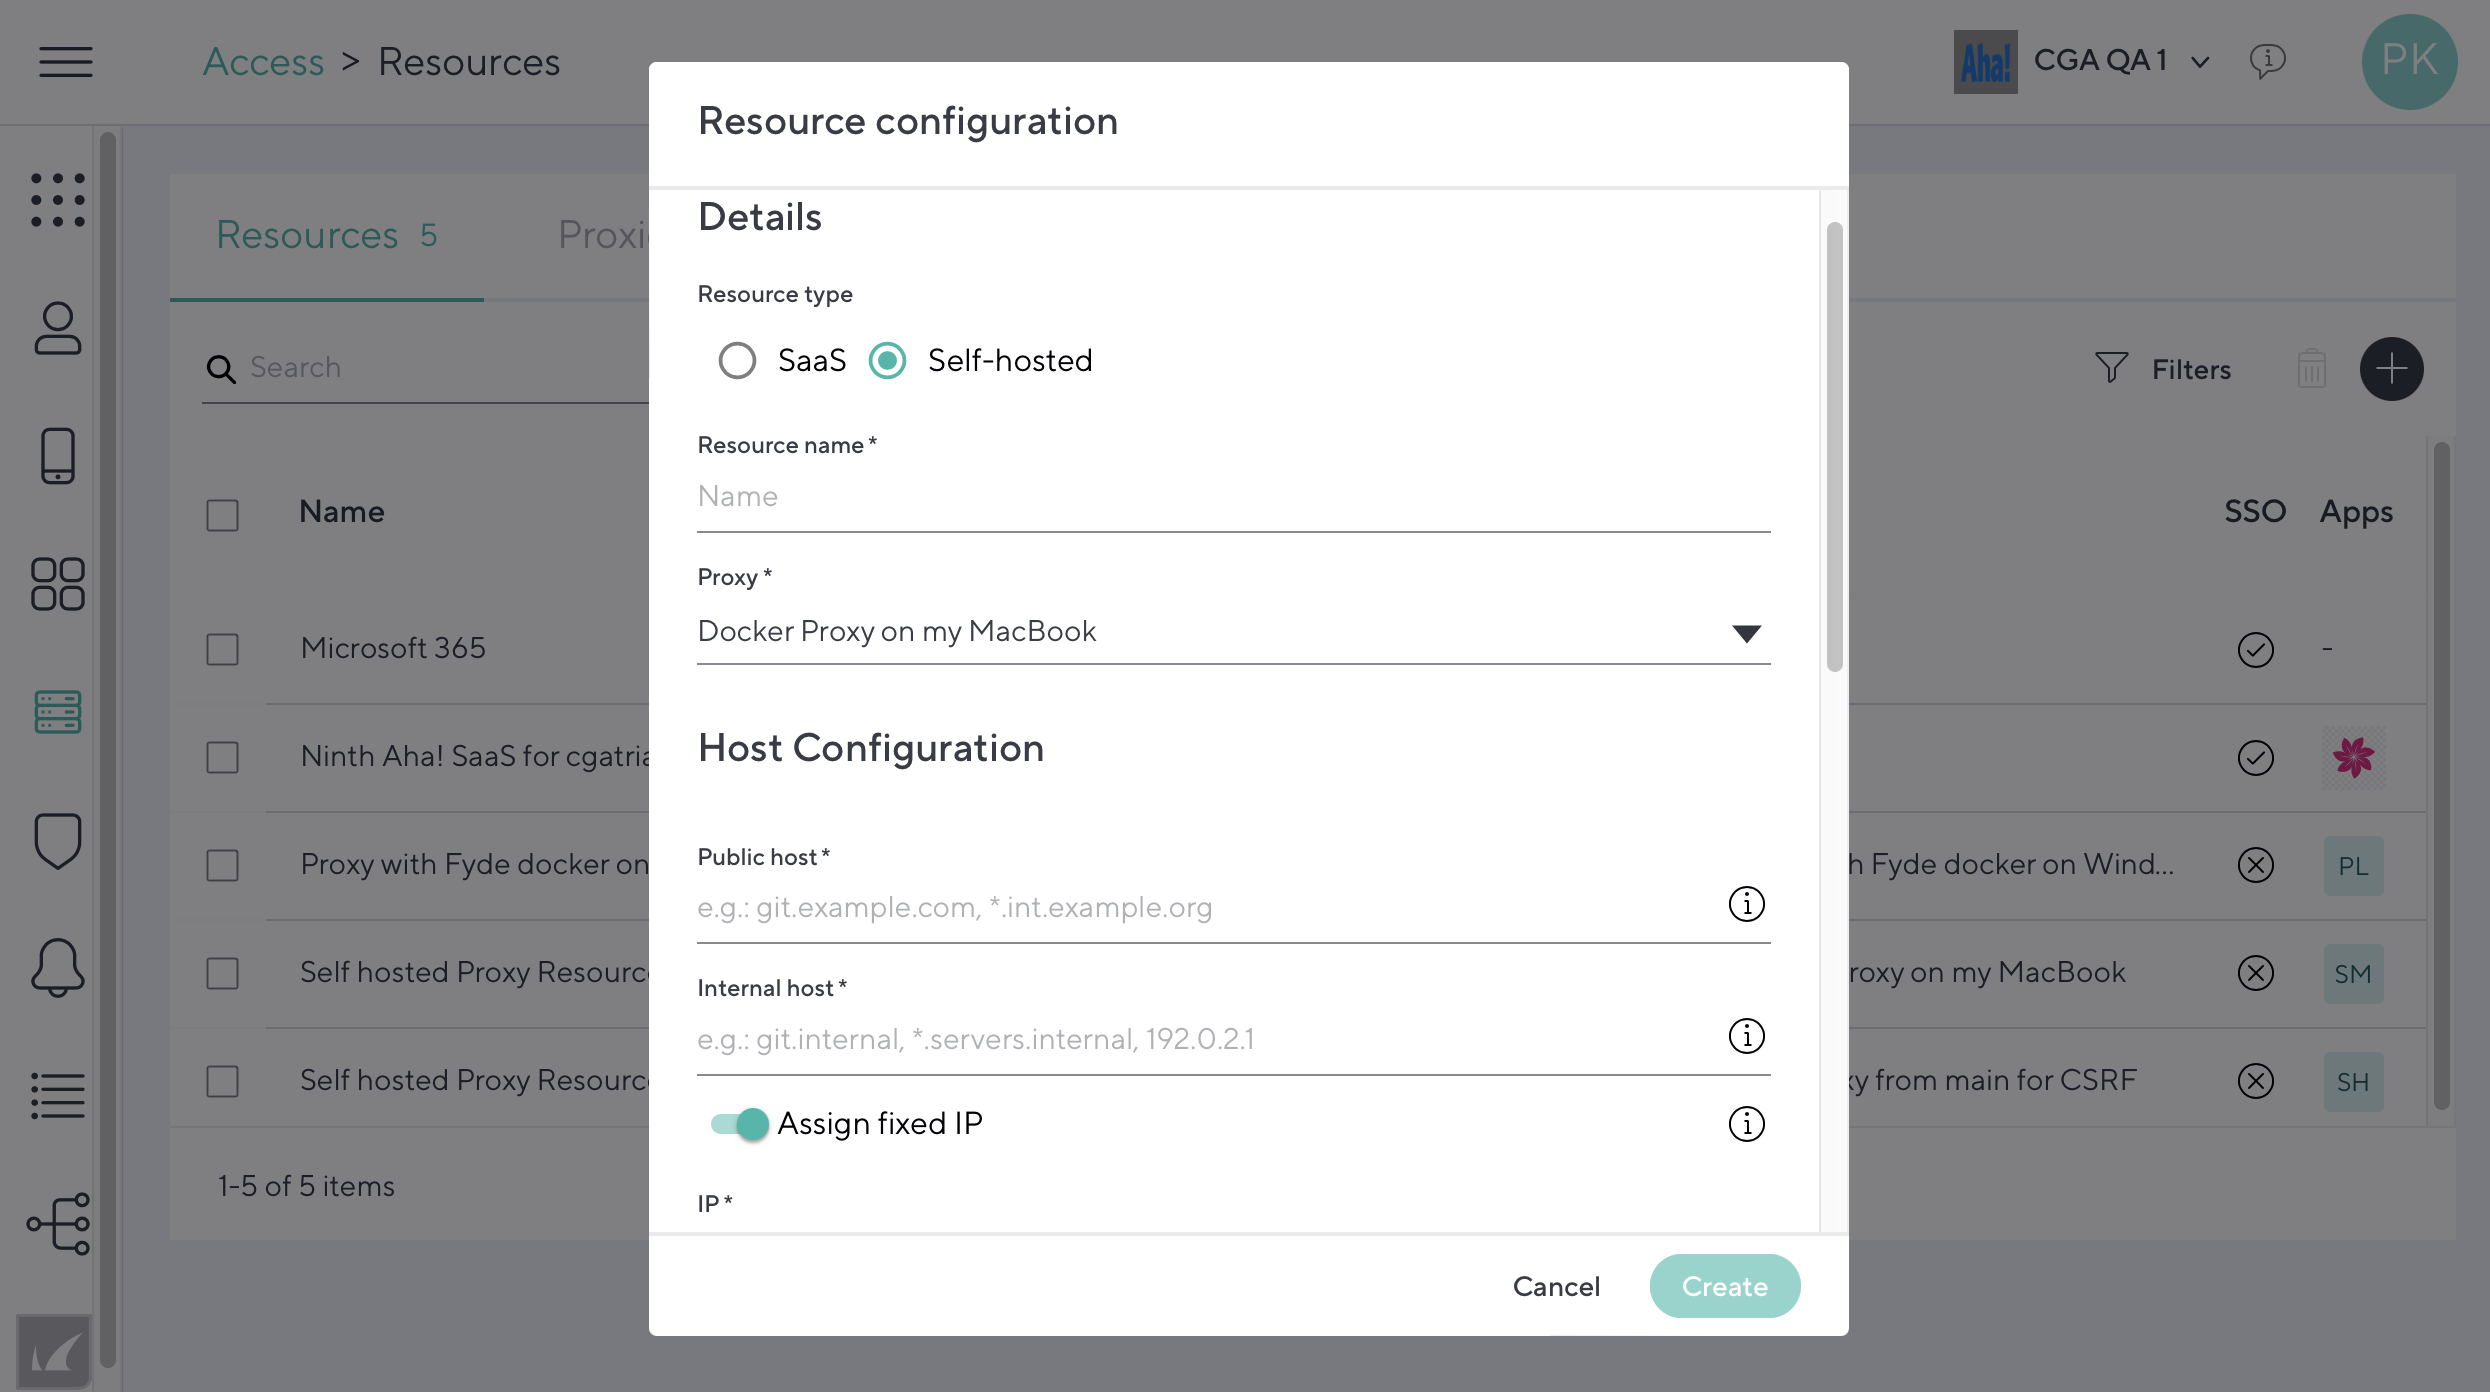
- Resource Type – Self-hosted:
- Resource Name – Simple identifier for the resource in the CloudGen Access Enterprise Console.
- Proxy – The CloudGen Access Proxy that will be used and has access to the resource being configured.
- Public Host – Hostname used by the device to redirect the request to the CloudGen Access Proxy.
- Does not need to exist as a public DNS record, private, or at all.
- Internal Host – Internal resource hostname or IP used by the CloudGen Access Proxy to connect to. Needs to be a hostname or IP that the CloudGen Access Proxy can resolve and connect to.
- Assign Fixed IP – If enabled, assigns a fixed IP address to the resource, and the resource domain will always be resolved to that IP address on the client side
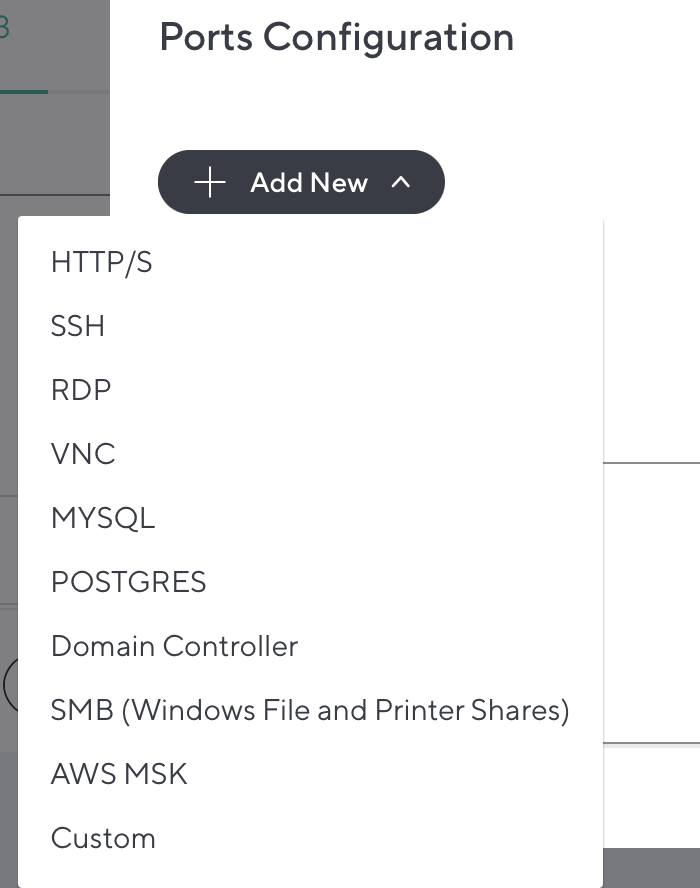
- Ports Configuration – Click Add New to add ports to allow for this resource. You can add ports as a single number or a range (e.g. 80 or 1000-1050). Note that the size of the public port and internal port ranges must be the same.
- Access Policies – Assign an existing policy to allow specific users or groups to log into this resource.
SSO Configuration – Secure the way you authenticate with this resource. When enabled, CloudGen Access acts as an Identity Provider for the resource, performing a complete policy validation against the configured attributes. The website/resource (SaaS application) you want users to access must support SSO through SAML. See the website configuration section, where you can copy/paste the Identifier (entity ID), Assertion consumer service URL, and/or SSO URL (metadata URL) from the website security and SSO settings.
If you select Metadata, you only need to paste the Metadata URL.If you select Manual, you need to paste the Identifier (entity ID) and the Assertion consumer service URL. You don't need to paste the SSO (Metadata) URL.
- Notes – Can be used to add extra information regarding the resource.
The Resources screen shows the Resource Type as either SaaS or Self-hosted. To view the SAML SSO Server URLs and certificate, click SaaS in the Type column in the table. Under SSO Configuration in the popup, click View Server Settings.
- Resource Type – Saas:
Errors
- If a CloudGen Access user is not enrolled, or if the CloudGen Access agent is not running and the user tries to log into a resource/website, they will receive an Access Denied error.
- If a user's device is disabled in CloudGen Access, and that user tries to log into the website using the SAML configuration, they will receive an Access Denied error.
SAML Response Parameters
When Barracuda CloudGen Access authenticates a user using SAML SSO, it will send a set of attributes to the target application (service provider) as follows:
Name ID
Email address or Persistent (unique ID)
This field can be configured on “Name ID Format” of the SSO Configuration
Email Address
Attribute: “email”
SAML Format: urn:oasis :names: tc:SAML :2. 0:attrname - format:basic
- Display Name
- Attribute: " displayname"
- SAML Format: urn:oasis :names: tc:SAML :2. 0:attrname - format:basic
Full name
Attribute: “name”
SAML Format: urn:oasis :names: tc:SAML :2. 0:attrname - format:basic
Given name
Attribute: “ first_name ”
SAML Format: urn:oasis :names: tc:SAML :2. 0:attrname - format:basic
Family Name
Attribute: “ last_name ”
SAML Format: urn:oasis :names: tc:SAML :2. 0:attrname - format:basic
Groups
Attribute: “groups”
SAML Format: urn:oasis :names: tc:SAML :2. 0:attrname - format:unspecified
Wildcard Resources
A wildcard is a character used to represent an unspecified resource name or an unspecified part of a resource name. You can add a wildcard resource by adding an asterisk (*) character at the beginning of the hostname.
Example: If you add *.acme.com as a resource, all traffic from the subdomains of acme.com will be intercepted and sent through the CloudGen Access proxy.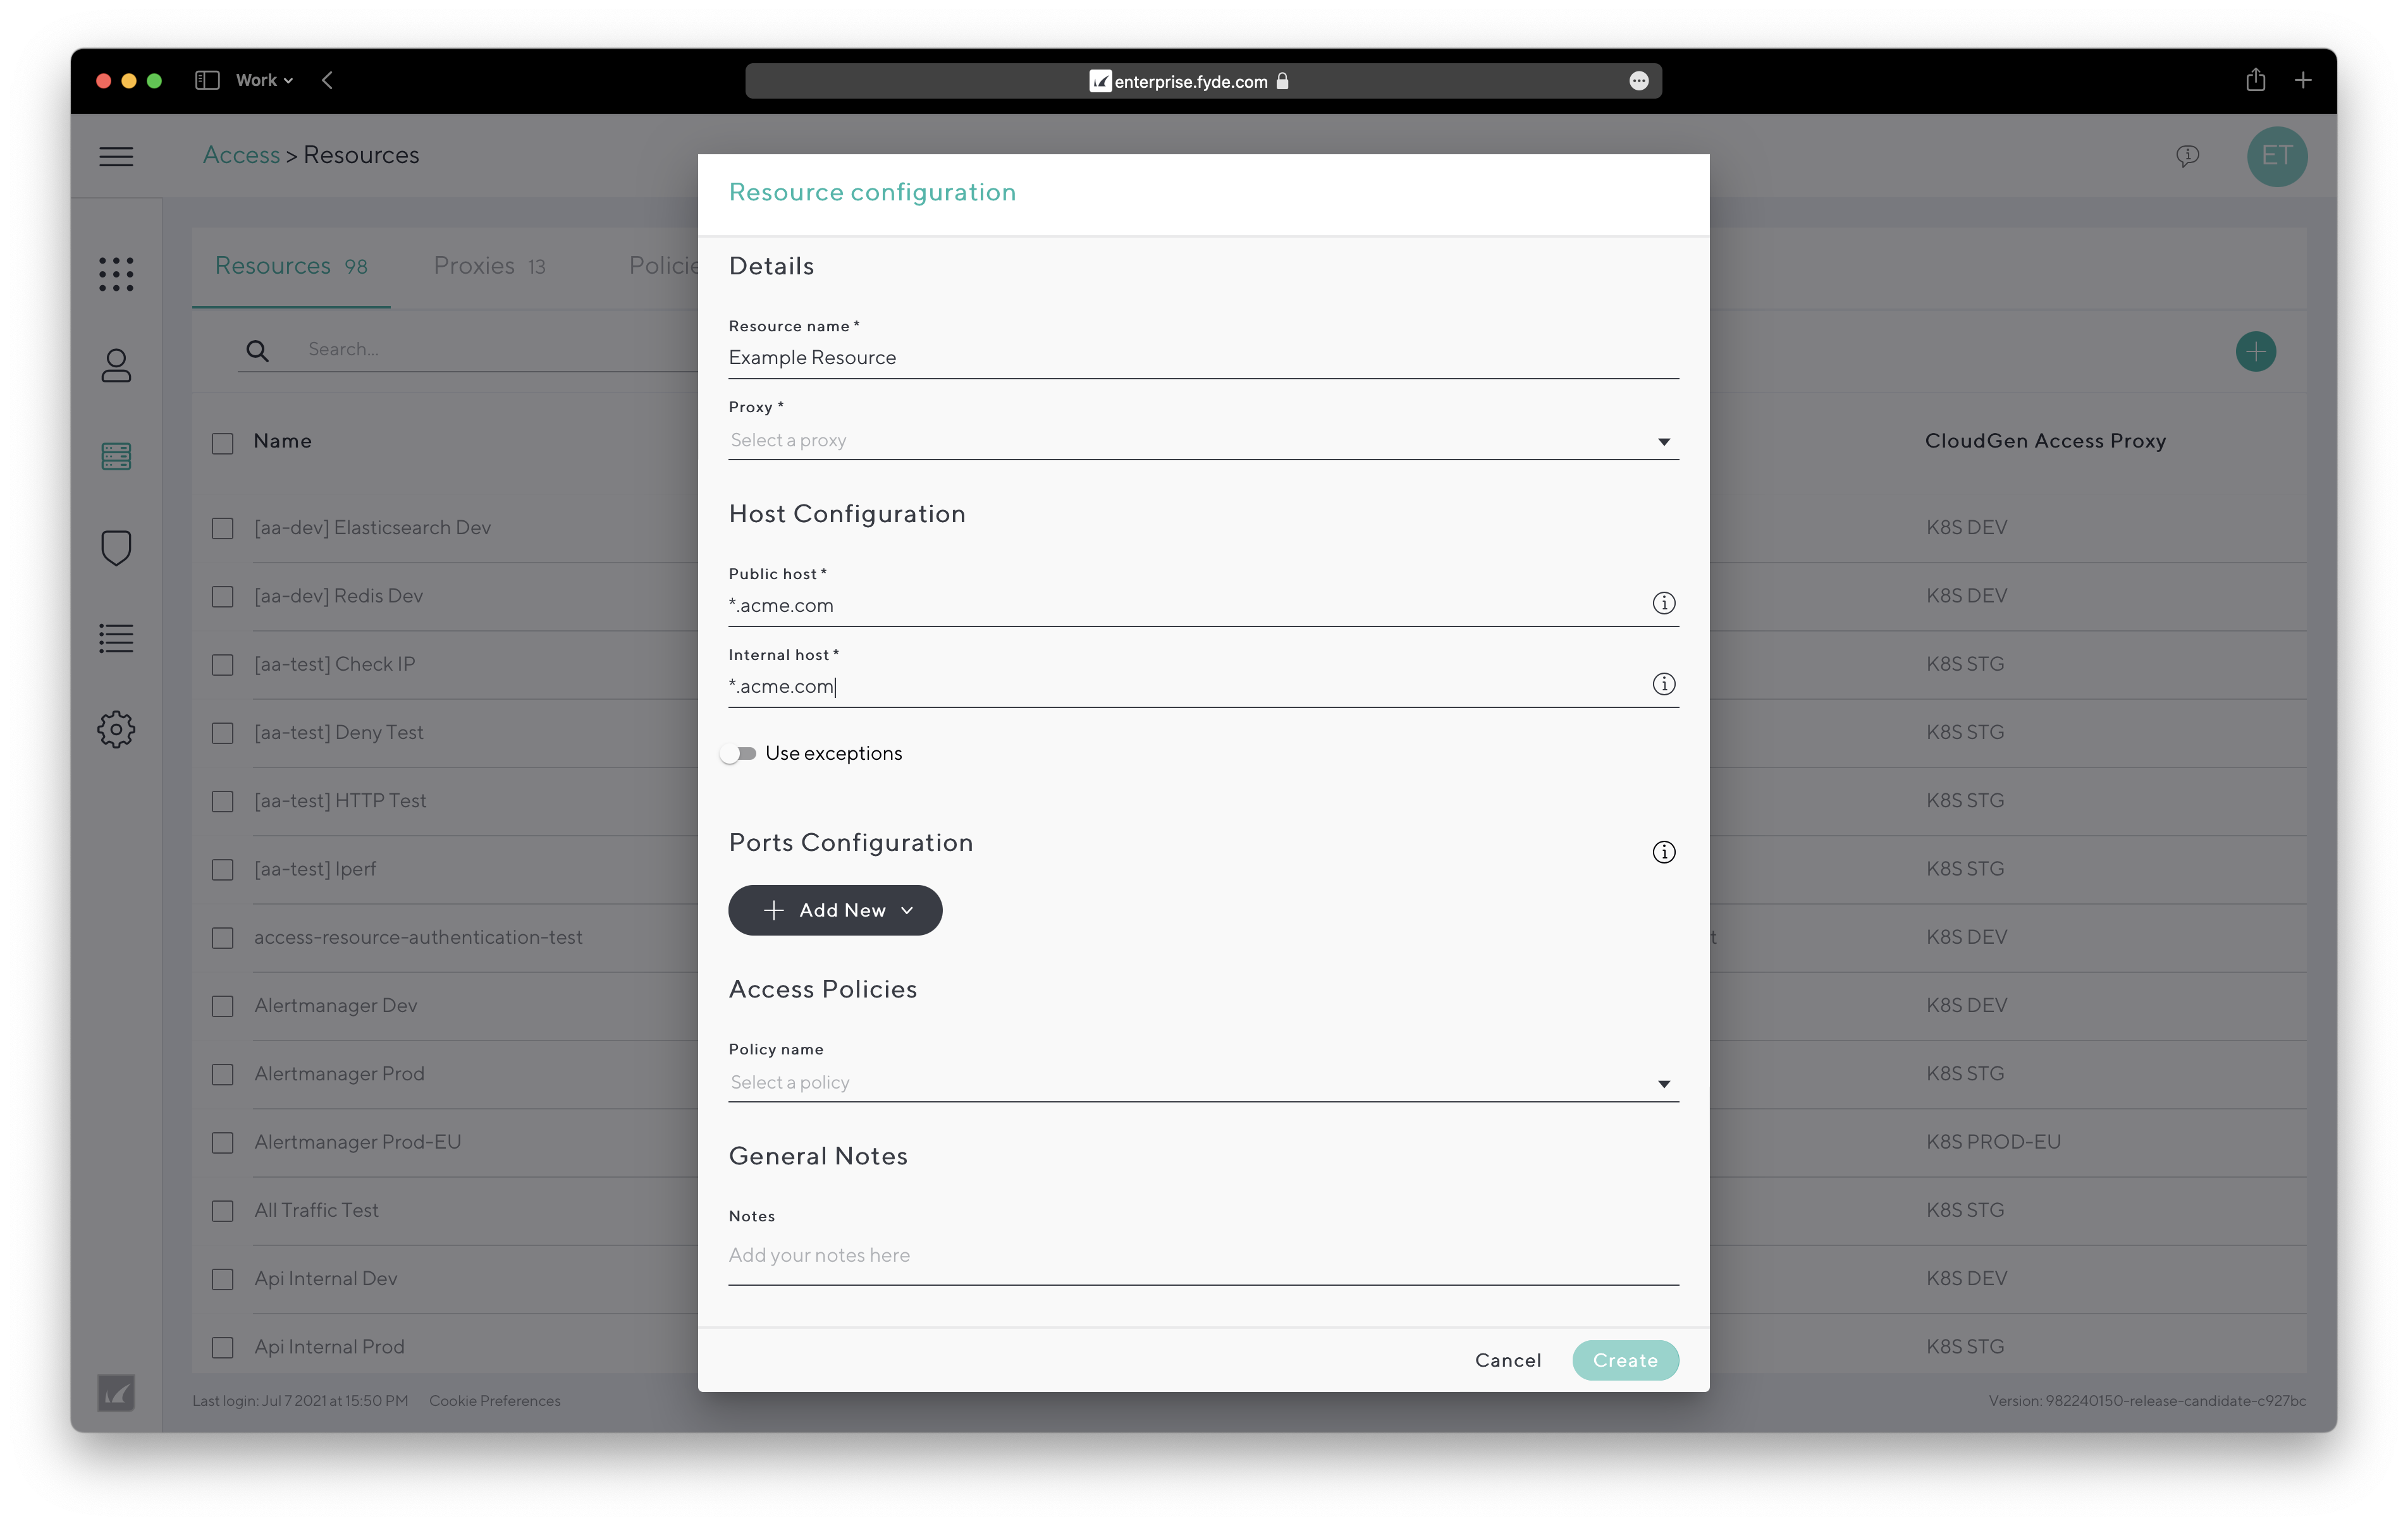
Wildcard Exceptions
If the resource domain (public or private) is a wildcard domain (example: *.acme.internal), you can add exceptions that will not be resolved via that resource.
Example: *.acme.internal will catch insights.acme.internal and chat.fruits.internal, but if you add an exception for 'chat', then chat.acme.internal will be resolved to the normal public DNS resolution.
Fixed IP
You can assign a fixed IP address (only for non-wildcard domains) to the resources. If you do so, a resource domain will always be resolved to that IP address on the client-side. This is necessary for some resources, such as VOIP (3CX) and other UDP protocols, that might send the IP that clients are expected to connect to as part of a separate session mechanism.
Example: If you add a fixed IP 192.168.0.3 for call.acme.internal, it will always be the same IP. This is necessary for some resources, such as the VOIP protocol (3CX).