

Note that it may take up to 24 hours to reflect a new version in the CloudGen Access console.
- Upgrade in Azure
- Upgrade in AWS
- Upgrade Bare Metal / Virtual Machine
- Upgrade in Docker
- Upgrade in Kubernetes
- Update on CloudGen Firewall
Update CloudGen Access Proxy in Azure
If you installed the CloudGen Access Proxy by using the Azure Marketplace template , you can manually update the proxy version.
Navigate to the related Resource Group.
- Go to Virtual machine scale set > Instances, and se lect the instance.
- Click Reimage.
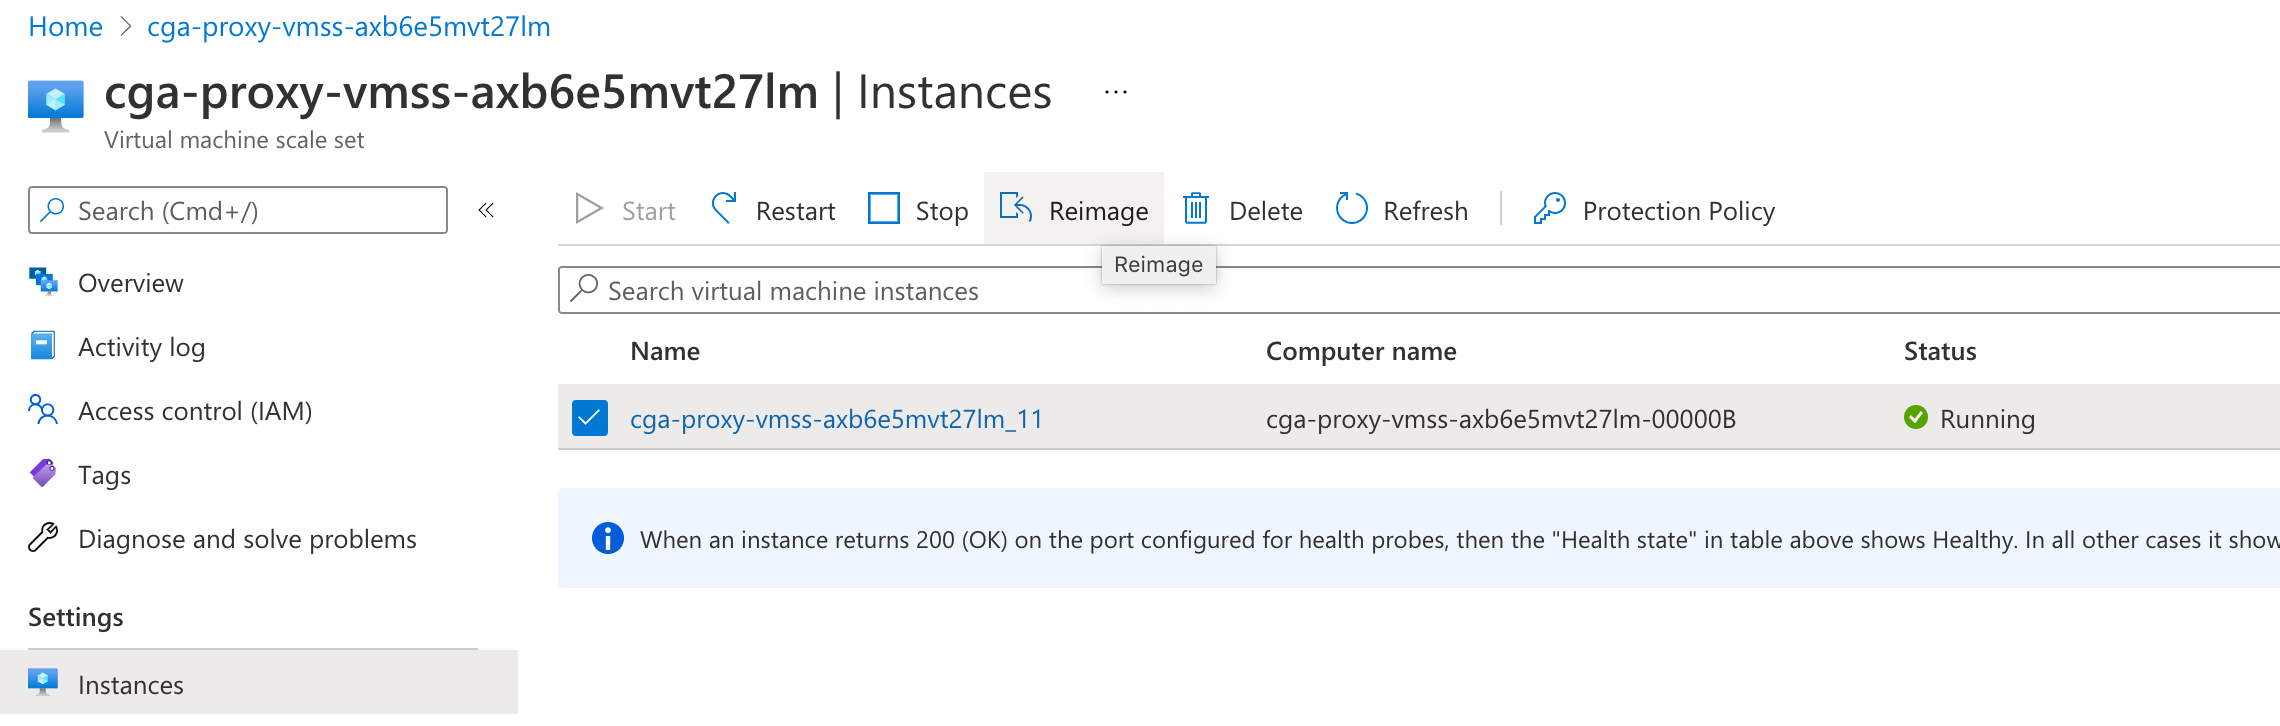
Instances may take five to ten minutes to reach a healthy state after the update.
Update CloudGen Access Proxy in AWS
If you installed the CloudGen Access Proxy by using the AWS CloudFormation Template, perform an instance refresh.
- Open the Amazon EC2 Auto Scaling console at https://console.aws.amazon.com/ec2autoscaling/.
- Select the checkbox next to your Auto Scaling group. A split pane opens up in the bottom part of the Auto Scaling groups page.
- On the Instance refresh tab, in Instance refreshes, choose Start instance refresh.
- (Optional) In the Refresh settings section, do the following:
- For Minimum healthy percentage, keep the default value of 90, or specify a new value within the range of 0 percent to 100 percent.
- For Instance warmup, specify the number of seconds before a newly launched instance is configured and ready to use. The default is to use the value for the health check grace period defined for the group.
- Choose whether to enable checkpoints. For more information, see Setting instance refresh checkpoint preferences in the AWS documentation.
- Click Start.
To check the status of an instance refresh:
- On the Instance refresh tab, under Instance refreshes, you can determine the status of your request by looking at the Status column. The operation goes into Pending status while it is initializing. The status should then quickly change to InProgress. When all instances are updated, the status changes to Successful.
- On the Activity tab, under Activity history, when the instance refresh starts, you see entries when instances are terminated and another set of entries when instances are launched. In the Description column, you can find the instance ID.
- On the Instance management tab, under Instances, you can verify that your instances launched successfully. Initially, your instances are in the Pending state. After an instance is ready to receive traffic, its state is InService. The Health status column shows the result of the health checks on your instances.
To cancel an instance refresh:
- Open the Amazon EC2 Auto Scaling console at https://console.aws.amazon.com/ec2autoscaling/.
- Select the checkbox next to the Auto Scaling group.
- On the Instance refresh tab, in Instance refreshes, choose Cancel instance refresh.
- When prompted for confirmation, click Confirm.
Update CloudGen Access Proxy in Bare Metal/ Virtual Machine
CentOS/RHEL
To update CloudGen Access Proxy, run the command below, and then reboot.
sudo yum upgrade fydeproxy envoy
Debian / Ubuntu
To update CloudGen Access Proxy, run the command below, and then reboot.
sudo apt-get update
sudo apt-get upgrade fydeproxy envoy
Update CloudGen Access Proxy in Docker
When using the tag “latest”, ensure that you have the most recent docker images with these commands:
docker pull fydeinc/envoyproxy-centos:latest
docker pull fydeinc/fydeproxy:latest
Next, restart the containers with this command:
docker restart envoy orchestrator
If you are using a tagged version, please check the latest version for the respective image in our docker repository: https://hub.docker.com/u/fydeinc.
Update CloudGen Access Proxy in Kubernetes
Examples use a deployment named envoy in the cloudgen-access-proxy namespace.
When using the tag “latest”, and imagePullPolicy is set to Always, restarting the deployment will start the new pods with the latest versions:
kubectl -n cloudgen-access-proxy rollout restart deployment envoy
If you are using a tagged version, please check the latest version for the respective image in our docker repository: https://hub.docker.com/u/fydeinc and update the deployment with the corresponding version. This triggers a rollout with the new versions:
kubectl -n cloudgen-access-proxy patch deployment envoy -p '{"spec":{"template":{"spec":{"containers":[{"name":"envoy","image":" fydeinc/envoyproxy-centos: 1.13.8.1"}]}}}}'Update CloudGen Access Proxy on the CloudGen Firewall
The CloudGen Access Proxy cannot be manually upgraded – upgrades are installed automatically with a CloudGen Firewall upgrade. See also:
- How to Manually Install Updates via Barracuda Firewall Admin
- How to Install Updates via SSH
- To see the available updates:
- Log into your Barracuda Cloud Control account at https://login.barracudanetworks.com/ .
- On the top menu, click Downloads.
- In the Please Select a Product dropdown, select Barracuda CloudGen Firewall.
- Under Type, select Update
- Scope is optional.
- Scroll down and select the firmware version.
- Scroll to the bottom of the page to see available updates.