

If you are not using the integrated TINA VPN client in CudaLaunch for Android, you can also manually configure the native IPsec client on the mobile device. This setup must be completed on every device that connects to the client-to-site VPN and is valid only for IPsec IKEv2 VPN configurations. The Barracuda CloudGen Firewall VPN service currently supports IKEv2/IPSec MSCHAPv2.
Before You Begin
- Verify your device is running Android 12 or higher.
- Configure the client-to-site IPsec IKEv2 VPN. For more information, see Example - Client-to-Site IKEv2 IPsec VPN with Username/Password Authentication.
- Copy the certificates to the Android device's internal storage.
Step 1. Set Up Certificates on the Android Device
- On the Android device, tap Settings > Security and privacy > Other security settings > Install from device storage.
- Tap CA certificate.
- Install the root and server certificates from the Internal storage.
The certificate appears under Settings > Security and privacy > Other security settings > Credential storage .
Step 2. Configure the Native Android IPsec VPN Client for Client-to-Site IPsec VPN
- On the Android device, tap Settings.
- In the Connections section, tap More connection settings.
- Tap VPN.
- Tap the menu in the right (...) next to VPN and select Add VPN profile.
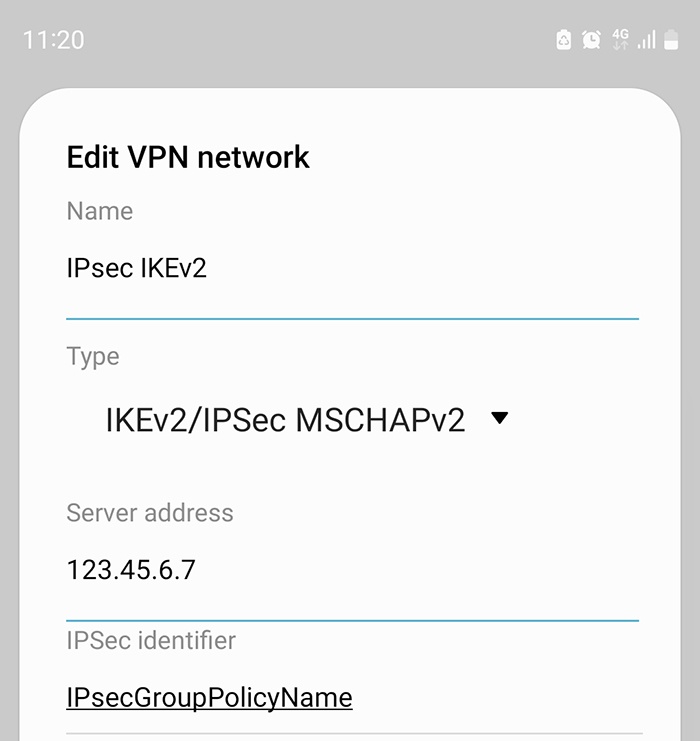
- On the Edit VPN network page, configure the following settings:
- Name – Enter a name for the VPN connection (e.g.,
IPsec IKEv2). - Type – Select IKEv2/IPSec MSCHAPv2. (IKEv2/IPSec RSA and IKEv2/IPSec PSK are currently not supported.)
- Server address – Enter the network address for the VPN service (e.g.,
123.45.6.7). - IPSec identifier – Enter a random string. This string is used as part of the IP Group identifier on the VPN > Client-to-Site page.
- Name – Enter a name for the VPN connection (e.g.,
- Select the previously installed IPsec CA certificate (e.g.,
RootCert). - Select the previously installed server certificate (e.g.,
VPNCert). - Enter Username and Password.
- Tap Save.
To connect to the VPN, tap the VPN profile you just created.