Connecting multiple VPCs to multiple locations, such as your data center or customer offices, can cause significant configuration overhead, especially if VPCs are frequently added and removed. For example, adding a new VPC requires configuration changes to each on-premises location. A second weak point is the communication between the VPCs. To share common resources, VPCs must be peered if they are in the same region; otherwise, the traffic must be routed through your data center.
To reduce the number of VPN connections required by each device participating in the network, use a central Transit Gateway, with all your cloud resources (VPCs and VPN Gateway) attached to it, and a Barracuda CloudGen Firewall connecting to the VPN Gateway through IPSec. In this setting, you will have a hub and spoke topology where the Transit Gateway acts as the hub and routes the traffic between all attached resources. The default configuration of the Transit Gateway is any-to-any communication, which allows all attached devices to reach all other attached devices. The VPCs and VPN Gateway attached to the Transit Gateway are propagated via BGP.
For more information on AWS Transit Gateway, see https://aws.amazon.com/transit-gateway/.

Before You Begin
Step 1. Create a Firewall in a High Availability Cluster in AWS
This firewall will later connect to your Transit Gateway using a VPN IKEv1 or IKEv2 IPsec tunnel to an Amazon VPN Gateway attached to your Amazon Transit Gateway.
Deploy a firewall in a high availability cluster in Amazon. For more information, see High Availability in AWS and AWS Reference Architecture - CloudGen Firewall HA Cluster with Route Shifting.
Configure source-based routing for the network the firewall is attached to (usually the public subnet). For more information, see How to Configure Source-Based Routes.
Disable the Source/Destination Check for the network interface. For more information, see Step 7 in How to Deploy a CloudGen Firewall in AWS via AWS Console.
Step 2. Create an Amazon Transit Gateway
Create an Amazon Transit Gateway that will later connect all your VPCs and the Amazon VPN Gateway.
Log into the AWS console.
Click Services and select VPC.
In the Transit gateways section, click Transit gateways.
Click Create transit gateway.

The Create transit gateway window opens. Enter a Name tag for your Transit Gateway and keep the default values.
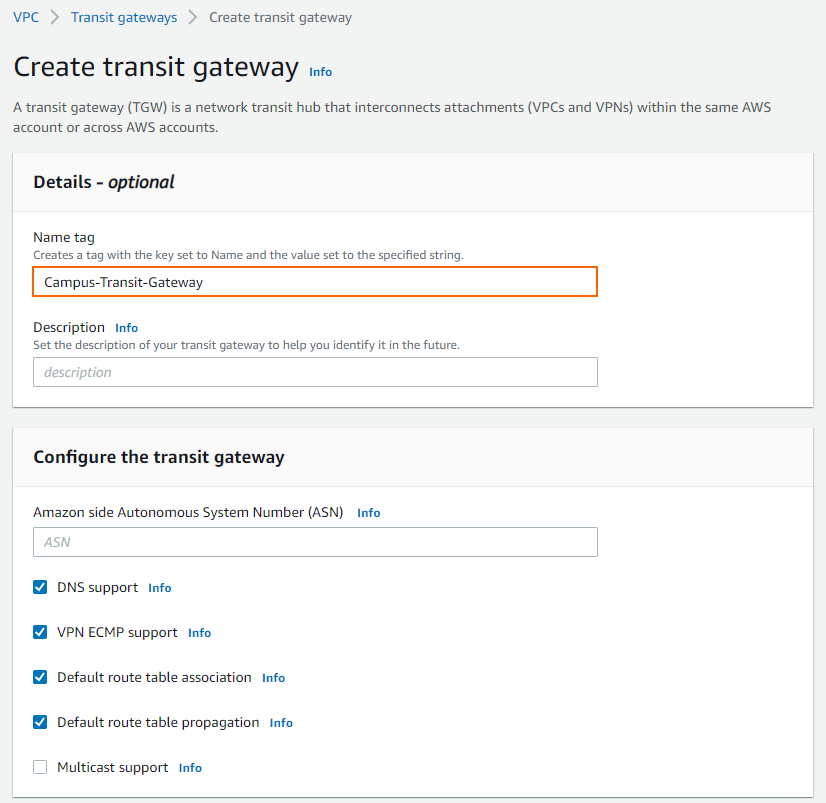
Click Create transit gateway.
Go back to VPC > Transit Gateways.
Select the Transit Gateway just created and scroll down to the Details tab.
Write down the ASN number next to Amazon ASN.

Step 3. Attach Your VPCs to the Transit Gateway
Attach the VPCs you want to be reachable through the Transit Gateway.
Log into the AWS console.
Click Services and select VPC.
In the Transit gateways section, click Transit gateway attachments.
Click Create transit gateway attachment and specify values for the following:
Transit gateway ID – Select the Transit Gateway created in Step 2.
Attachment type – Select VPC.
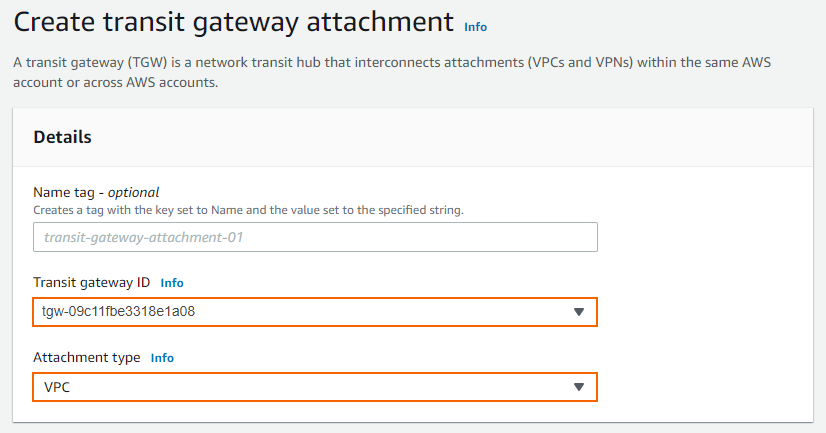
VPC ID – Select the VPC you want to attach to the Transit Gateway.
Subnet ID – Select the subnet you want to attach to the Transit Gateway.
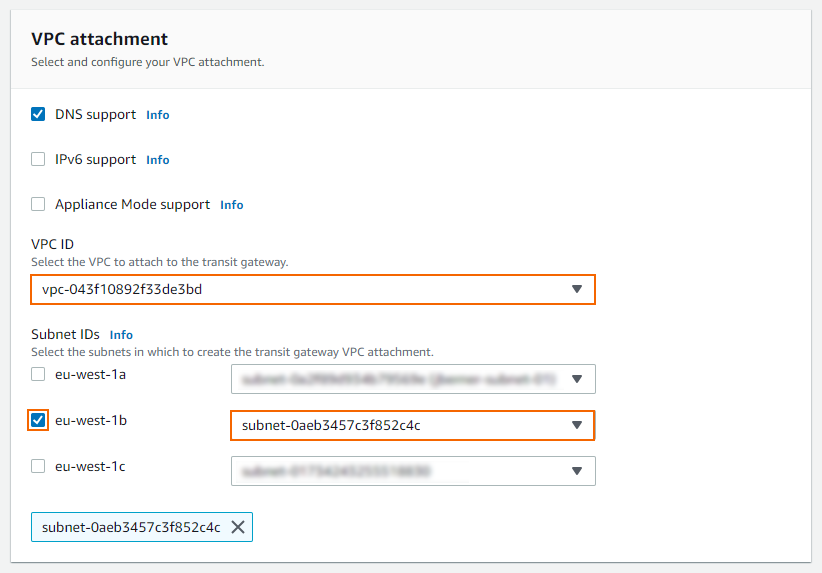
Click Create transit gateway attachment.
Repeat Step 3 with all VPCs you want to attach to the Transit Gateway.
Step 4. Specify the Transit Gateway as the Default Route of the Attached VPCs.
Configure the route table of the VPCs attached to the Transit Gateway in Step 3 to use the Transit Gateway as default route.
Log into the AWS console.
Click Services and select VPC.
Click Route tables.
Search for the name of your VPC attached to the Transit Gateway in Step 3.
Select the route table of your VPC and click Actions > Edit routes. The Edit routes window opens.
Click Add route and specify values for the following:
Destination – Enter
0.0.0.0/0.Target – Select Transit Gateway from the drop-down list and select the Transit Gateway created in Step 2.

Click Save changes.
Repeat Step 4 with all route tables of all VPCs attached to the Transit Gateway in Step 3.
Step 5. Attach the Amazon VPN Gateway to Your Transit Gateway
Attach the VPN Gateway to your Transit Gateway to allow traffic between all VPCs attached to the Transit Gateway and the VPN Gateway.
Log into the AWS console.
Click Services and select VPC.
In the Transit Gateways section, click Transit Gateway Attachments.
Click Create transit gateway attachment and specify values for the following:
Transit Gateway ID – Select the Transit Gateway created in Step 2.
Attachment type – Select VPN.
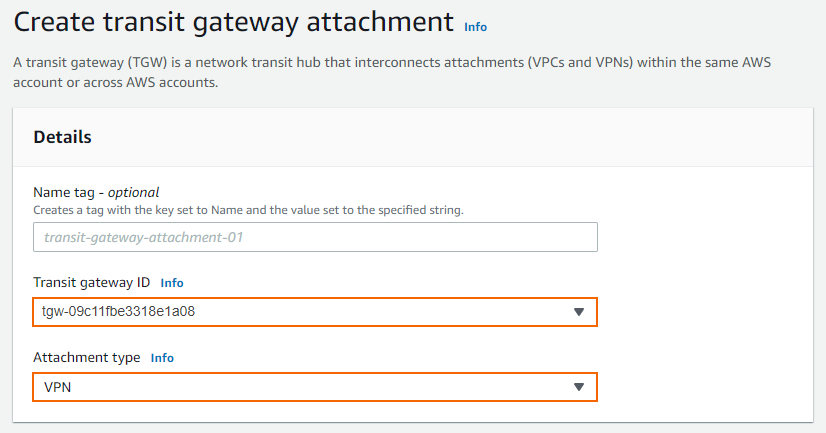
Customer Gateway – Select New.
IP Address – Enter your external IP Address, assigned to your firewall in Step1.
BGP ASN – Enter your BGP ASN number.
Routing options - Select Dynamic (requires BGP).
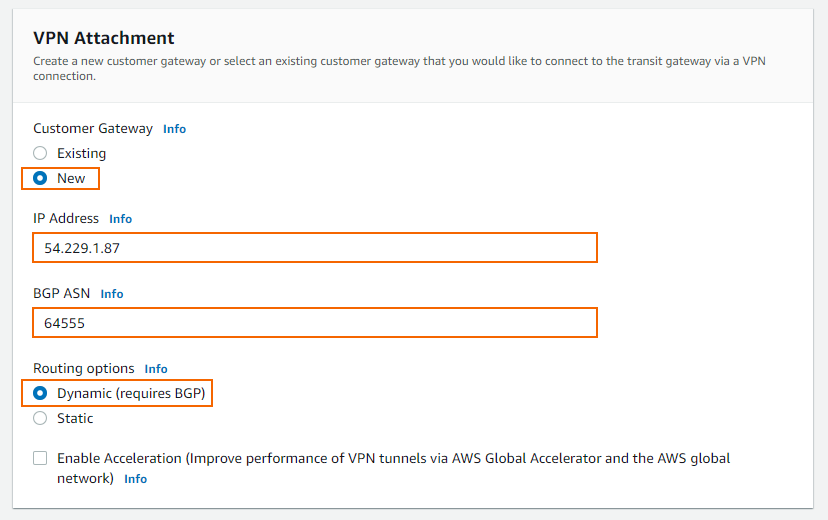
Click Create transit gateway attachment.
The VPN Gateway is attached to the Transit Gateway and a site-to-site VPN connection is created automatically.
Step 6. Configure an IKEv1 or IKEv2 IPsec VPN to the AWS VPN Gateway Attached to Your Transit Gateway
Step 6.1 Download the Configuration File
Download the configuration file of the site-to-site VPN connection automatically created in Step 5.
Log into the AWS console.
Click Services and select VPC.
Click Site-to-Site VPN connections.
Select the VPN site where the Transit Gateway created in Step 2 is attached to.
Click Download configuration.
Select generic vendor and platform settings for the configuration file:
Vendor – Select Generic.
Platform – Select Generic.
Software – Select Vendor Agnostic.
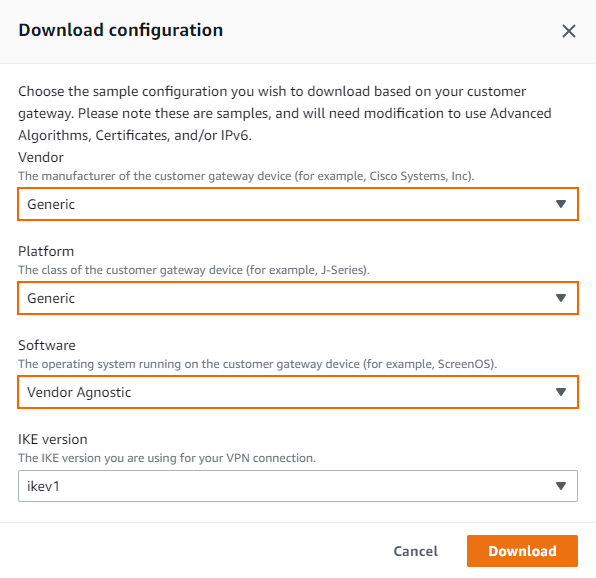
Click Download, and save the
vpn-<YOUR-S2S-ID>.txtfile. The configuration file contains all required information to configure each VPN tunnel and the respective BGP routing options on your CloudGen Firewall.
Step 6.2 Configure an IKEv1 or IKEv2 IPsec Tunnel to the AWS VPN Gateway.
Create an Amazon VPN Gateway and connect your firewall with an IKEv1 or IKEv2 IPsec VPN tunnel with BGP routing enabled. The Amazon virtual private gateway uses two parallel tunnels to ensure constant connectivity.
Use the IP addresses provided in the Amazon generic VPN configuration file you downloaded at the end of Step 6.1.
Use the ASN number you wrote down before.
To connect your firewall, follow the respective guide. Start with Step 2 since the AWS VPN Gateway has already been created:
For more information on using an IKEv1 tunnel, see How to Configure an IKEv1 IPsec VPN to an AWS VPN Gateway with BGP.
For more information on using an IKEv2 tunnel, see How to Configure an IKEv2 IPsec VPN to an AWS VPN Gateway with BGP.
Verify that the network your firewall is attached to is advertised via BGP. For more information see Step 3.1 from the guide linked above.
Verify that the network your firewall is attached to is allowed by the host firewall rule to access all the VPCs in AWS. For more information see Step 4 from the guide linked above.
Next Steps
(optional) The default configuration of the Transit Gateway is any-to-any communication, which allows all attached devices to reach all other attached devices. Edit the routing table of your Transit Gateway and the attached VPCs to match your requirements and create host firewall rules accordingly.
(optional) Connect an on-premise CloudGen Firewall with a TINA tunnel. For more information, see TINA VPN Tunnels.
