To export the settings of the client-to-site VPN for your Barracuda VPN or Network Access Client, you must export a VPN file. The VPN file can be exported for both personal license and VPN group policy VPN configurations.
Download VPN File from VPN Group Policy
Download the VPN template (*.vpn) file from the client-to-site configuration.
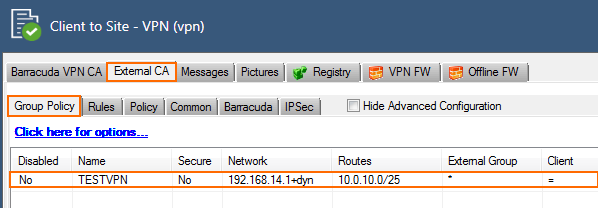
- Go to CONFIGURATION > Configuration Tree > Box > Assigned Services > VPN-Service > Client-to-Site.
- Click the External CA tab.
- In the Group Policy tab, double-click on the VPN group policy. The Edit Group Policy window opens.

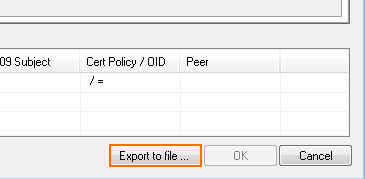
- Click Export to file. The Export VPN Profile window opens.

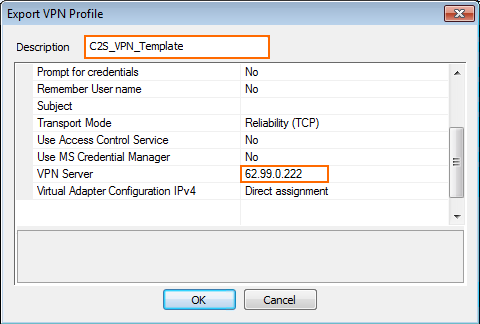
- Enter a new Description.
- Enter the IP address of the VPN Server.
- Click OK.

Download VPN File from Personal License Configuration
- Go to CONFIGURATION > Configuration Tree > Box > Assigned Services > VPN-Service > Client-to-Site.
- In the Barracuda VPN CA tab, double-click on the personal license you want to export.
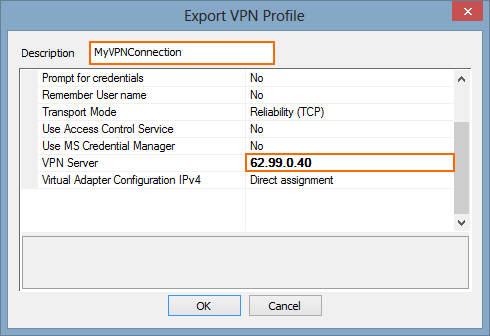
- Click Export to File and click Export to .vpn file. The Export VPN Profile window opens.

- Enter a Description. This is the name of the imported VPN profile in the VPN client.
- Scroll down to the VPN Server entry and enter the public IP address the client uses to connect to the VPN service.

Next Step
Double-click on the VPN file to import it into the Barracuda VPN or Network Access Client.
For more information, see Remote Access Clients.
