SMS PASSCODE offers strong authentication via SMS messaging on mobile phones. It provides out-of-the-box protection of standard login systems such as Citrix, Cisco, Microsoft, other IPsec and SSL VPN systems, as well as websites. Follow the steps in this article to configure VPN authentication for SMS PASSCODE.
Step 1. Enable RADIUS Authentication
- Go to CONFIGURATION > Configuration Tree > Box > Infrastructure Services > Authentication Service.
- In the left menu, select RADIUS Authentication.
- Click Lock.
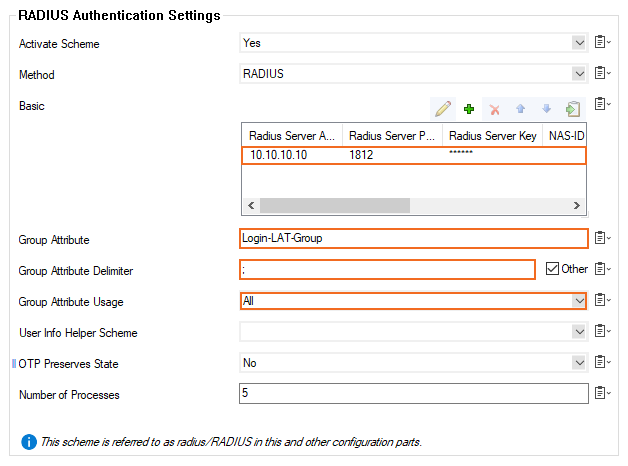
- From the Activate Scheme field, select Yes.
- In the Basic section, click + to add a RADIUS Server. The Basic configuration window opens.
In the Radius Server Address field, enter the IP address of the IAS/NPS server as the SMS PASSCODE RADIUS authentication client.
- Click OK.
- Select Login-LAT-Group from the Group Attribute drop-down list.
- Next to the Group Attribute Delimiter field, select the Other check box.
- Enter
;as the the Group Attribute Delimiter. From the Group Attribute Usage list, select All.
Click Send Changes and Activate.
Step 2. Configure the Client-to-Site VPN
- Go to CONFIGURATION > Configuration Tree > Box > Assigned Services > VPN-Service > Client to Site.
- Click Lock.
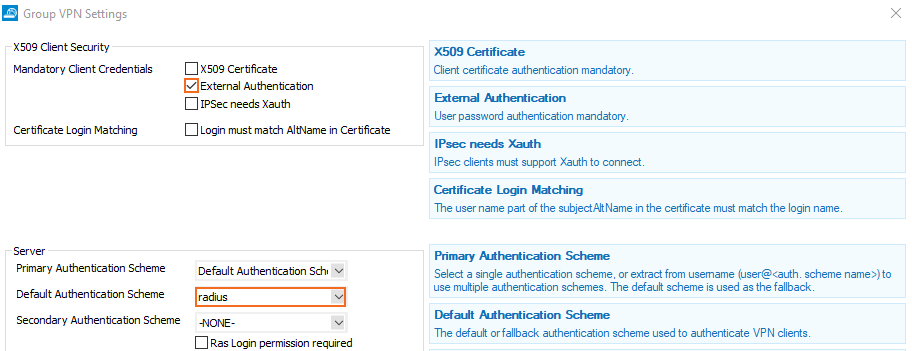
- Click the External CA tab and then click the Click here for options link. The Group VPN Settings window opens.
- When using user/password authentication, select the External Authentication check box.
- From the Default Authentication Scheme list, select radius.
- Click OK.
- Click Send Changes and Activate.
Step 3. Create a Group Policy
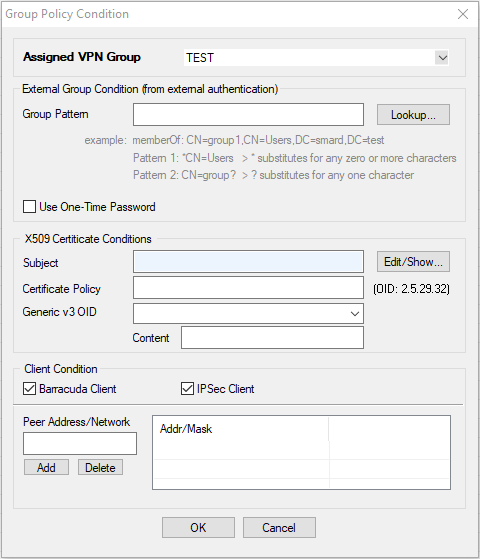
Create a Group Policy with the corresponding Group Policy Condition to allow access from the client. (For detailed information on how to create group policies, see Step 4 in How to Configure a Client-to-Site VPN Group Policy.)
Group Policy Setup
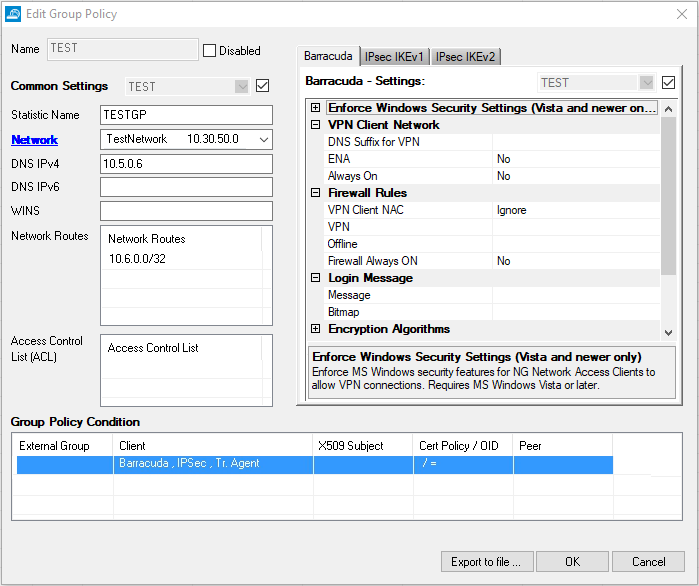
Group Condition Setup
Step 4. Configure SMS PASSCODE
- Install and configure the RADIUS client according to the "SMS PASSCODE Administrator's Guide."
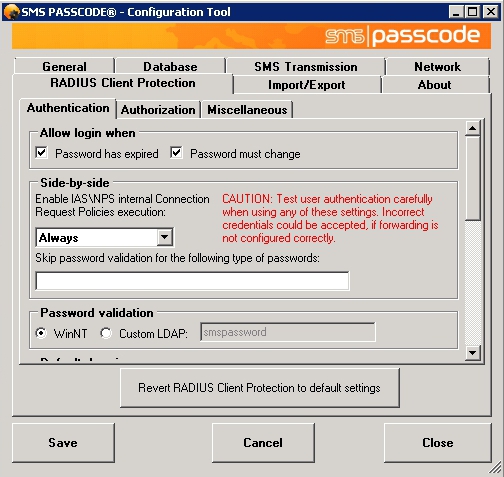
- From the Authentication tab in the SMS PASSCODE - Configuration Tool window, select Always from the Request Policies execution list in the Side-by-side section.
See the following figure:
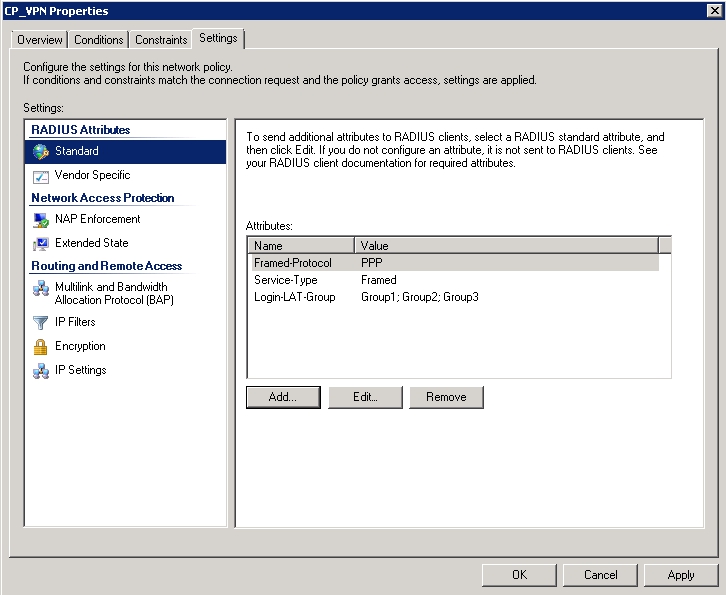
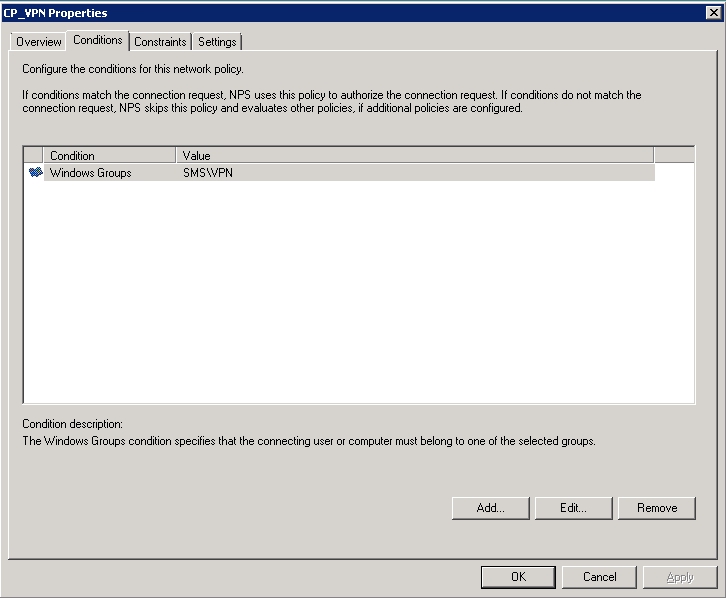
Open the Microsoft Windows Network Policy Server (IAS/NPS) and create a network policy. Open the policy and choose the Windows groups containing the users.
- To send group names to the RADIUS client, configure the Login-LAT-Group attribute.
