If you are not using a DNS sinkhole you can configure the URL filtering in the firewall to achieve similar results for HTTP and HTTPS traffic. This allows you to restrict access to malicious websites that may compromise the security of your client. The Malicious Sites URL category also uses spyware and a botnet database. Create a URL Filter policy object blocking access to websites in the Malicious Sites category and use it in the application rule matching your web traffic. When access to a malicious site is detected, the user is redirected to a custom block page. A valid Energize Updates subscription is required.
Before You Begin
- (optional) Configure an outbound TLS Inspection policy. To use TLS Inspection the Feature Level of the Forwarding Firewall must be set to 7.2 or higher. For more information, see TLS Inspection in the Firewall and How to Configure Outbound TLS Inspection.
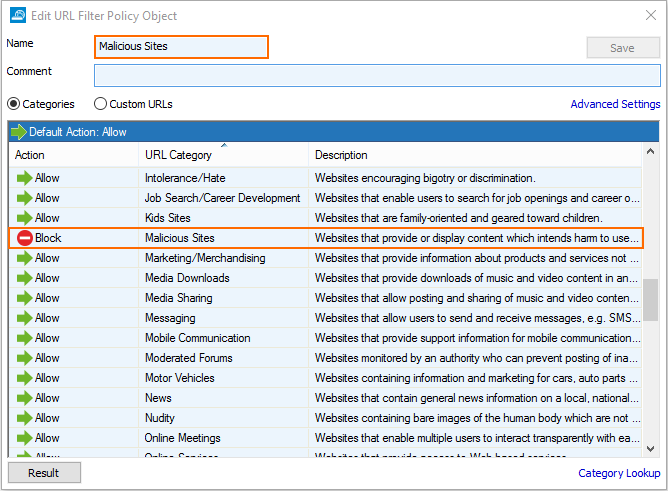
Step 1. Create a URL Filter Policy Object
Create a URL Filter policy object and set the Action for Malicious Sites category to Block.

For more information, see How to Create a URL Filter Policy Object.
Step 2. Enable URL Categorization
You must enable the URL Filter to be able to process URL categorization requests. To change additional settings for the URL Filter service, see the Application Detection section in General Firewall Configuration.
- Go to CONFIGURATION > Configuration Tree > Box > Assigned Services > Firewall > Security Policy.
- Click Lock
- In the URL Filter section, click Enable URL Filter in the Firewall.

- Click Send Changes and Activate.
The Barracuda URL Filter is now enabled and can handle URL categorization requests.
Step 3. Enable the URL Filter for the Access Rule Handling Web Traffic
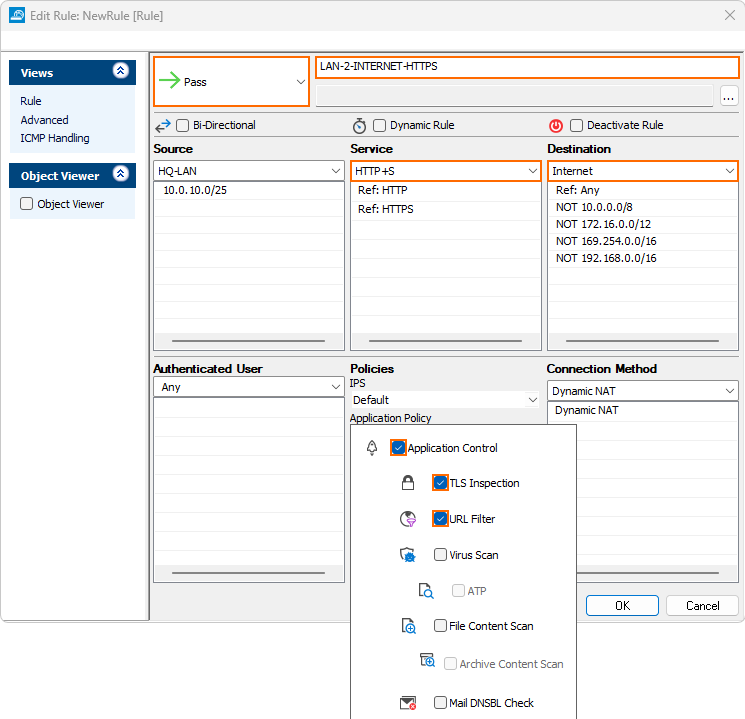
Enable Application Control, TLS Inspection, and URL Filter for the access rule matching web traffic.
- Go to CONFIGURATION > Configuration Tree > Box > Assigned Services > Firewall > Forwarding Rules.
- Double-click to edit the access rule matching HTTP and HTTPS traffic.
- Click on the Application Policy link and select:
- Application Control – required.
- TLS Inspection – recommended.
- URL Filter – required.

- Application Control – required.
- Select a policy from the TLS Inspection Policy drop-down list.
- Click OK.
- Click Send Changes and Activate.
Step 4. Create an Application Rule using URL Filter Objects
- Go to CONFIGURATION > Configuration Tree > Box > Assigned Services > Firewall > Forwarding Rules.
In the left menu, click Application Rules. - Click Lock.
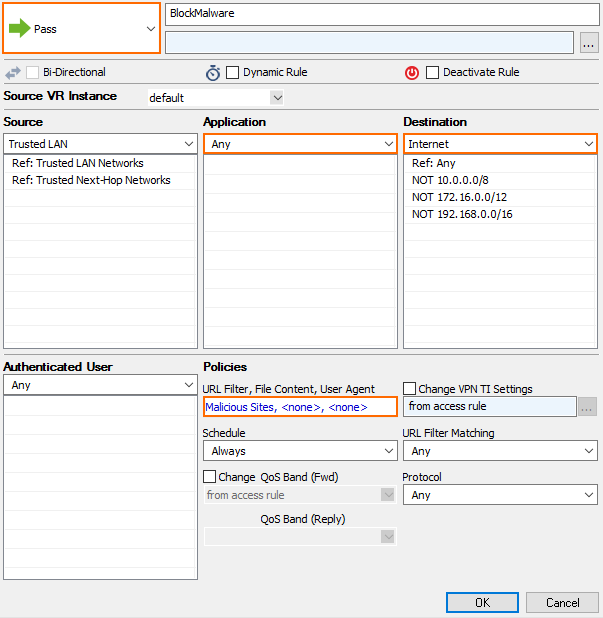
- Create a Pass application rule. For more information, see How to Create an Application Rule.
- Source – Select the same source used in the matching access rule.
- Application - Select Any to use only the web filtering. Otherwise, select an application object from the drop-down list to combine application control and URL filtering.
- Destination - Select Internet.
- Click the URL Filter, File Content, User Agent link.
- Click URL Filter.
- Click the URL Filter policy object created in step 1.

- Click OK.
- Click Send Changes and Activate.
Firewall Monitor
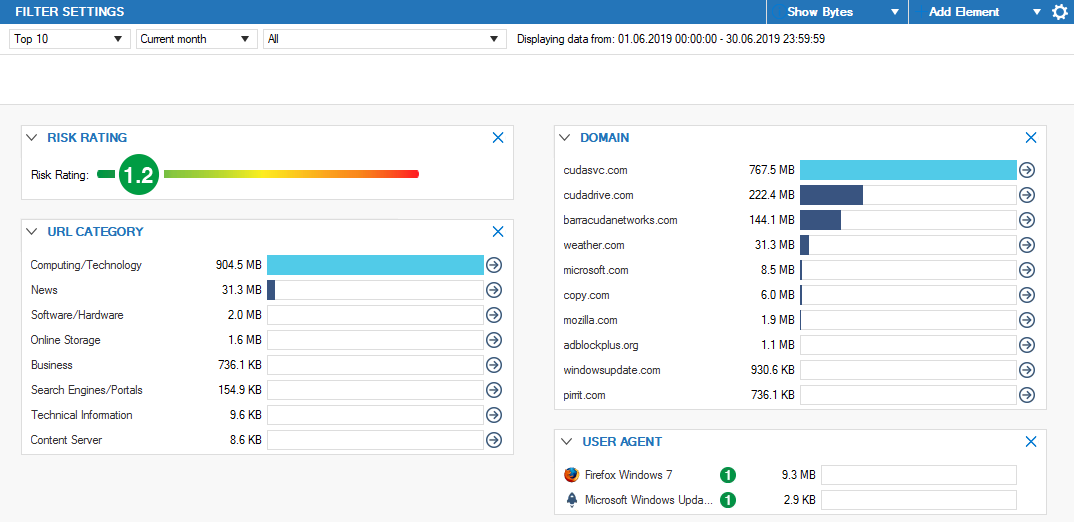
Go to FIREWALL > Monitor and drill down into the Malicious Sites category to receive a summary of all clients attempting to access websites in this category.

