As of firmware 9.0.0, the Automated Critical Updates feature is activated by default. For security reasons, Barracuda Networks recommends that you keep it activated. However, if you want to turn the feature off, or if you must make changes to the settings, perform the following steps.
How to Change Settings for Automated Critical Updates
Option 1: For Managed Firewalls on a Control Center
The Automated Critical System Updates feature is disabled by default. For this reason, the related node is not displayed in the configuration tree. You first must first enable the feature for it to appear in the configuration tree.
Log into your Control Center.
To enable/disable the feature, depending on the level in the configuration tree:
Global level – Go to CONFIGURATION > Configuration Tree > Global Settings > CC Parameters
Range level – Go to CONFIGURATION > Configuration Tree > Global Settings > your range > Range Properties
Cluster level – Go to CONFIGURATION > Configuration Tree > Global Settings > your range > your cluster > Cluster Properties
Click Lock.
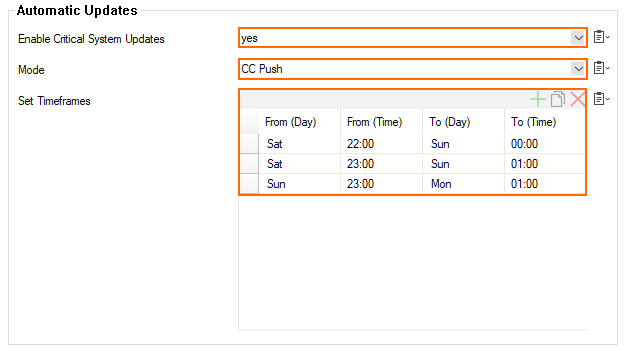
To disable/enable the feature, select yes/no for Enable Critical System Updates.
(Only for range and cluster level) To change the mode from CC Push to Box Pull (or vice versa): select the required option for Mode from the list.
To modify time frames:
To delete an existing time frame:
Select the required time frame.
Click the red 'X' on the top of the time frame's list view.
To add a new time frame to the schedule:
Click the green '+' on the top of the time frame's list view.
A new entry with default values is added to the list.
Modify the parameters to match your requirements.
Click Send Changes/Activate.
Option 2: For a Stand-alone Firewall or for a Control Center on the Box Level
Log into your firewall.
Go to CONFIGURATION > Configuration Tree > Box > Advanced Configuration > Firmware Update.
Click Lock.
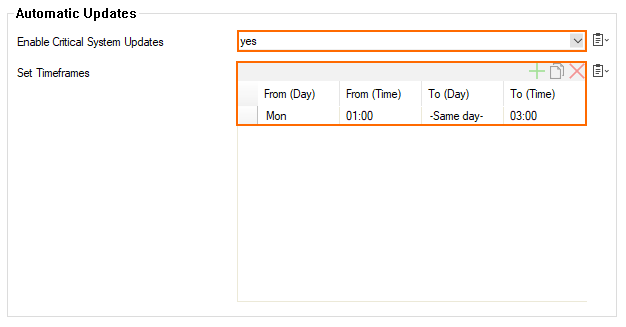
To disable/enable the feature, select yes/no for Enable Critical System Updates.
To modify time frames:
To delete an existing time frame:
Select the required time frame.
Click the red 'X' on the top of the time frame's list view.
To add a new time frame to the schedule:
Click the green '+' on the top of the time frame's list view.
A new entry with default values is added to the list.
Modify the parameters to match your requirements.
Click Send Changes/Activate.