Firewall admins must make intensive use of network and IP addresses at several configuration places. Although configuring addresses manually provides more flexibility, assigning IP addresses automatically can save time.
A Pool Object automatically assigns IP addresses from a configurable range.
Usage and Limitations
Pool Objects can be created on a global, range, or cluster level. The IP addresses taken from a Pool Object can be used at all places where, previously, only predefined single IPv4 address objects were allowed. The main applications for Pool Object IP addresses are Management IP, VIP, and Shared IP.
Although the assignment to a specific box is done automatically, creating a Pool Object must be done manually. Admins must therefore ensure that no overlapping of configured IP addresses in the pool occurs.
When a new IP address is requested from the address pool, the firewall assigns the next available IP address that is higher than the highest, most recently assigned IP address. These automatically assigned IP addresses are subordinated to the STATIC node in the view of network objects.
If a firewall that used an automatically assigned IP address has been deleted, the Control Center puts this IP address back into the pool of unused IP addresses. Therefore, when the highest available IP address has already been assigned, the Control Center checks all unused IP addresses in the pool and can reassign this free IP address on the next request.
Note that only a single network address in CIDR notation is currently evaluated. This network must be configured in the first line of the related configuration area:
For more information on how to create network objects, see How to Create Network Objects.
Important Considerations for Using Pool Objects
Before using a Pool Object, carefully plan for the usage of Pool Object-based IP addresses and their associated network addresses. Inappropriate usage can lead to duplicate IP addresses.
Because pool-based IP addresses can be created for VIP networks and are also listed for non-VIP-related fields, selecting the incorrect pool object later for usage can cause problems.
Options for Creating a Pool Object
Pool Objects can be configured on a Control Center at Global Settings > VIP Networks. You can also create a Pool Object by selecting it from the list of available network objects and adding an address range from which automatically provided IP addresses are distributed on demand.
Option 1: How to Create a Pool Object as a Global Firewall Object
Log into your Control Center.
- Go to CONFIGURATION > Configuration Tree > Multi-Range > Global Settings > Global Firewall Objects/Policies.
- Click Lock.
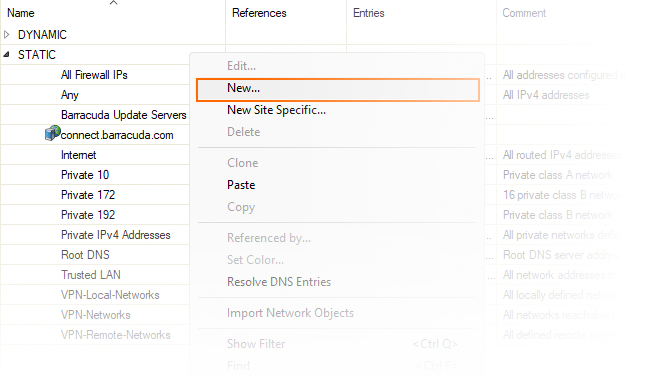
- Right-click in the main view.
- Select New... from the list.
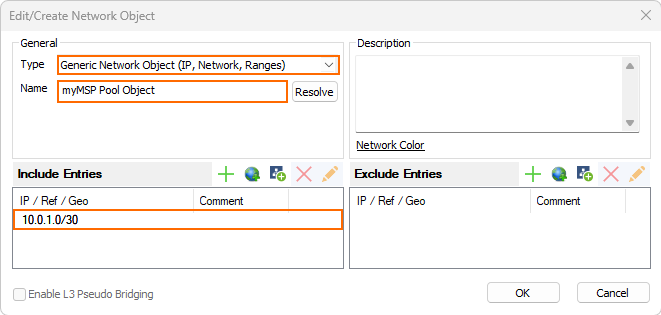
- The Edit/Create Network Object window is displayed.
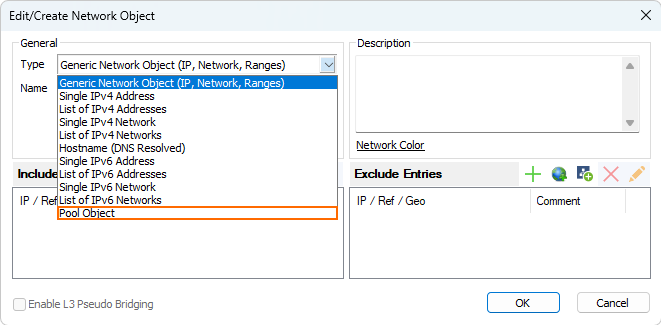
- Click the list item for Type.
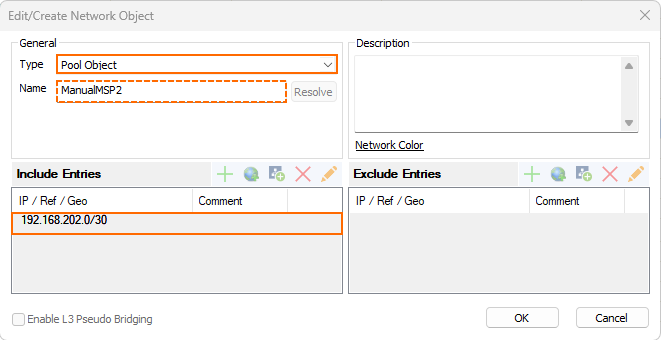
- Select Pool Object from the list.
- For Name, enter the name for the new Pool Object.
- Click the '+' symbol to the right of Include Entries.
- The Edit/Create Include Entry window is displayed.
- Enter the network address in CIDR notation, e.g., 10.0.1.0/30.
- Click Insert and Close.
- Click OK.
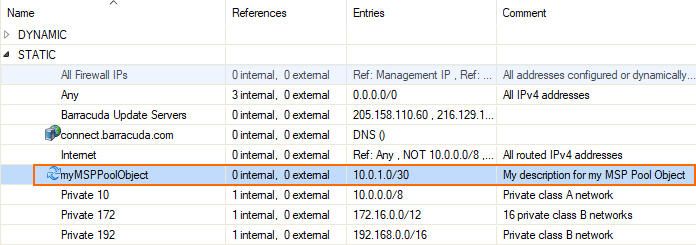
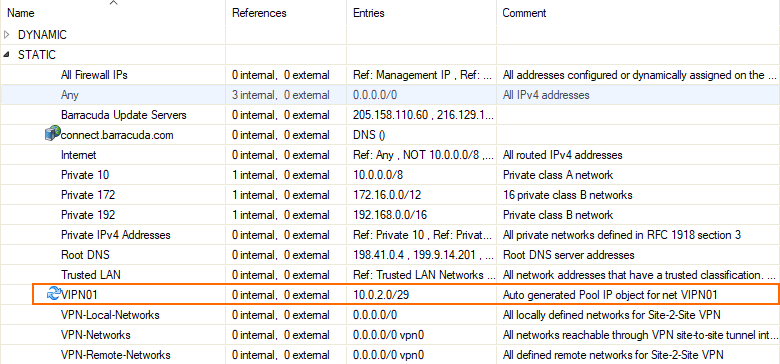
After the configuration, the new network will be displayed in the list of the main view subordinated to the STATIC node. Note that the leading symbol at the beginning of the line indicates that this is an MSP Pool Object:
Option 2: How to Create a Pool Object for VIP Networks
To provide IP addresses for VIP networks, perform the following steps:
- Log into your Control Center.
- Go to CONFIGURATION > Configuration Tree > Multi-Range > Global Settings > VIP Networks.
- Click Lock.
- Click the green '+' symbol at the top of the list box to add a new VIP network.
- The VIP Networks window is displayed.
- Enter the name of your new VIP network.
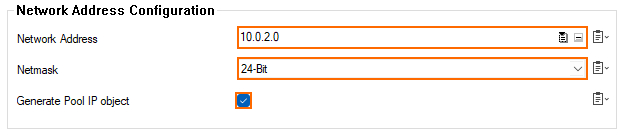
- For Network Address, enter the network address.
- For Netmask, select the size of the netmask in bits from the drop-down list.
- For Generate Pool IP object, select the check box.
- Click OK.
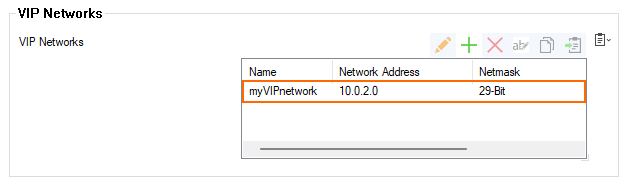
The new network will be displayed in the list of configured VIP networks.
This new network will also be displayed at CONFIGURATION > Configuration Tree > Multi-Rage > Global Settings > Global Firewall Objects/Policies > Networks.
Checking the Pool Object IP Addresses that Are in Use
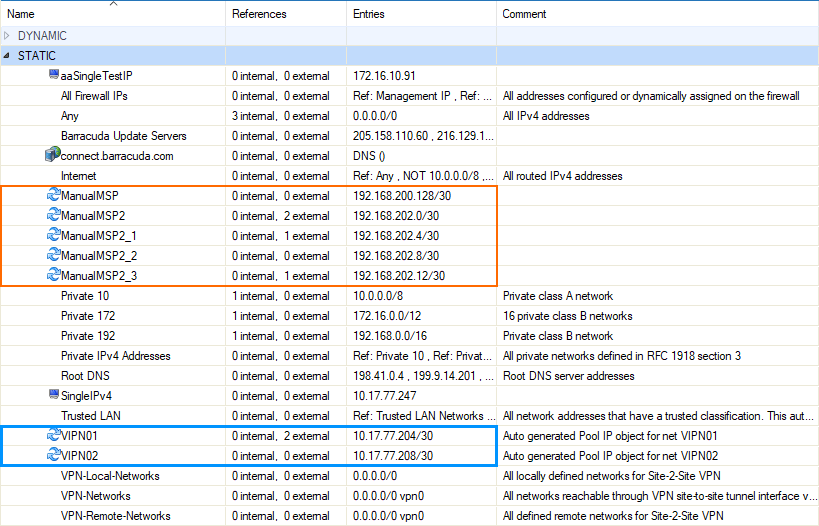
Although you can create new Pool Objects at the two different places described above, you can check all of them in the same view at CONFIGURATION > Configuration Tree > Multi-Rage > Global Settings > Global Firewall Objects/Policies > Networks.
If you want to know which firewall is using an IP address of one of the configured pools, perform the following steps:
- Right-click the required line in the list.
- In the menu list, click Referenced by... .
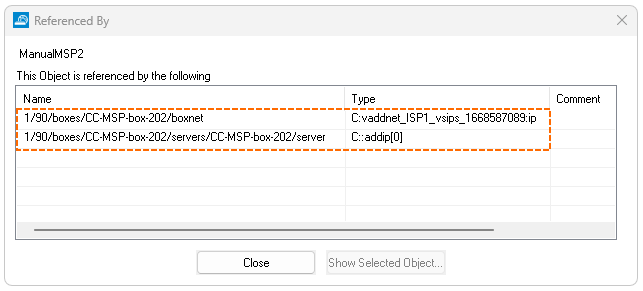
- The Referenced By window opens.
- In the list, you can see what appliances are referencing the MSP Pool Object.