In an HA setup, the primary CloudGen Firewall stays active until a serious problem occurs. If services must be shut down (for example, for system maintenance), you can do a manual failover. When you do so, the primary firewall sends a signal to the secondary unit which, in turn, immediately activates the services followed by an immediate shutdown of all services running on the primary unit. This mechanism works identically for an HA pair that is managed by a Barracuda Firewall Control Center and a stand-alone HA pair.
Step 1. Perform a High Availability Failover
This case assumes that the primary firewall is the active one while the secondary firewall is on standby (although the example also applies if the primary unit is on standby and the secondary unit is the active one). This is the setup that applies to the default state of two firewalls running in an HA configuration. When the failover is completed, the new status of both firewalls is locked so that it cannot be reverted accidentally.
In case a failover has already been initiated, continue with Step 2.
- Go to CONTROL > Services.
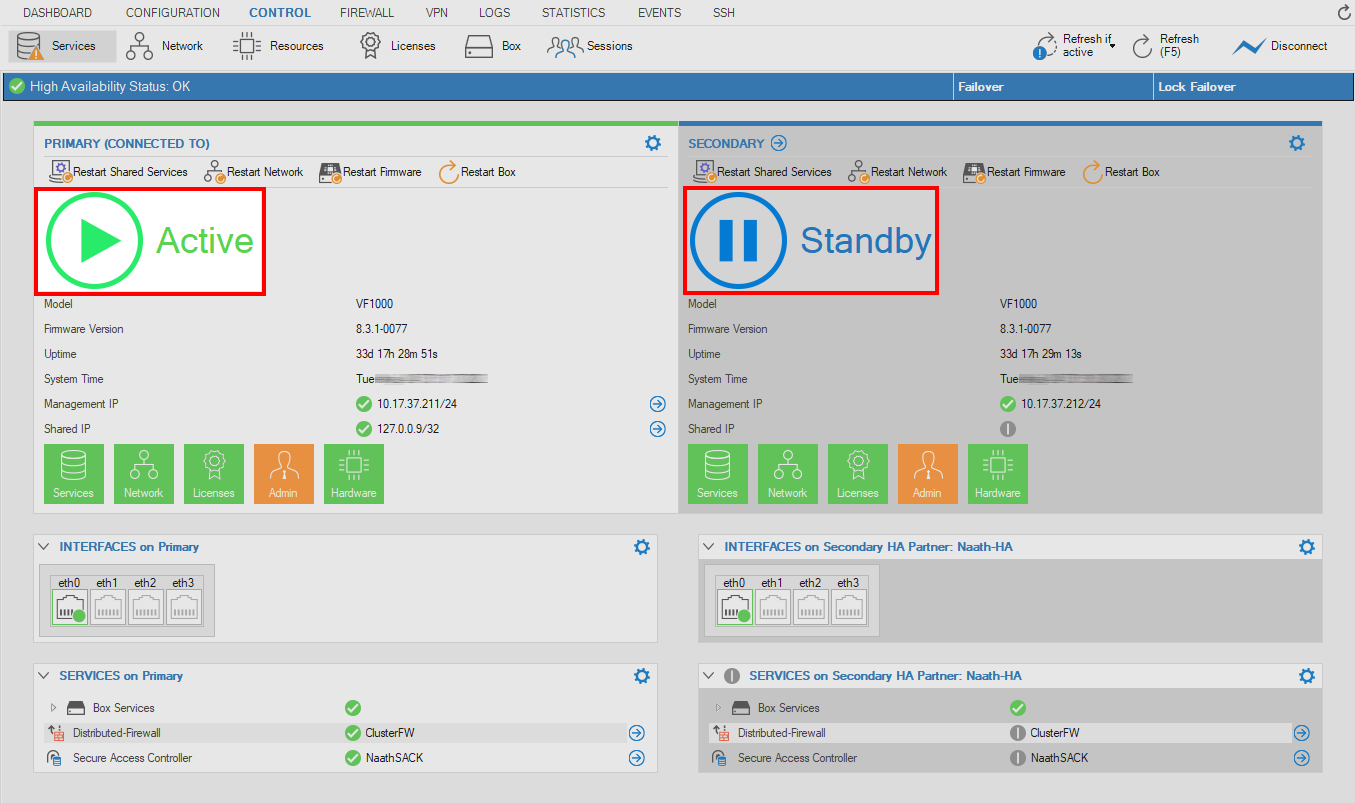
- Click the Failover button in the status area below the ribbon bar.
- The firewall performs the failover.
- The High Availability Status bar now displays HA Takeover Blocked.
- The Failover button is displayed grayed indicating that another HA failover is currently not possible.
- In the HA status bar, the current state now reports: "High Availability Status: Backup Appliance has taken over".
- The new firewall service status displays the status of the services on the PRIMARY firewall as Blocked and the services on the SECONDARY as Active.
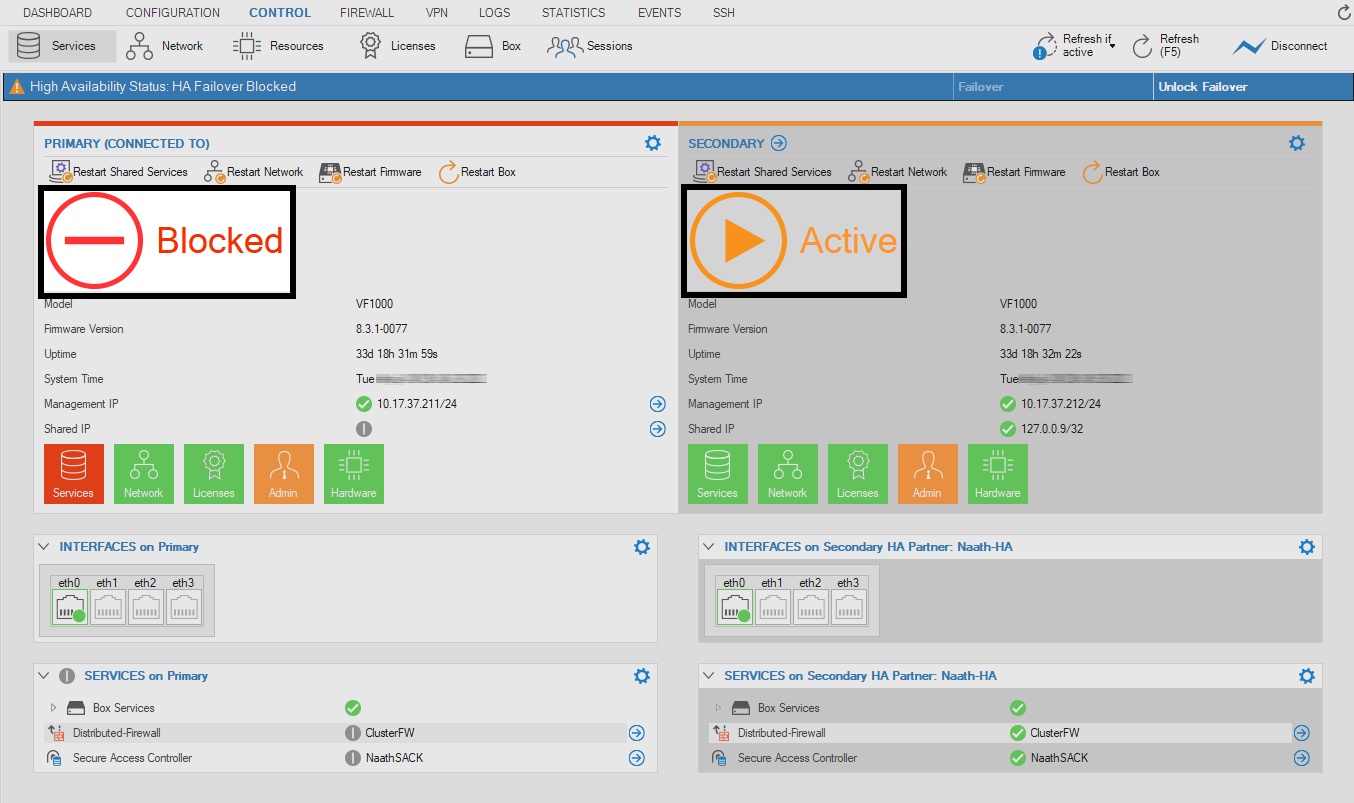
- The Services icon is displayed in red color, indicating that all services are currently blocked. In the image above, the element for the services still shows all services with a leading green bullet because the services are still running on the primary unit and because the services on the secondary unit have still not taken over.
(optional) Step 2. Release the HA-Failover Lockdown
To revert the failover to the standard status where the PRIMARY is Active and the SECONDARY is Blocked, you must first release the HA-failover lock. This will reactivate all services and keep them in a wait state in case the failover must be subsequently reverted.
- Go to CONTROL > Services.
- Click Unlock Failover in the status bar below the ribbon bar.
- The status of the PRIMARY firewall is now displayed to be on Standby while the SECONDARY is Active.
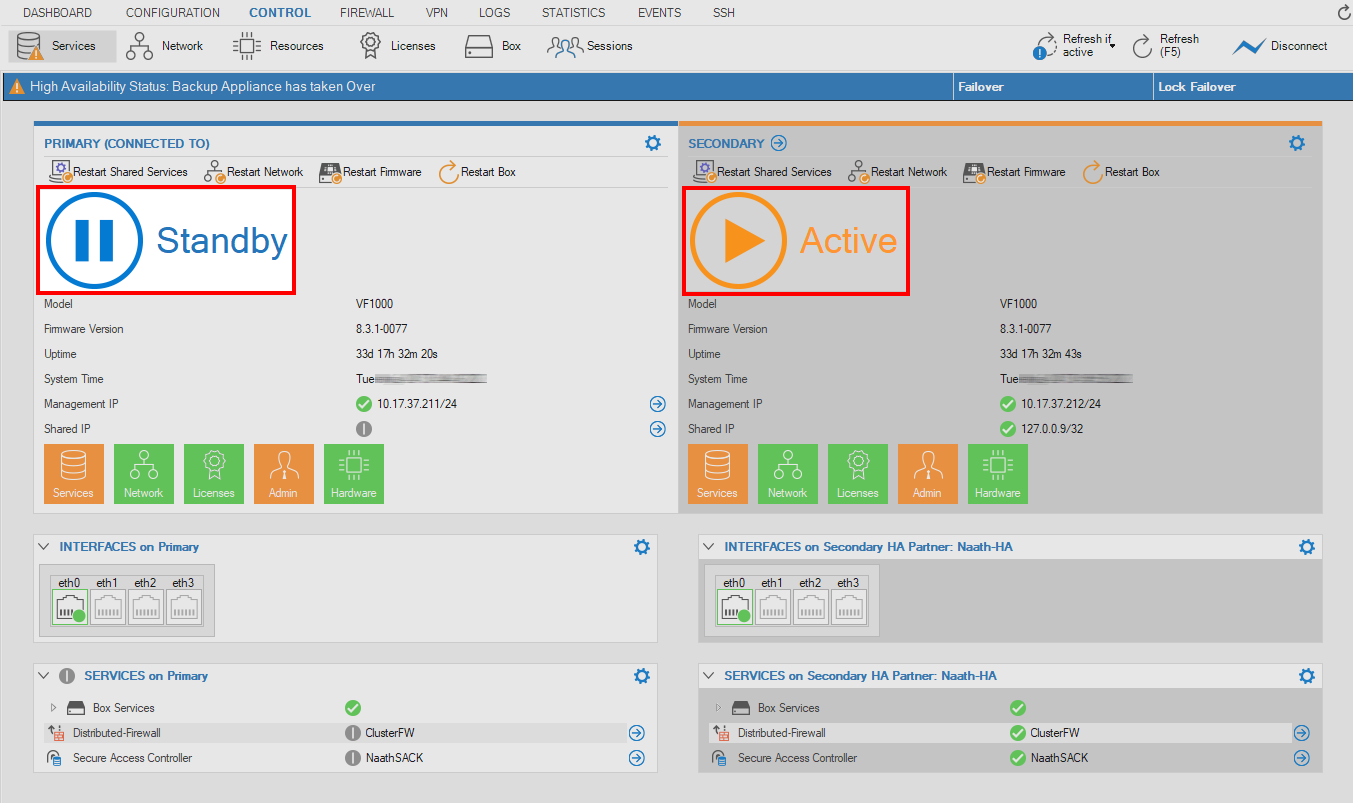
- The Services icon is no longer displayed in red color, indicating that all services are ready to be reactivated.
(optional) Step 3. Revert the HA-Failover to its Standard Configuration
- Go to CONTROL > Services.
- Click the Failover button in the status area below the ribbon bar.
- The firewall performs the failover.
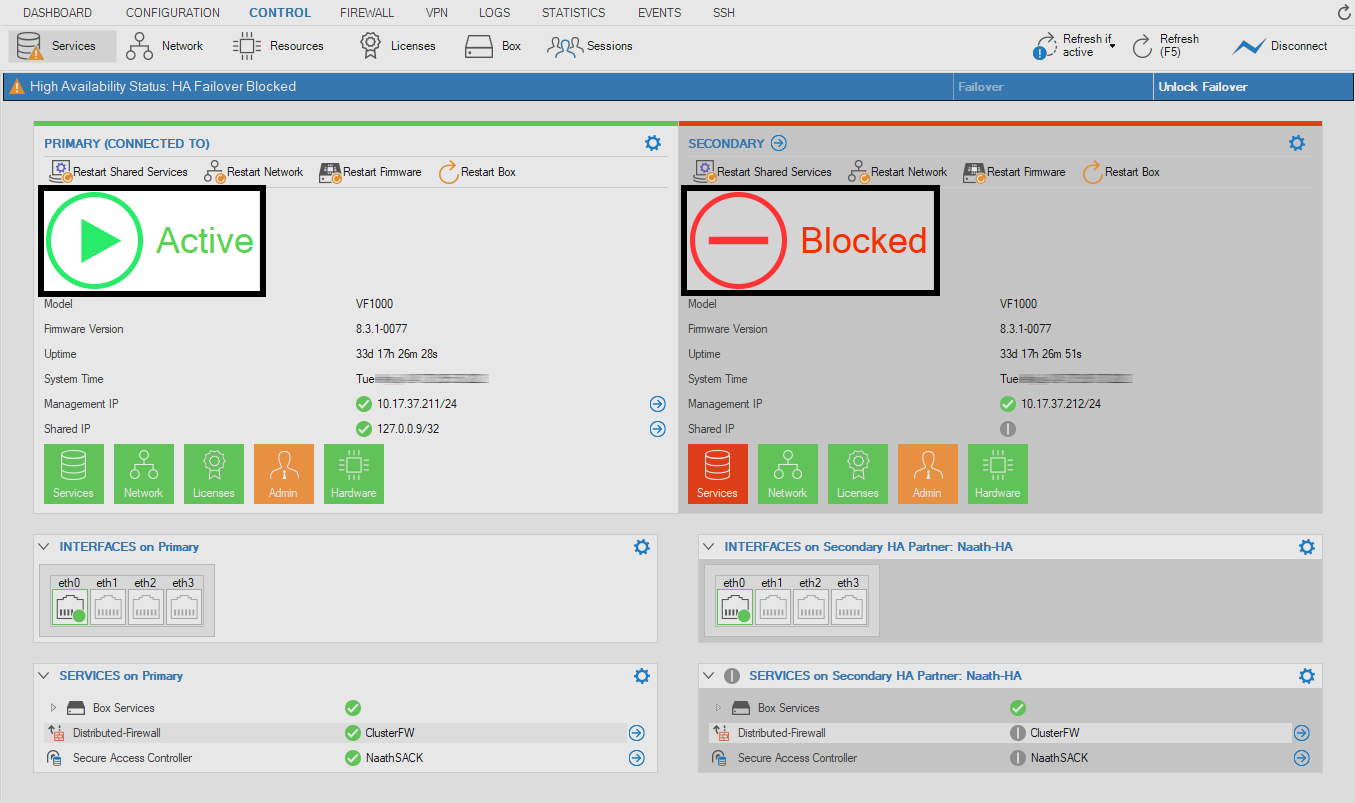
- The Services icon is displayed in red color, indicating that all services are currently blocked.
- Click Unlock Failover to switch the HA partners to their default state and prepare them for a future failover. All services on the secondary unit are displayed with a gray status bullet, indicating that they are prepared for the next HA failover.
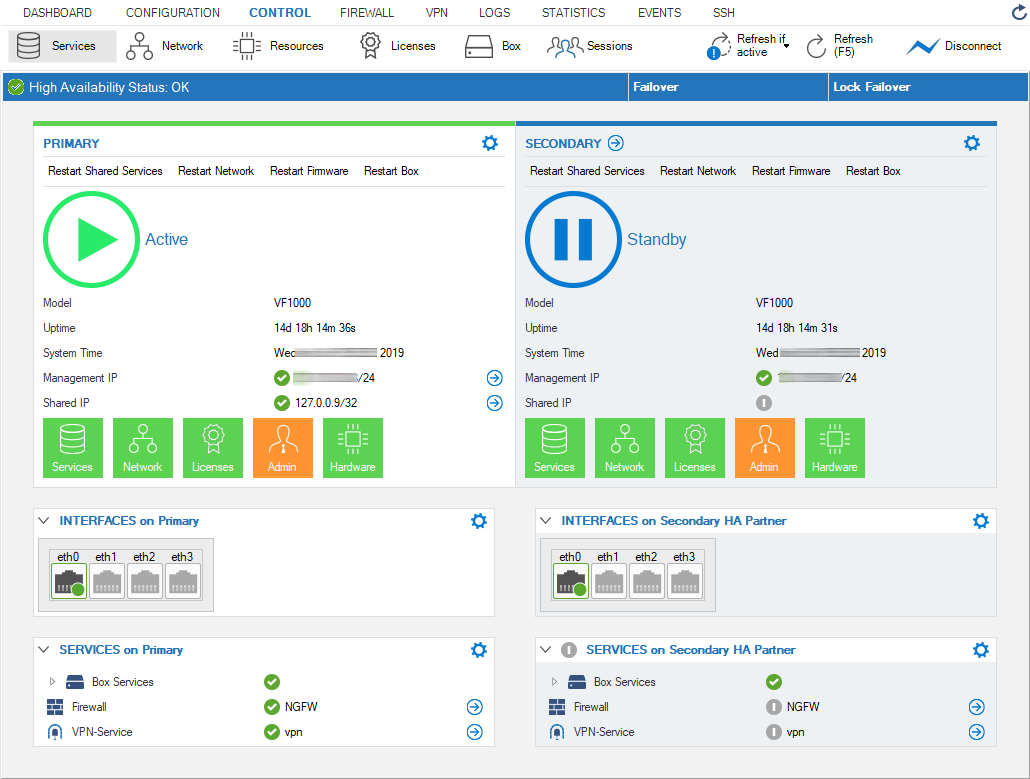
- In the HA status bar, the current state now reports: "High Availability Status: OK".
