When switching to a new hardware model for your managed firewalls, the configuration is migrated directly on the Control Center. To ensure that no incompatible configuration changes are pushed to the remote (source) firewall during this process, configuration updates must be blocked until the migration is complete and the new firewall is installed.
Before starting the migration, verify that the target model is running a firmware version matching the cluster version. Some configuration nodes, such as repository linked configurations containing model-specific settings and cluster-level shared services, must be migrated manually. Repositories containing no model-specific settings are migrated. Repository overrides using model-specific override setting are also migrated, as long as the underlying repository object can be migrated. The migration report lists all configuration nodes that need to be checked or migrated manually.
To finish the migration, activate the configuration changes, export the PAR file, and deploy the new firewall. When the new firewall is up and installed in place of the old appliance, unblock the configuration updates. If a second migration is required, you must unblock/block the configuration changes to be able to start the second migration.
Before You Begin
Verify that the firewall model you are migrating to is supported for the source model. For more information on the supported models, see Migrating to a New Hardware Model.
Step 1. Block Configuration Updates
Go to CONTROL > Configuration Updates.
Right-click on the firewall and click Block Updates.
The firewall no longer receives configuration updates. Configuration updates may not be unblocked until the hardware has been replaced; otherwise, the remote firewall will receive an invalid configuration.
Step 2. (optional) Migrate the Cluster Version
If required, migrate the cluster version. Migrating the cluster version will migrate the configuration for all firewalls in this cluster. If you only want to update one firewall, create a new cluster, move the firewall to the new cluster, and then migrate the cluster to the desired version.
Step 3. Migrate the Firewall Model
Go to CONFIGURATION > Configuration Tree.
Locate the firewall in the configuration tree.
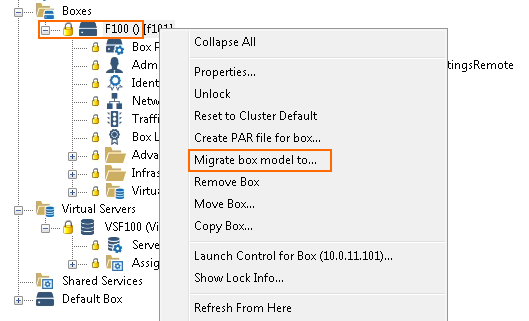
Right-click the firewall and click Lock.
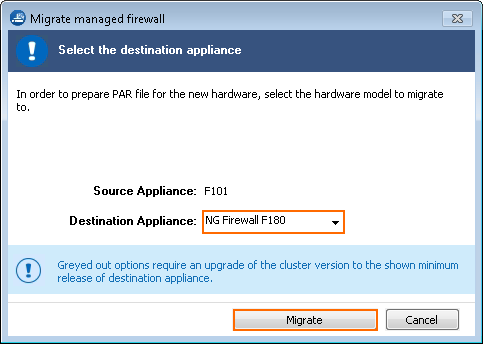
Right-click the firewall and click Migrate box model to. The Migrate managed firewall window opens.

Select the Destination Appliance. Only supported appliances are listed. If the model is greyed out, a cluster migration is required before being able to select this model.
Click Migrate.

(optional) Click Export Migration Report to save the log file of the migration.
Click Continue.
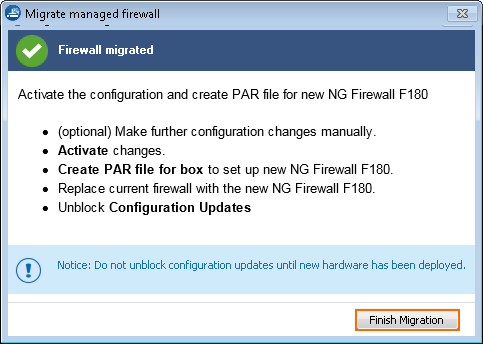
Click Finish Migration.

(if required) Complete manual migrations, or verify the configuration nodes listed by the migration wizard.
Click Activate.
Step 4. Export the PAR File and Deploy the New Firewall Model
Deploy the migrated firewall configuration via PAR file to the destination firewall. If required, reinstall the firewall with the desired firmware version.
Step 5. Unblock Configuration Updates
When the new firewall is in place and running instead of the old hardware, unblock configuration updates.
Go to CONTROL > Configuration Updates.
Right-click on the firewall and click Unblock Update.
