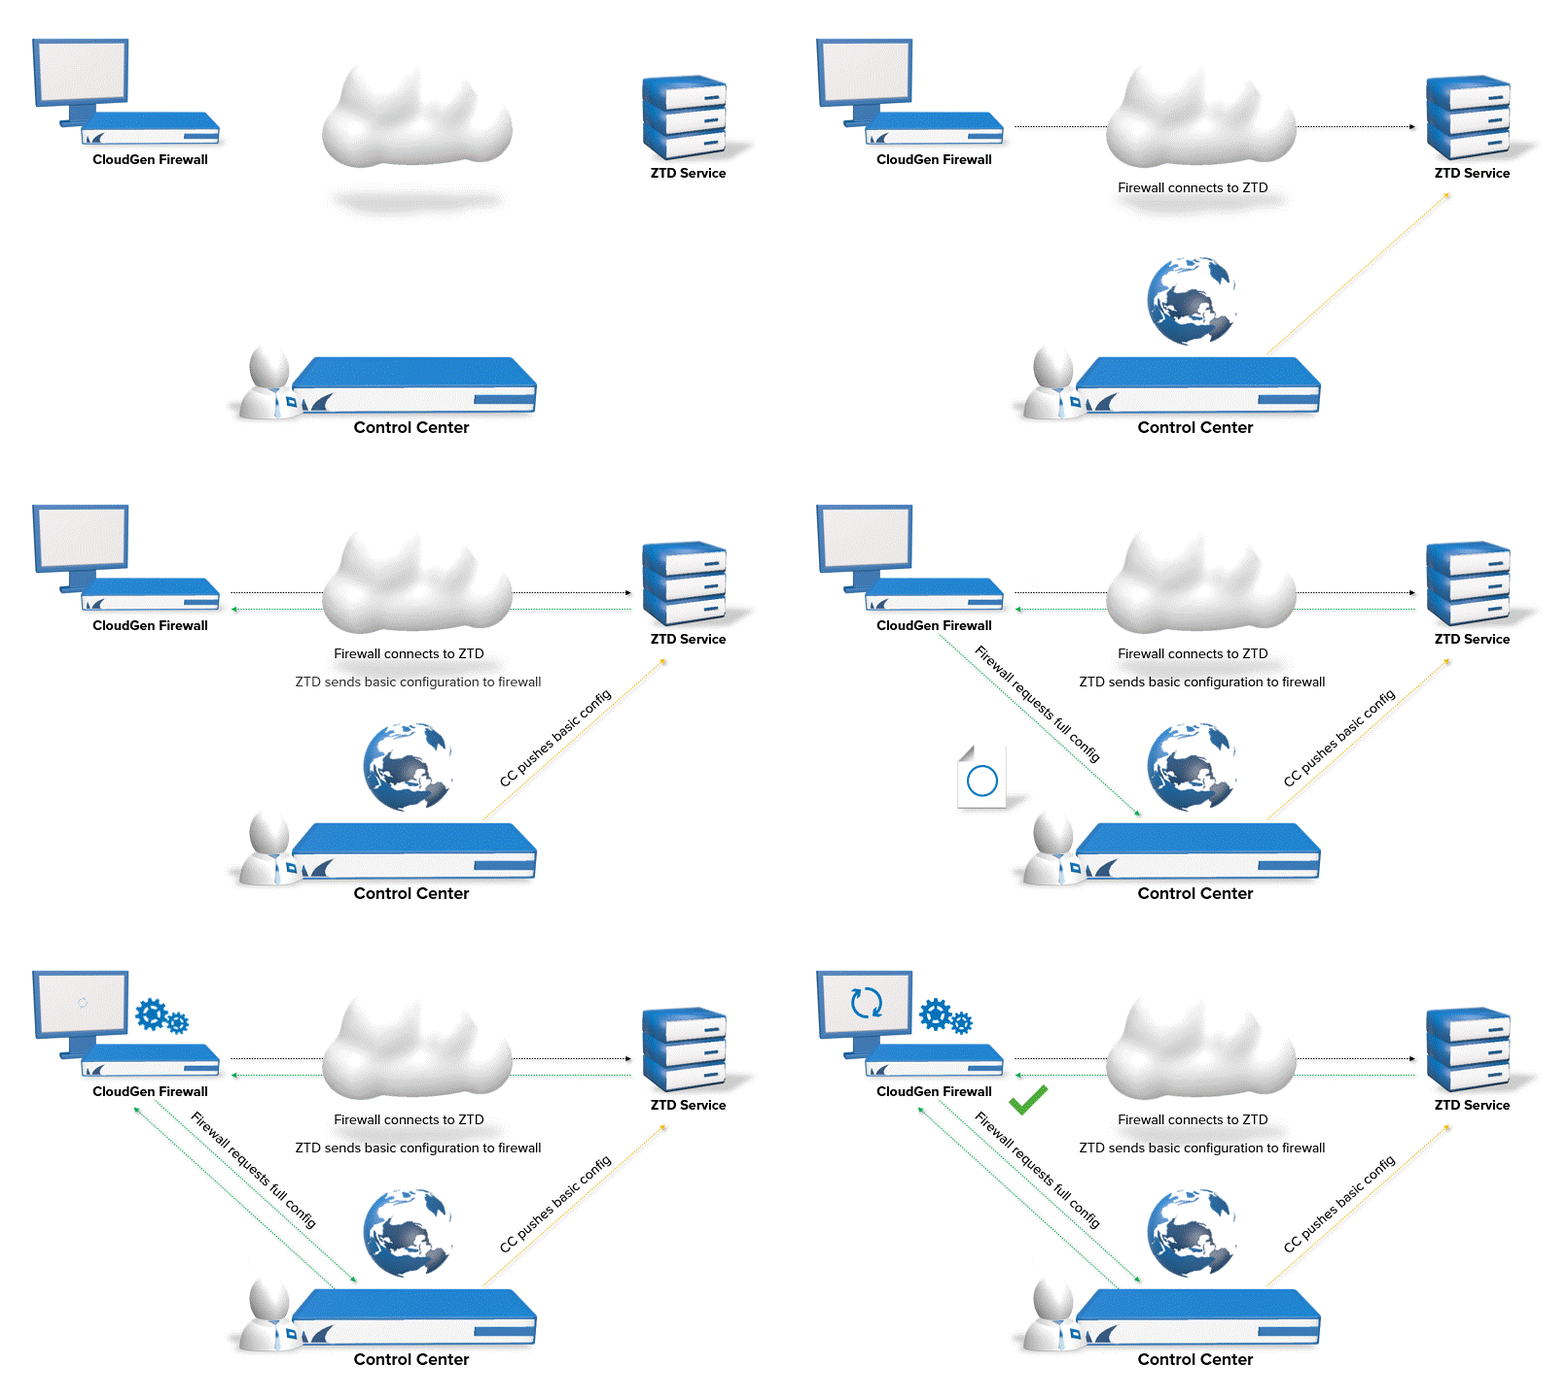
To deploy a firewall via Zero Touch Deployment (ZTD), the Control Center must be configured to sync with the Zero Touch Deployment service. Create the firewall configuration and push the basic configuration to the Zero Touch Deployment service. It is always recommended to order the firewall with the Zero Touch option. However, you can manually claim a firewall that was ordered without the Zero Touch option.
- Orders placed with ZTD option – The firewall is automatically assigned to the Control Center. It cannot be claimed manually via the linking code to avoid having the wrong customer claim the firewall.
- Orders placed without ZTD option – The firewall is not associated with a Control Center. Manually claim the firewall on the Control Center or in the Zero Touch Deployment service web interface using the serial number and linking code supplied in the order confirmation email from Barracuda Customer Services. Firewalls claimed by Control Center can no longer be claimed by another Control Center using the same BCC account to connect to the ZTD service.
Before You Begin
- Verify that the hardware firewall model is supported for Zero Touch Deployment.
- Verify that the appliance was ordered with the Zero Touch Deployment option, and that you received the order confirmation email with the serial number and linking code.
- Verify that the Control Center and the remote firewalls can access ztd.barracudanetworks.com.
Step 1. Configure Zero Touch Deployment Settings
Configure the Control Center to connect to the ZTD portal.
- Log into the Control Center.
- Go to CONFIGURATION > Configuration Tree > Multi-Range > CC Parameters.
- Click Lock.
- In the left menu, click Zero Touch Setup.
- Configure the Zero Touch Deployment Configuration:
- ZTD Service Server – Enter
https://ztd.barracudanetworks.com - ZTD Service Port – Enter
443

- ZTD Service Server – Enter
- In the left menu, click BCC Authentication.
- Enter the ZTD portal Username.
- Set the ZTD portal Password.

- Click Send Changes and Activate.
Step 2. Create the Firewall Configuration
Prepare the firewall configuration on the Control Center. Verify that the cluster version and the firmware installed on the firewall match.
- Go to CONFIGURATION > Configuration Tree > your range > your cluster > Boxes.
- Right-click Boxes and select either Create Box Wizard or Create Box.
For more information, see How to Add a New CloudGen Firewall to the Control Center and How to Configure a Remote Management Tunnel for a CloudGen Firewall.
Step 3. (Orders without ZTD option) Claim the Firewall
If the firewall was not part of a ZTD order, it can still be associated with the Control Center by manually claiming the appliance. The serial number and linking code required to claim a firewall is included in the invoice email and on the back of the Quick Start Guide included with the firewall. It is not possible to claim an appliance that has already been claimed on a different Control Center or that has been ordered as part of a ZTD order.
- Go to CONTROL > Zero Touch Deployment.
- Right-click on the firewall and select Claim Appliances for Zero Touch Deployment. The Claim Appliance from Zero Touch Deployment window opens.

- Enter the serial number and linking code.
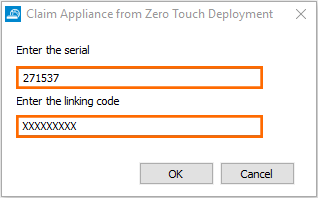
- Click OK.
Step 4. Push the Basic Configuration
Push the basic configuration for the claimed firewall to the Zero Touch Deployment service.
- Go to CONFIGURATION > Configuration Tree > your range > your cluster > Boxes > your firewall
- Depending on the managed type of firewall, continue accordingly:
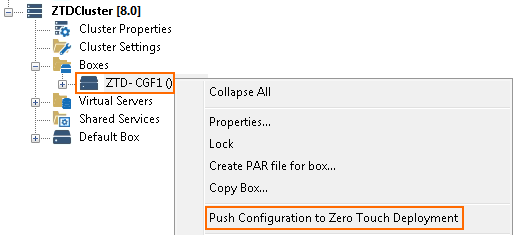
- For a managed single box, right-click the firewall and select Push Configuration to Zero Touch Deployment. The Push Configuration to Zero Touch Deployment window opens.
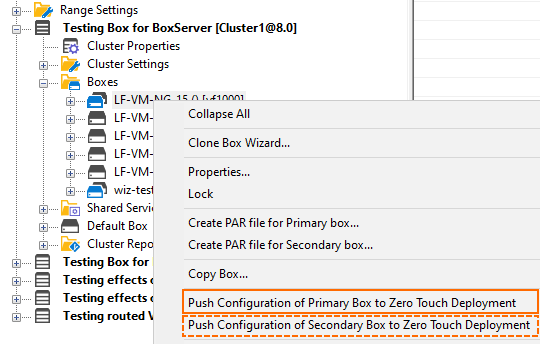
- For a managed HA pair of firewalls, right-click the firewall and select Push Configuration of Primary Box to Zero Touch Deployment for the primary firewall or Push Configuration of Secondary Box to Zero Touch Deployment for the secondary firewall.
- For a managed single box, right-click the firewall and select Push Configuration to Zero Touch Deployment. The Push Configuration to Zero Touch Deployment window opens.
- Select the matcher type to determine which firewall the basic configuration is assigned to.
- All – The new firewall connecting to ZTD is selected.
- Local IP/Subnet – The IP address or network assigned to the DHCP interface of the firewall.
- Public IP/Subnet – The public IP address, as seen by the ZTD portal.
- Serial Number – The serial number of the appliance.
- Depending on the matcher, enter the matching value.
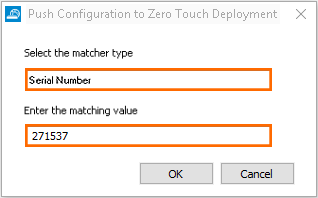
- Click OK.
Go to CONTROL > Zero-Touch Deployment and verify that the appliance state is In Progress.

As soon as the claimed firewall connects to ZTD, the firewall uses the basic configuration to connect to the Control Center. The ZTD status is Completed.

Troubleshooting information can be found in the Zero Touch Deployment service web interface or in the ZTD log file Box/Config/daemon.log and Box/Config/ztd.log
When pushing configurations from a CC to the ZTD service, the version number of the pushed configuration can even be lower than the firewall's firmware version as long as the version of the pushed configuration supports ZTD. However, this does not affect the need to keep a firewall's version in sync with existent range or cluster versions.
