To deploy the Barracuda CloudGen Firewall on Microsoft Azure using Azure PowerShell, you can upload a local VHD image to a managed Azure disk and then create an Azure gallery image definition.
Before You Begin
Download the CloudGen Firewall or Control Center VHD disk images from the Barracuda Download Portal.
Install Azure PowerShell version 7 or higher.
Log into your Azure account with
Login-AzureRmAccount.
Step 1. Upload the Local VHD as a Managed Disk
Open an Azure PowerShell.
To upload a local VHD file to a managed Azure disk, use the PowerShell command:
Add-AzVhd -LocalFilePath <path> -ResourceGroupName <resource-group> -Location <region> -DiskName <name> -DiskOsType Linux -DiskHyperVGeneration V1 [-DiskZone <zone>]For the command, replace the following details:
* path: full path to the local VHD file
* resource-group: name of the resource group where the managed disk will be created
* region: region where the managed disk will be created
* name: name of the managed disk
* zone: (optional) name of the availability zone, if high availability is desired (and supported by the chosen region)
This command first computes an MD5 checksum of the image and then starts the upload itself. When done, a managed disk will be created in the target region and resource group with the specified name.
Step 2. Create the Azure Gallery Image Version
Create an Azure gallery image version from the managed disk created in the previous step.
Log into the Azure portal: https://portal.azure.com
Go to the managed disk created at the previous point.
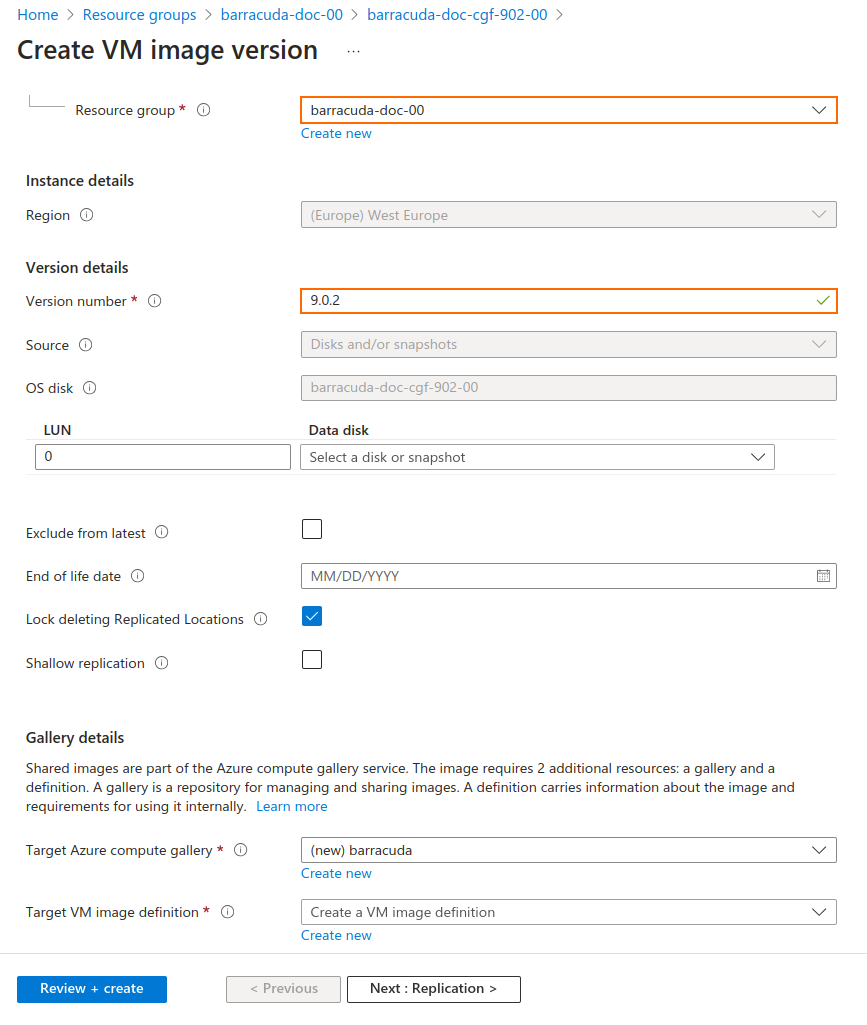
Select + Create VM image version.

The Create VM image version window opens.
Select the name of the Resource group that will hold the Azure gallery.
Enter the Version number of your Barracuda CloudGen Firewall.

In the Gallery details section, select a name for your gallery, or click Create new to create a new entry.
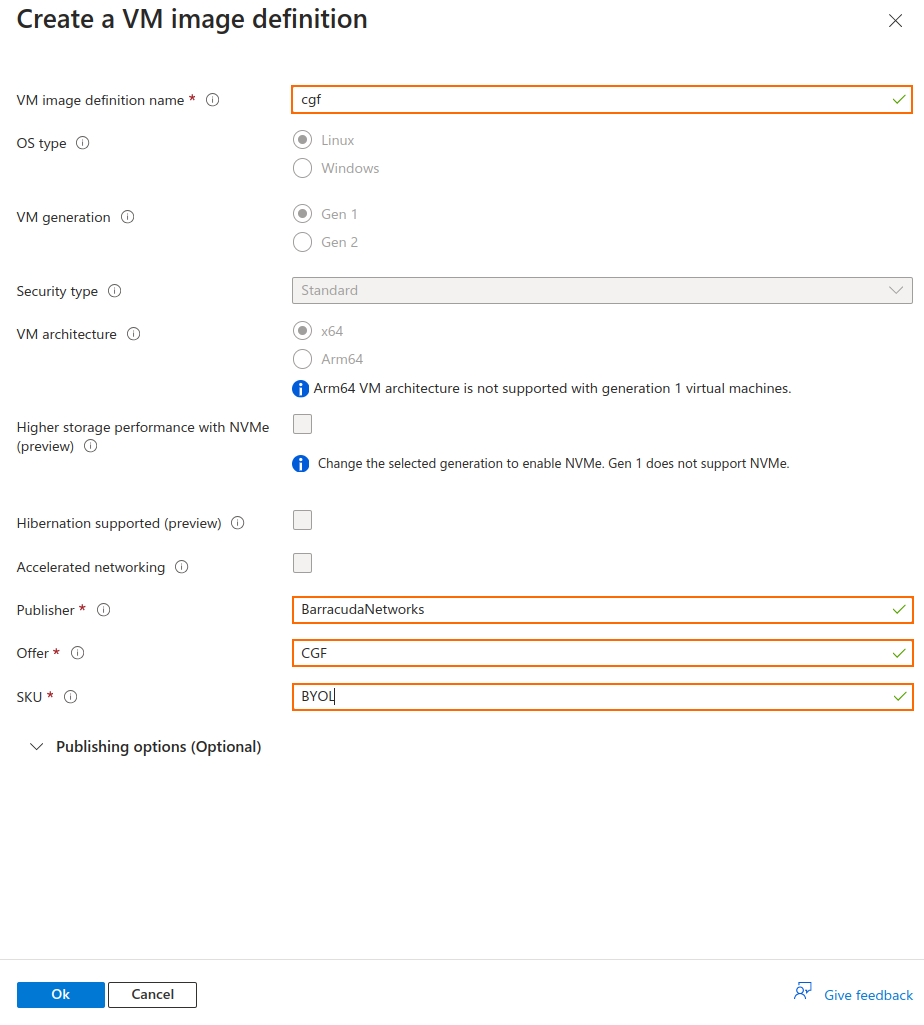
Click Create new to create a VM image definition.
The Create a VM image definition window opens. Fill in VM image definition name, Publisher, Offer, and SKU.

Click Ok.
Click Next : Replication.
In the Replication dialog, chose the number and the name of the regions holding replicas.
Click Next : Encryption.
In the Encryption dialog, leave the settings as default.

Click Next : Tags.
In the Tags dialog, add your tags if needed.
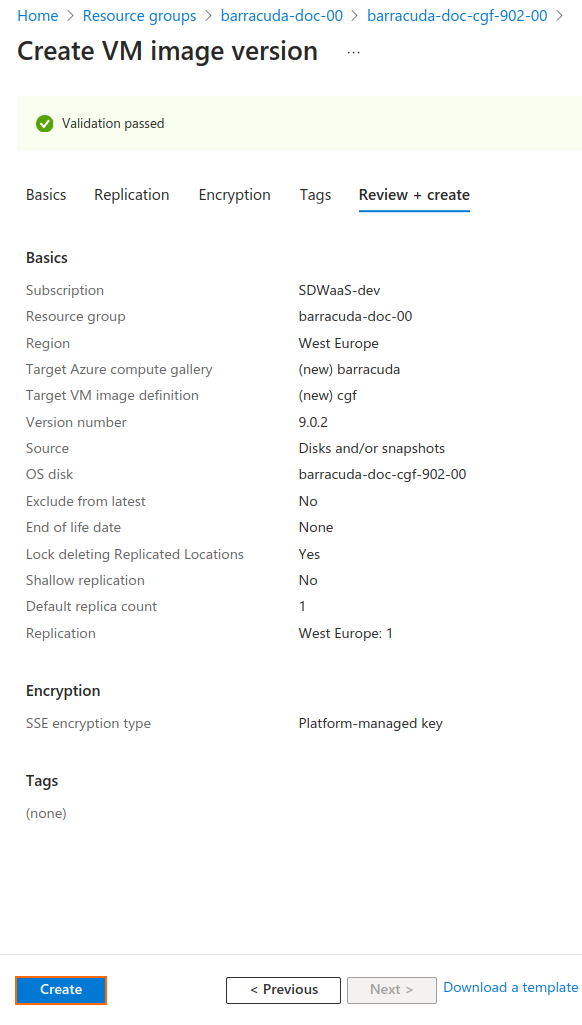
Click Review + create.

Review your settings and click Create. Wait for the deployment to finalize. Note that this can take some time depending on how fast the replication is done.
After the deployment is finalized, you can use the Azure gallery image definition to launch VM instances through the usual methods.
Next Steps
Deploy a CloudGen Firewall VM using the uploaded source image via Azure PowerShell. For more information, see How to Deploy a CloudGen Firewall in Microsoft Azure Using PowerShell and ARM.
