Choosing to do so is optional for firmware release 8.0.2 and will be enforced in the upcoming firmware versions.
The following table shows the different versions of how to migrate the server node to the new Assigned Services node:
| Type of Firewall | Follow Migration Instructions |
|---|---|
| Stand-alone firewalls and CC (box-level only) | How to Migrate the Server Node to the Assigned Services Node for Stand-Alone Firewall and Control Centers (Box-Level only) |
| CC-managed firewalls | How to Migrate the Server Node to the Assigned Services Node for CC-Managed Firewalls |
| Stand-alone HA pairs | How to Migrate the Server Node to the Assigned Services Node for Stand-Alone HA Pairs |
| CC-managed HA pairs | How to Migrate the Server Node to the Assigned Services Node for CC-Managed HA Pairs |
Known Issue after Box-Server Migration
After migrating the server node for CC-managed boxes, the status of the affected box will display the incorrect status No in the column Has Service Container in CC > CONFIGURATION:
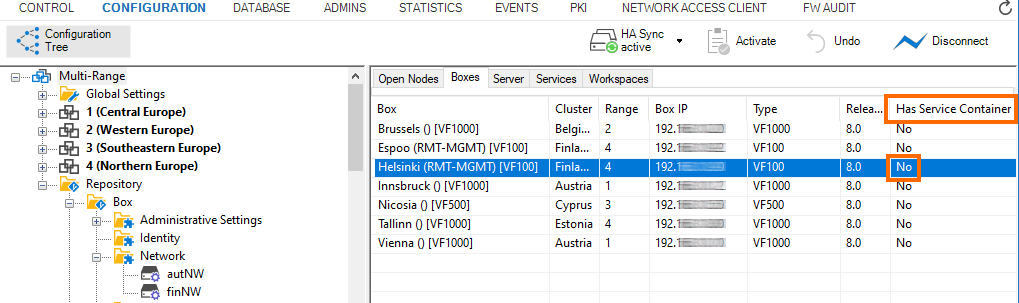
In addition, an incorrect status of the box is displayed in CC > CONTROL:
As a workaround, you can execute the command-line tool conftool r - rebuild_db which will update the database. As a result, the status of the migrated box will be displayed correctly.
Before You Begin
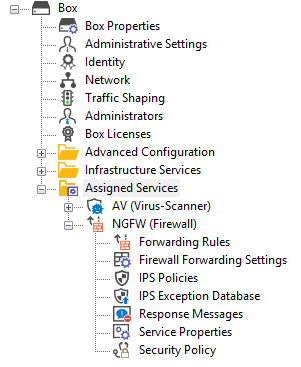
- Make sure you are familiar with the difference between the old 3-layer and the new 2-layer structure. For more information, see Understanding Assigned Services.
- The firewall/CC must have been upgraded from firmware version 7.x to 8.0.1 or 8.0.2.
- On a Control Center, the feature level for clusters must set to 8.0.
- The configuration tree must display the old 3-layer structure with a virtual server node.
How to Migrate the Server Node to the Assigned Services Node for Stand-Alone Firewall and Control Centers (Box-Level Only)
- Log into the firewall or Control Center on box level.
- Right-click Box.
- The window with the menu is displayed.
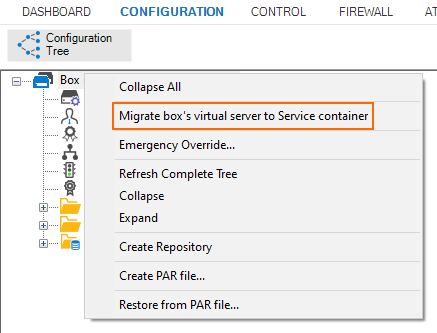
- In the list, click Migrate box's virtual server to Service container.
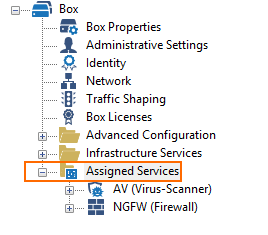
- The old 3-layer server-service node with the name Virtual Servers will be transformed into the new 2-layer service node with the name Assigned Services.
- When the conversion is completed, the configuration tree will contain the node Assigned Services.
How to Migrate the Server Node to the Assigned Services Node for CC-Managed Firewalls
Before You Begin
- On a Control Center, the feature level for the cluster the firewall lives in must be set to 8.0. For more information, see How to Manage Ranges and Clusters.
Migrating the Server Node
- Log into the Control Center that manages the target firewall.
- Go to CONFIGURATION > Configuration Tree > Multi Range > your range > your cluster > Boxes > your box.
- Right-click Box.
- The window with the menu is displayed.
- In the list, click Migrate box's virtual server to Service container.
- When the conversion is completed, the configuration tree will contain the node Assigned Services.
How to Migrate the Server Node to the Assigned Services Node for Stand-Alone HA Pairs
Before You Begin
- This example assumes that you have an unmanaged/stand-alone pair of HA firewalls running.
Migrating the Server Node
Step 1. Block the Server on the Secondary Firewall.
- Log into the secondary firewall.
- Go to CONTROL.
- Click Block server.
Step 2. Remove the HA Box Node for the Secondary on the Primary Firewall.
- Log into the primary firewall.
- Go to CONFIGURATION > Box > HA Box.
- Right-click HA Box.
- In the list, click Lock.
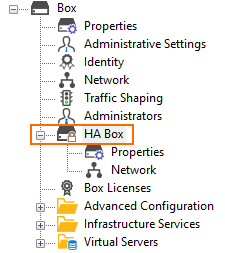
- Right-click HA Box.
- In the list, click Remove.
- The node for HA box will be marked for deletion.
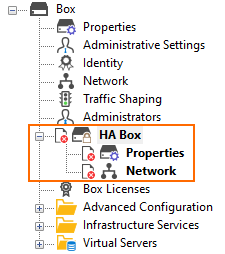
- Click Send Changes.
- Click Activate.
Step 3. Migrate the Virtual Server on the Primary Box.
- Right-click Box.
- In the list, click Migrate box's virtual server to Service container.
- The window for Migrating Box's Server to Container Server is displayed.
- Click OK.
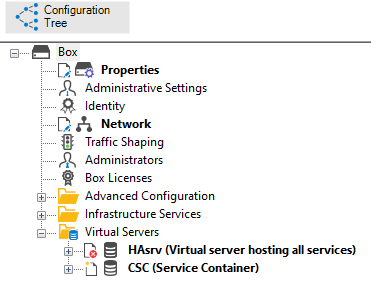
- The configuration tree will display the following:
- A new Network node.
- A new container for the services, CSC(Service Container).
- A red deletion symbol on the old server node.
- Click Activate.
- After the server node has been migrated, the configuration tree will display the new Assigned Services node.
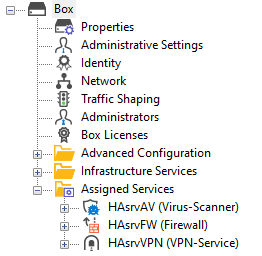
- The names of the services will now consist of 'HAsrv' appended with the name of the service, e.g., HAsrvAV, HAsrvFW, HAsrvVPN.
Step 4. Create the Secondary Box on the Primary Firewall.
- Right-click Box.
- In the list, click Create Secondary Box.
- The Network window for entering the MIP for the secondary firewall is displayed.
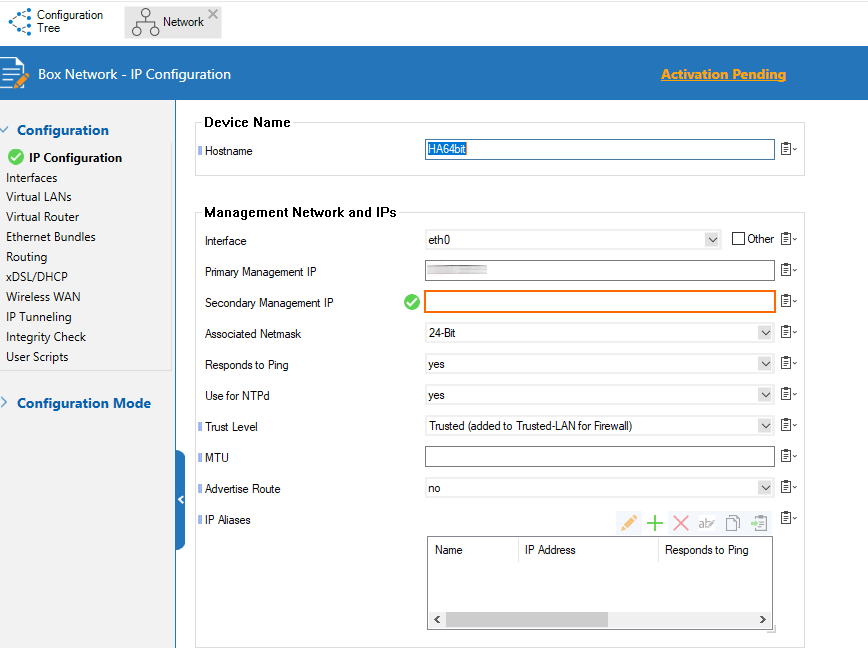
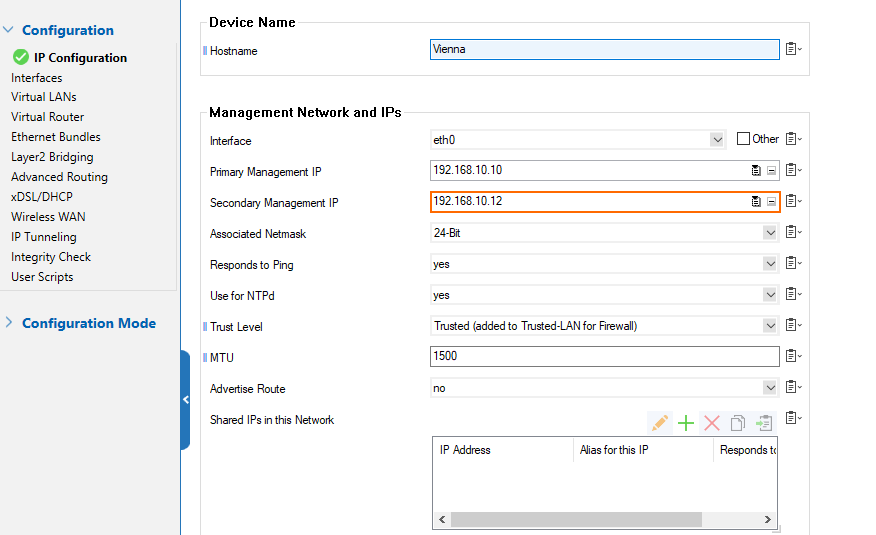
- For Secondary Management IP, enter the IP address.
- Click Send Changes.
- Click Activate.
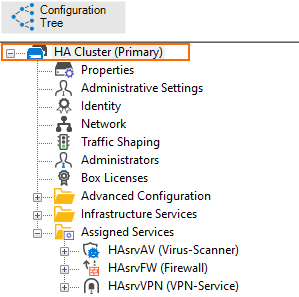
- After the creation of the secondary box, the configuration tree on the primary firewall will display the name HA Cluster (Primary).
Step 5. Reactivate the Network Configuration
- Go to CONTROL > Box.
- In the left navigation bar, click Network.
- In the left navigation bar, click Activate new network configuration.
Step 6. Create the PAR file for the Secondary Firewall
The new configuration must be propagated to the primary firewall.
- Go to CONFIGURATION > Configuration > Box.
- Right-click Box and select Create PAR file for secondary box…
- Save the PAR file for the secondary firewall.
- Reconnect to the primary firewall to see the new CONTROL window.
Step 7. Import the PAR file into the Secondary Firewall
- Log into the secondary firewall.
- Go to CONFIGURATION > Configuration Tree > Box.
- Right-click Box and select Emergency Override.
- Right-click Box and select Restore from PAR file.
- Click OK.
- Click Activate.
Step 8. Reactivate the Network Configuration
- Go to CONTROL > Box.
- In the left navigation bar, click Network.
- In the left navigation bar, click Activate new network configuration.
Step 9. Reconnect to Both Firewalls to See the New CONTROL Window
Do the following steps on both the primary and secondary firewall:
- Go to CONFIGURATION.
- Click Disconnect on the right side of the ribbon bar.
- The session to the firewall will be terminated.
- Click Connect on the right side of the ribbon bar to reconnect to the firewall.
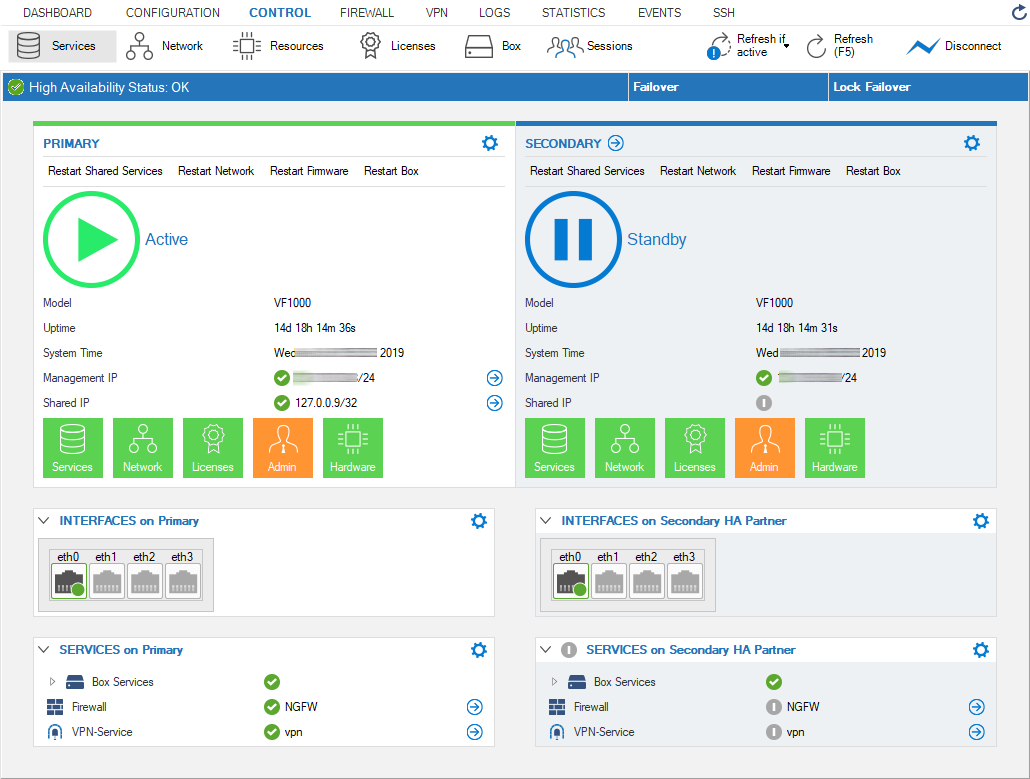
- Go to CONFIGURATION > CONTROL.
- The window now displays the new controls.
How to Migrate the Server Node to the Assigned Services Node for CC-Managed HA Pairs
Before You Begin
- All repository links that refer to the Network node must be unlinked.
Step 1. Migrate the Primary Firewall
- Right-click Box.
- In the list, click Migrate box's virtual server to Service container.
- A window is displayed that asks you if you want to keep the server or remove it.
- Confirm which option is more important to you. In case you keep the server, it will stay in the configuration tree but will no longer have any function.
- The window for Migrating Box's Server to Container Server is displayed.
- Click OK.
Step 2. Delete the Secondary Firewall
The secondary firewall must be deleted in the configuration tree because it will be managed via the primary firewall.
- Right-click Box of your secondary firewall.
- In the list, click Lock.
- Right-click Box of your secondary firewall.
- In the list, click Remove.
- Click Activate.
Step 3. Create the PAR File for the Secondary Firewall
On the primary firewall, right-click Box.
- In the list, select Create Secondary box.
- In the file selection window, provide a file name for the PAR file.
- Go to Network.
- Provide the IP address for the Secondary Management IP.
- Click Send Changes / Activate.
- The node for the secondary firewall will disappear from the configuration tree. From now on, the secondary firewall will be configured via the primary firewall. Therefore, only the node for the primary firewall will be visible in the configuration tree.
- Right-click Box for the primary firewall.
- In the list, click Create PAR file for secondary.
Step 4. Import the PAR File on the Secondary Firewall
- In the CC, click Status Map.
- Locate the secondary firewall in the list of managed firewalls. The name of the new secondary firewall will now have the name of the box trailed by the appendix "-HA", e.g., MyBox-HA.
- In the Status Map, double-click the entry of the secondary firewall.
- On the secondary firewall, go to CONFIGURATION.
- Right-click Box.
- Click Emergency Override.
- Right-click Box.
- Click Restore from PAR File.
- In the file selection window, select the PAR file to restore.
- Click Activate.
- Go to CONTROL > Box.
- In the left navigation bar, click Network to expand the list.
- In the list, click Activate new network configuration.
- In the ribbon bar, click Disconnect to close the session to the secondary firewall.
- In the ribbon bar, click Connect to re-establish a new session to the secondary firewall.
- Go to CONTROL to see the new window contents.