

Aerohive devices running HiveOS such as Aerohive Access Points must be able to communicate with either the cloud or the on-premises HiveManager NG management portal. Create access rules allowing the management traffic from the access points to the HiveManager NG. If an on-premises HiveManager NG appliance is used, the appliance must also be allowed to download firmware updates from the Aerohive cloud.
Step 1. Configure DHCP Reservations for Each AP
To ensure that the access points receive the same DHCP IP each time, configure DHCP reservations for each access point. Alternatively, it is also possible to reconfigure the Aerohive access points to use static IP addresses.
For more information, see How to Configure DHCP IP Address Reservations.
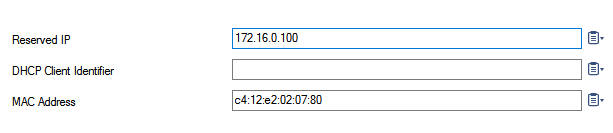
The access points are now listed with their reserved IP addresses on the DHCP tab:

Step 2. Create Service Object for Aerohive Management Traffic
Create a service object for the communication between the access point and the Aerohive HiveManager NG.
- Go to CONFIGURATION > Configuration Tree > Box > Assigned Services > Firewall > Forwarding Rules.
- In the left menu, click Services.
- Click Lock.
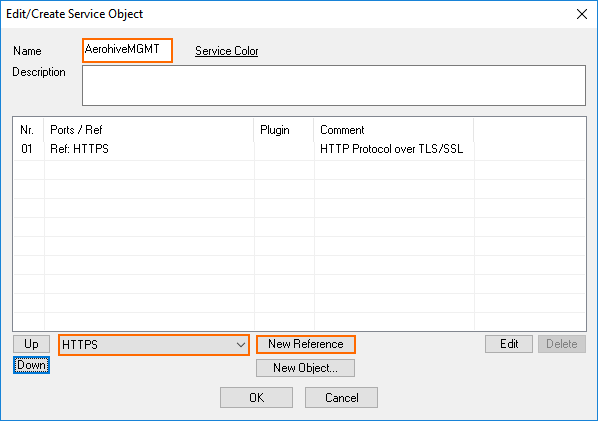
- Right-click the table and select New. The Edit/Create Service Object window opens.
- Enter the Name. E.g.,
AerohiveMGMT - Select HTTPS from the references drop-down list and click New Reference.
- Click New Object to configure a new object. The Service Entry Parameters window opens.
- IP Protocol – Select 017 UDP.
- Port Range – Enter
12222

- Click OK.
- Click New Object to configure a new object. The Service Entry Parameters window opens.
- IP Protocol – Select 006 TCP.
- Port Range – Enter
2083.
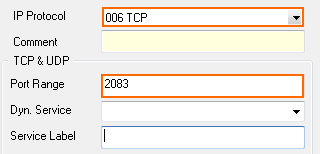
- Click OK.
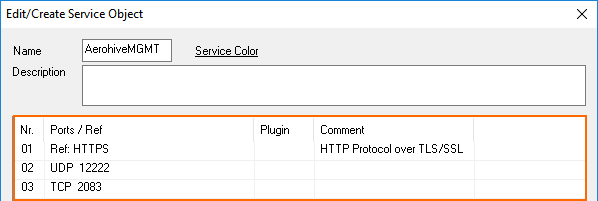
- Click OK.
- Click Send Changes and Activate.
Step 3. Create Network Object Containing the IP Addresses of the Access Points
- Go to CONFIGURATION > Configuration Tree > Box > Assigned Services > Firewall > Forwarding Rules.
- In the left menu, click Networks.
- Click Lock.
- Right-click the table and select New. The Edit/Create Network Object window opens.
- From the Type drop-down list, select List of IPv4 Addresses.
- Enter a Name for the network object. E.g.,
AerohiveAccessPoints - For each access point, click + in the Include Entries section:
- IP – Enter the IP address of the access point.
- Interface (optional) – Enter the firewall interface the access point is plugged into.
- Click Insert to add additional entries, or Insert and Close to insert when your are done.
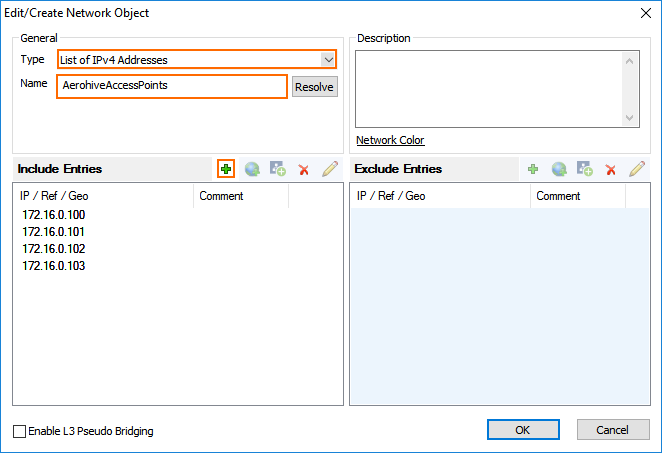
- Click OK.
This network object must be updated if access points are removed or additional access points are added to the network.
Step 4. Create Access Rule to Allow Traffic from the HiveOS Device to the Aerohive HiveManager NG
- Go to CONFIGURATION > Configuration Tree > Box > Assigned Services > Firewall > Forwarding Rules.
- Click Lock.
- Either click the plus icon (+) at the top right of the ruleset, or right-click the ruleset and select New > Rule.

- Select Pass as the action.
- Enter a Name for the rule.
- Configure the access rule:
- Source – Select the network object containing the Aerohive access points created in Step 3.
- Destination – Select Internet to use Aerohive Manager NG Public Cloud, or enter the IP address of the Aerohive Manager NG appliance.
- Service – Select the service object created in Step 2.
- Connection Method – Select Dynamic NAT if you are using Aerohive Manager NG Public Cloud, or Original Source IP for the Aerohive Manager NG appliance.
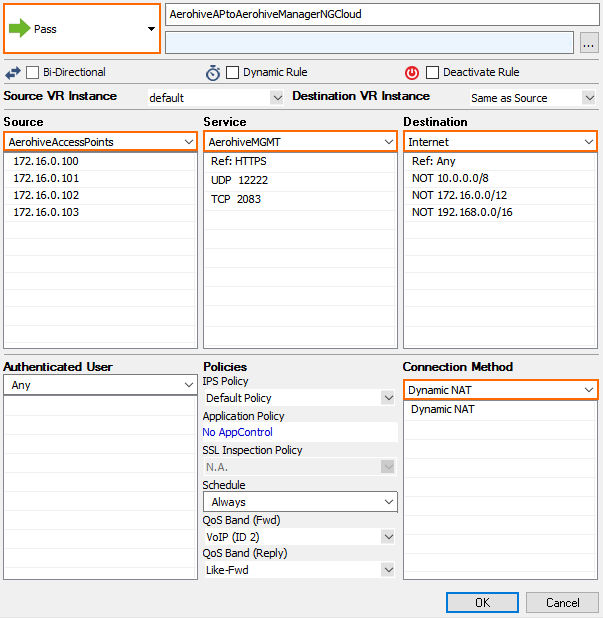
- Click OK.
- Click Send Changes and Activate.
The access points can now communicate with the HiveManager NG.
Step 4. (HiveManager NG Appliance Only) Allow the HiveManager NG Appliance to Download Firmware Updates from the Update Servers
Step 4.1. Create a Hostname Network Object
- Go to CONFIGURATION > Configuration Tree > Box > Assigned Services > Firewall > Forwarding Rules.
- In the left menu, click Networks.
- Click Lock.
- Right-click the table and select New. The Edit/Create Network Object window opens.
- Configure the hostname network object:
- Type – Select Hostname (DNS Resolved).
- Name – Enter
hmupdates-ng.aerohive.com
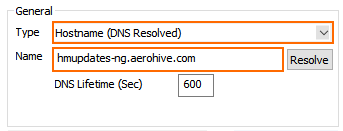
- Click OK.
- Click Send Changes and Activate.
Step 4.2. Create an Access Rule to Allow the Appliance to Download Firmware Updates
- Go to CONFIGURATION > Configuration Tree > Box > Assigned Services > Firewall > Forwarding Rules.
- Click Lock.
- Either click the plus icon (+) at the top right of the ruleset, or right-click the ruleset and select New > Rule.
- Select Pass as the action.
- Enter a Name for the rule.
- Configure the access rule:
- Source – Enter the IP address of the Aerohive HiveManager NG appliance.
- Destination – Select the hostname network object created in Step 4.1.
- Service – Select HTTPS.
- Connection Method – Select Dynamic NAT.
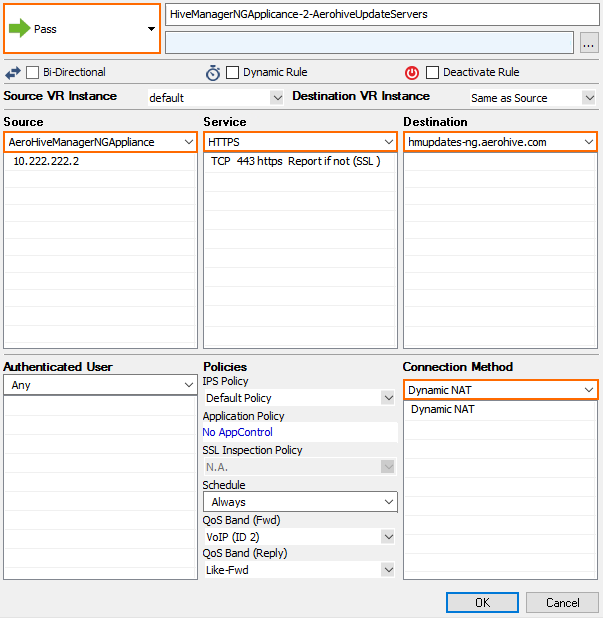
- Click OK.
- Click Send Changes and Activate.
Your Aerohive devices running HiveOS can now communicate with their on-premises or cloud HiveManager NG.