

Inbound TLS Inspection allows the firewall to decrypt and secure inbound TLS connections to servers or services behind the firewall. The firewall uses the server's TLS certificate to terminate the connection. This allows the firewall to define the allowed cipher sets and minimum TLS version used for the connection. The traffic is then scanned, and the configured policies are applied. The firewall then creates a TLS connection to the server and forwards the traffic to its destination.

Before You Begin
Create a TLS Inspection policy for inbound TLS Inspection. For more information, see How to Create a TLS Inspection Policy for Inbound TLS Inspection.
Step 1. Enable TLS Inspection
- Go to CONFIGURATION > Configuration Tree > Box > Assigned Services > Firewall > Security Policy.
- Click Lock.
Expand the Enable TLS Inspection drop-down list and enable TLS Inspection.
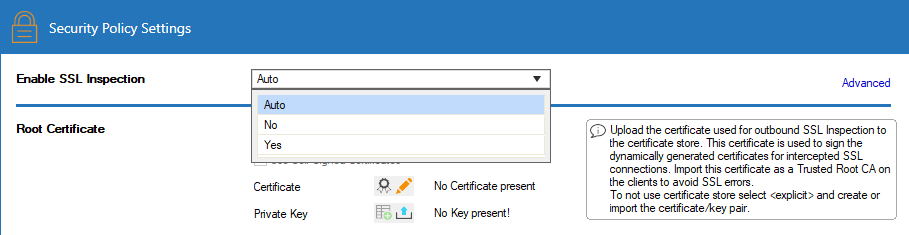
- Click Send Changes and Activate.
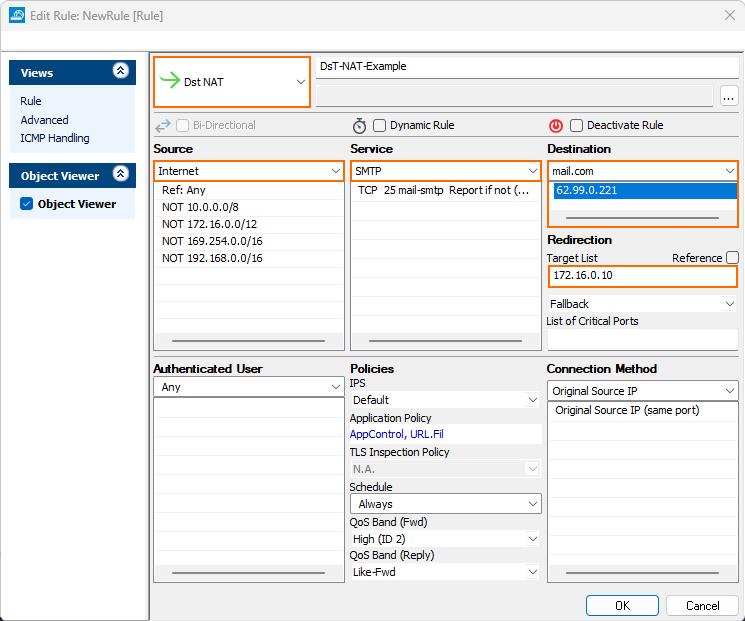
Step 2. Create Access Rule with Inbound TLS Inspection
Enable TLS Inspection on the Dst NAT access rule forwarding traffic to the internal server.
- Go to CONFIGURATION > Configuration Tree > Box > Assigned Services > Firewall > Forwarding Rules.
- Click Lock.
- Either click the plus icon (+) in the top right of the ruleset or right-click the ruleset and select New > Rule.
- Select Dst NAT as the action.
- Enter a Name for the rule.
- Specify the following settings that must be matched by the traffic to be handled by the access rule:
- Source – Select Internet.
- Destination – Select the network object containing the external IP address of the firewall.
Service – Select the service(s) for which inbound TLS inspection should be used. For example, select SMTP.
Target List – Enter the internal IP address(es) of the server, or select a network object containing the web server IP addresses. For more information, see How to Create a Destination NAT Access Rule.
Connection Method – Select Original Source IP.
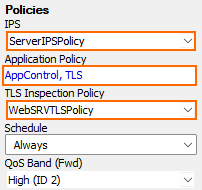
- From the IPS Policy drop-down list, select the IPS policy.
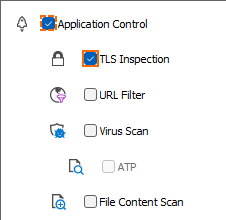
Click the Application Policy link and select:
- Application Control – Required.
- TLS Inspection – Required.
- Virus Scan – Optional.
- ATP – Optional.
- File Content Scan – Optional.
- Application Control – Required.
- From the TLS Inspection Policy drop-down list, select a TLS Inspection policy for inbound inspection. For more information, see How to Create a TLS Inspection Policy for Inbound TLS Inspection.
- Click OK.
- Click Send Changes and Activate.
Incoming TLS connections are now terminated on the firewall before being forwarded to the internal server.
Monitoring and Troubleshooting
TLS Inspection error messages are written in the Firewall/SSL.log file. On the FIREWALL > Live page, the State column shows the padlock ( ) icon for SSL-inspected connections.