

The VPN GTI Editor page provides an easy way to create VPN site-to-site tunnels and displays VPN tunnels that are created on a graphical interface. To access the VPN GTI Editor page, go to CONFIGURATION > Configuration Tree > Multi-Range > Global Settings > VPN GTI Editor.
The page is divided into two main sections:
- Details Section
- Canvas Section
Details Section
The upper section of the VPN GTI Editor page displays all VPN groups, VPN services, WAN Optimization, and VPN root certificates that have been configured on the Control Center.
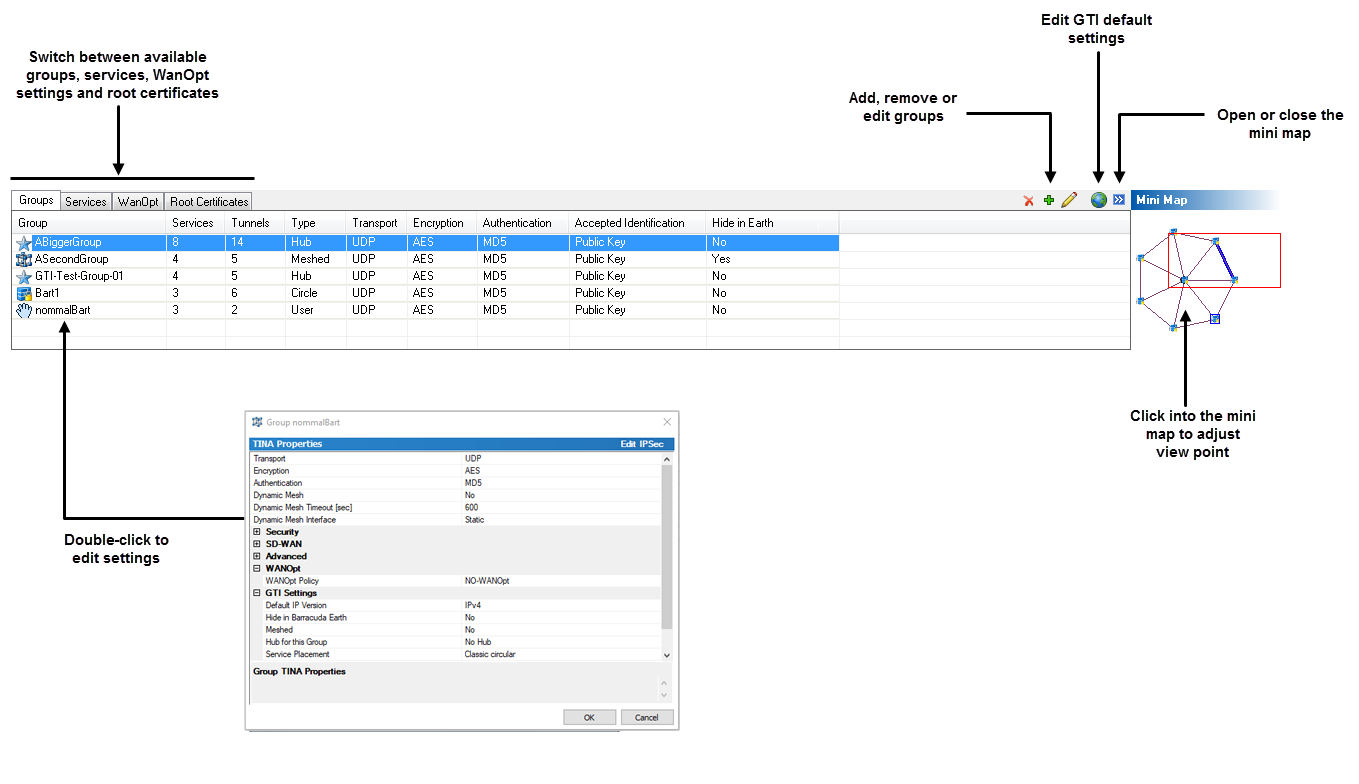
All information displayed in the Details section is arranged by tabs:
Groups Tab
Group – Name of the VPN group. An icon indicates how the VPN tunnels are configured and placed in the canvas map.
Icon Description 
Meshed topology. 
Meshed topology with user-defined placement. 
Not meshed. Hub- or user-defined placement. 
Hub topology without user-defined placement. 
User-defined topology. If active, you can drag and drop the according VPN service inside the canvas map. This can be helpful if multiple VPN tunnels overlap when placed automatically.
- Services – Number of services that are part of this group.
- Tunnels – Number of tunnels within the group.
- Type – Group topology.
- Transport – Transport protocol used.
- Encryption – Encryption method used.
- Authentication – Packet header authentication used/required.
- Accepted Identification – Identification method used/required.
- Hide in Earth – Visible/hidden in Barracuda Earth.
Services Tab
Server – Name of the virtual server this VPN service belongs to.
No icon The VPN service was not added to the GTI or is not part of any group. 
External VPN service. 
The service is added to the GTI. - Groups – Name of groups this VPN service is used in.
- Range – Range this VPN service is used in.
- Cluster – Cluster this VPN service is used in.
- Service – VPN service name.
- Internal Name – Internal service name.
WanOpt Tab
This tab contains the Wan Optimization policies. For further details on how to configure WanOpt, see How to Configure WAN Optimization Policies.
Root Certificates Tab
This tab contains the VPN root certificates that have been configured on the Control Center. For further details on how to configure VPN root certificates, see How to Set Up Barracuda VPN CA VPN Certificates.
Canvas Section
The lower section of the VPN GTI Editor page displays each CloudGen Firewall that has been configured in the VPN group. You can create VPN tunnels by dragging a system to its peer.
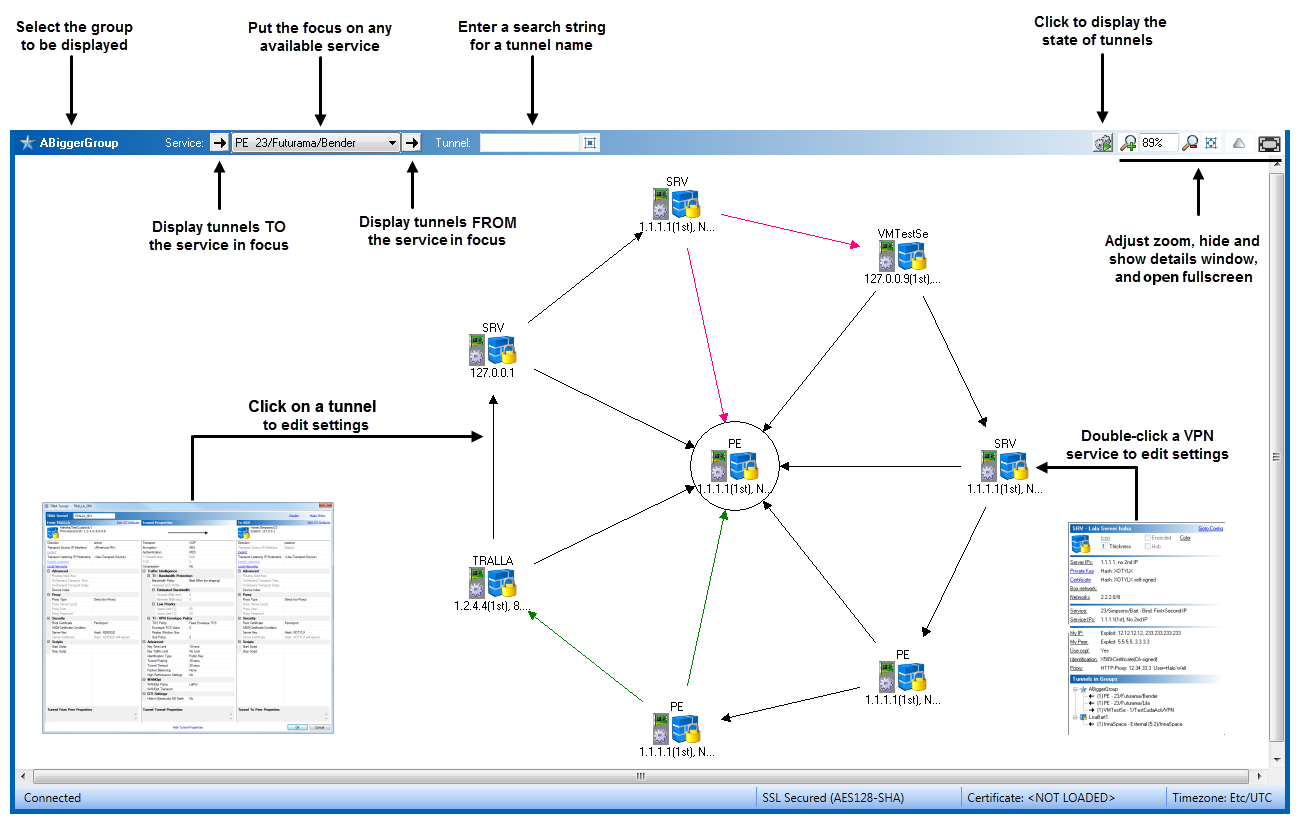
After creating VPN tunnels, you can view the following information about the tunnels:
- VPN Service Name – The name is formatted as <server-name> service-name/cluster/range.
- Configured Server IP Addresses – Optionally, explicit service IPs.
- Status – The status of the VPN tunnel is indicated by the following colors:
- black – Enabled tunnel
- grey – Disabled tunnel
- Protocol – The protocol of the VPN tunnel is indicated by the following lines:
- solid line – TINA tunnel
- dotted line – IPsec tunnel
- Direction – The direction of the tunnel is indicated by an arrow to the designated tunnel endpoints. The direction of the arrows also indicate the tunnel type:
- Tunnels flagged with one arrow tip – Active-passive tunnel (the arrow points to the passive tunnel endpoint)
- Tunnels flagged with arrow tips on both ends – Active-active tunnel