

To ease deployment, the Barracuda CloudGen Firewall Vx units are available as prebuilt OVA images that can be imported into your VMware hypervisor. You do not need to create or configure a virtual machine (VM). Before deploying the CloudGen Firewall Vx unit, verify that the host system meets the minimum storage requirements and review the resource recommendations for the production system. You can deploy the firewall using either the VMware vSphere Client or the VMware OVF Tool (ovftool).
Before You Begin
- For information regarding the sizing of your CPU, disk, and RAM, see Virtual Systems (Vx).
- Before you start the Barracuda CloudGen Firewall Vx for the first time, assign a manual MAC address to the first virtual network interface. This lets you move the VM later without invalidating your license. For more information, see Best Practice - Performance Tuning on VMware Hypervisors.
- Download the VMware OVA image from the Barracuda Download Portal.
- Ensure that you have claimed your firewall at
ztd.barracudanetworks.com. Without claiming your firewall prior to deploying it, activation will fail. - While you are performing the steps listed below, you must send the token that you received in your purchase mail with the serial. Ensure that the firewall to be deployed is not connected behind another appliance that catches network traffic for packet inspection because this will break the activation process!
Use the VMware vSphere Client
The following instructions require VMware's Hypervisor ESXi 7.0 and a CGF OVA file.
To start the deployment of a new CloudGen Firewall, perform the following steps:
Create a Virtual Firewall on Your ESXi Hypervisor
Step 1. Start the Deployment on the VMware Hypervisor.
- Log into your VMware Hypervisor and go to the menu for creating a new virtual machine.
- The window New virtual machine opens.
- From the menu list in the main view, select Deploy a virtual machine from an OVF or OVA file.
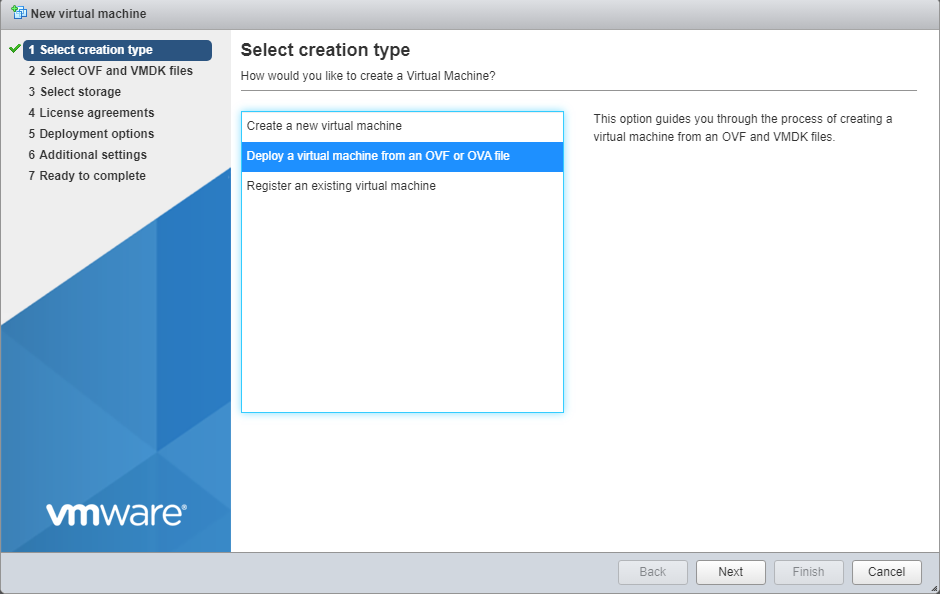
- Click Next.
Step 2. Select the OVA for the VM You Want to Deploy
- Select a meaningful name for your CloudGen Firewall, e.g., CGF-8.3.1
- Enter the name of your CloudGen Firewall into the edit field.
- Drag the symbol of your OVA file into the main view of the window.
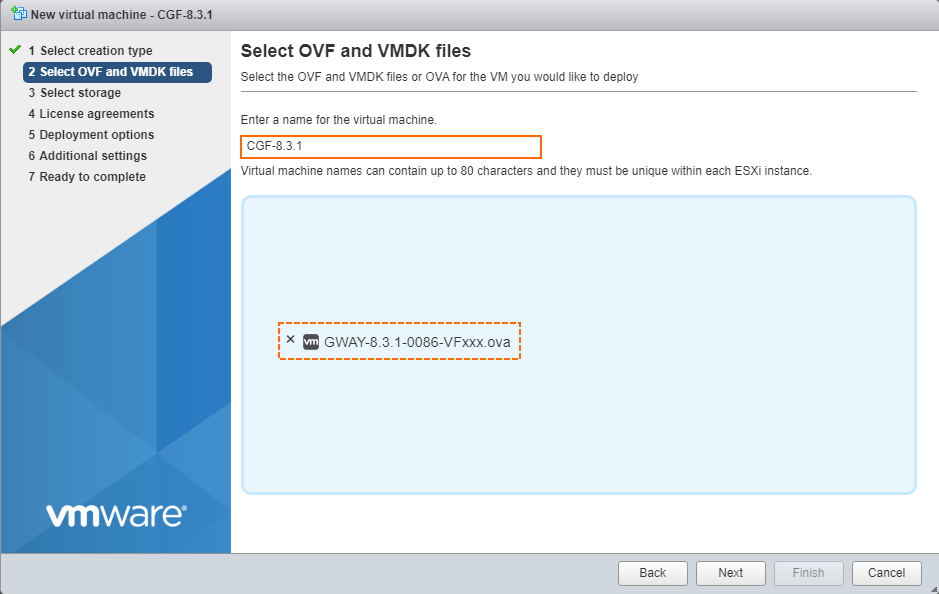
- Click Next.
Step 3. Select the Storage for Your Virtual Machine
You must provide enough storage space for your virtual machine. In case of doubt, contact your system administrator.
- Select the type of memory that best matches your requirements.
- Select the storage that provides enough storage space for your virtual machine.
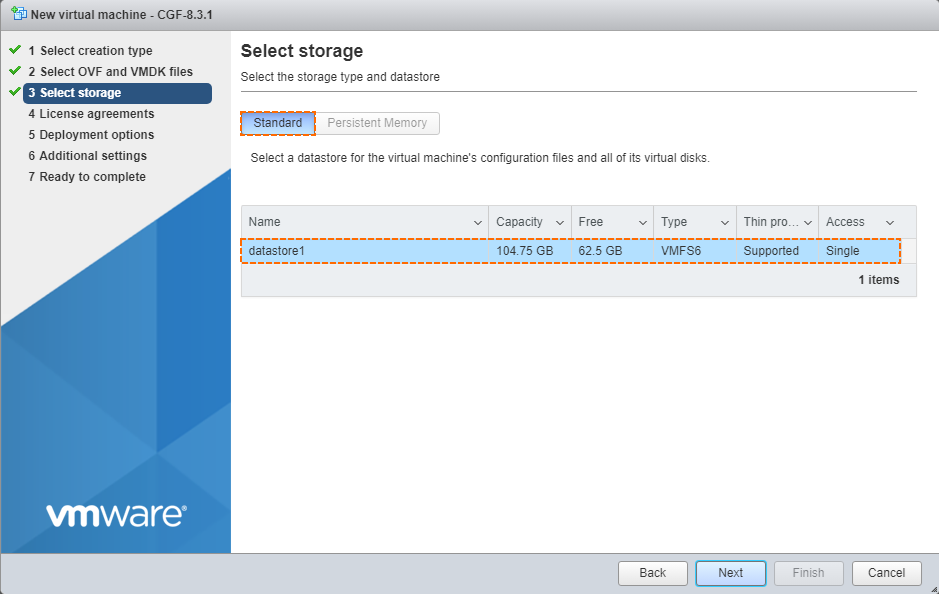
- Click Next.
Step 4. Configure Specific Deployment Options
You must configure certain deployment options regarding how the virtual machine handles storage and behaves in certain situations.
- Depending on your individual preferences, select Thin or Thick for Disk Provisioning.
- Select the check box for Power on automatically.
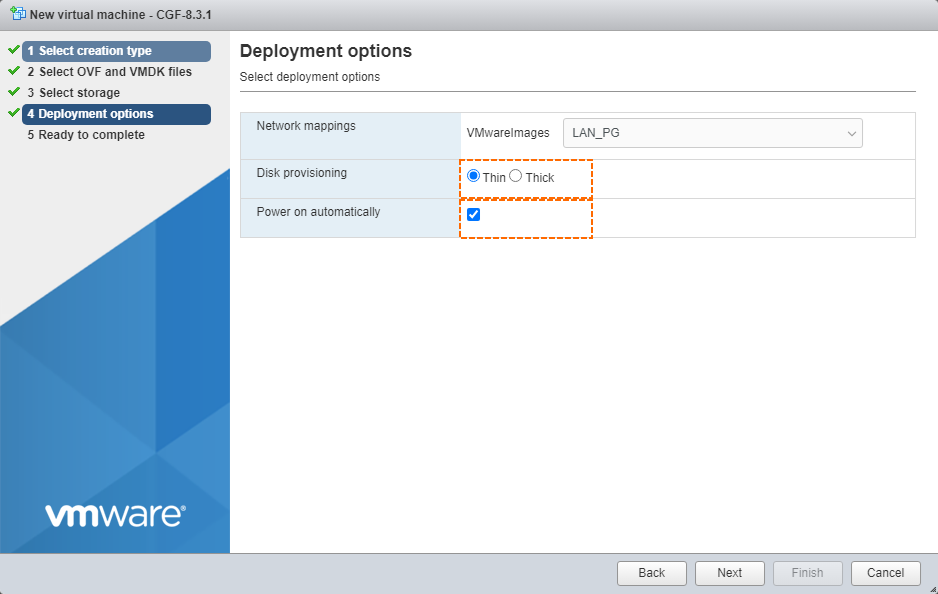
- Click Finish.
- The firewall is installed on your ESXi Hypervisor and finally starts.
Perform Basic Configurations on Your Firewall
Step 5. Enter Basic Configuration Data for Network Settings
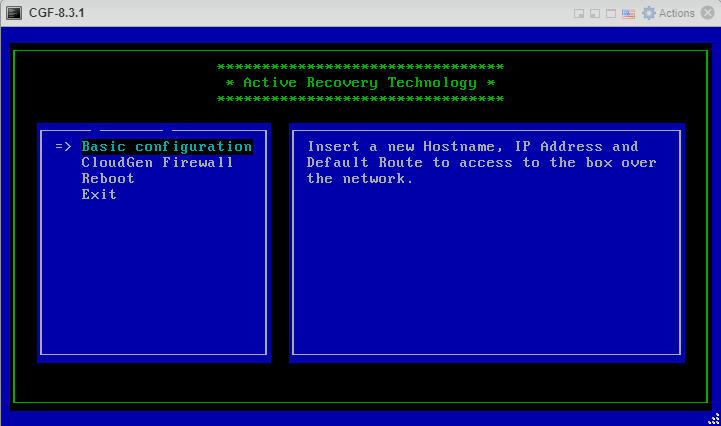
- After the restart, the firewall will display the ART (Active Recovery Technology) screen. The highlighted menu entry is Basic configuration.
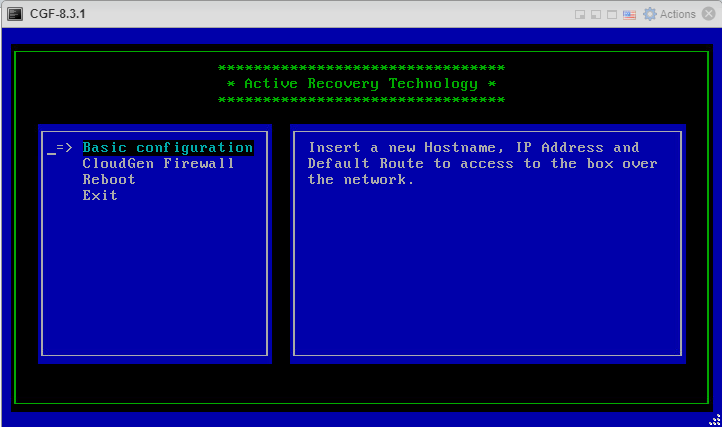
- Press Enter on your keyboard.
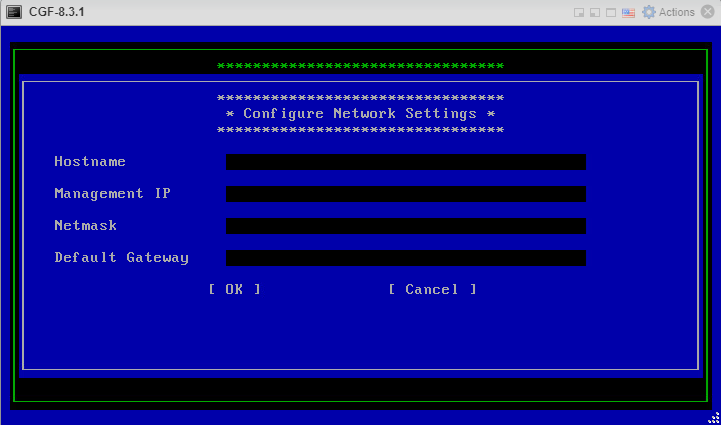
- An area is displayed for Configure Network Settings. The area shows the following labels with their related edit fields:
- Hostname – The desired hostname for your firewall.
- Management IP – The IP address that your firewall should be reachable through.
- Netmask – The subnet mask in dotted quad notation. For example,
255.255.255.0. - Default Gateway – The IP address of the next hop device that serves as an access point to another network.
- Enter the specific data that identifies your firewall in the network. Replace the values in the screenshot with your own data.
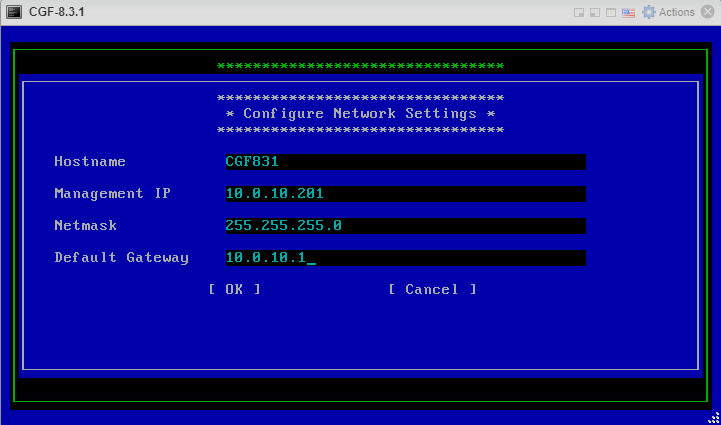
- Click OK.
- The firewall proceeds with its configuration process and displays a screen with output.
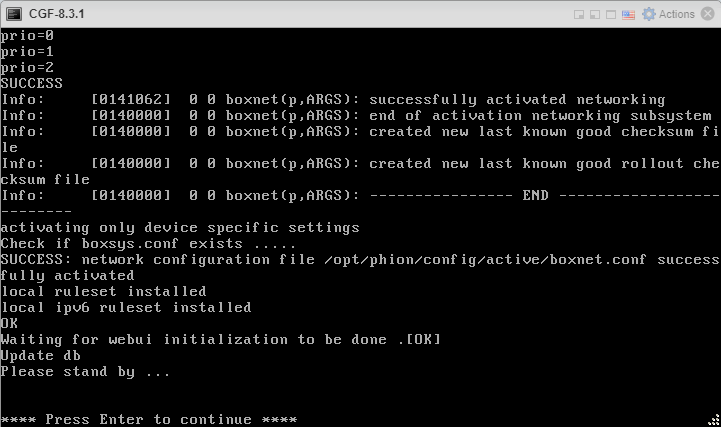
- If prompted to do so, press Enter on the keyboard.
- The firewall confirms that your network information has been saved.
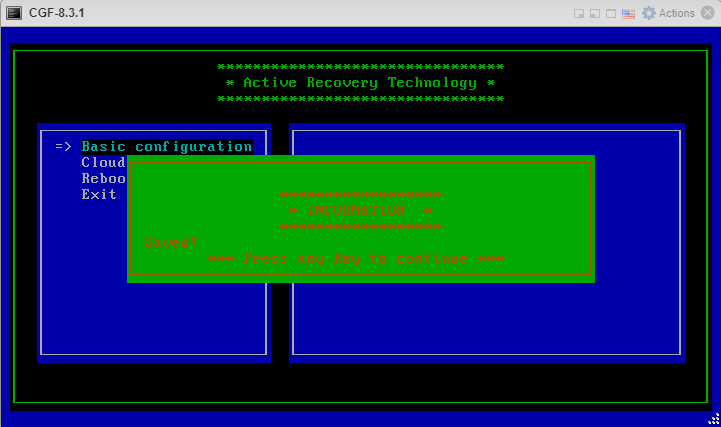
- Press any key to continue.
- The firewall displays the initial ART menu.
Activate Your Virtual CloudGen Firewall
You have two options for activating your firewall:
Option 1 - Step 1: Activate Your Firewall Using Zero Touch Deployment in the ART Window
To reduce the activation process of virtual firewalls deployed on the VMware ESXi hypervisor on the basis of OVA files, the ART menu now contains a new option that uses the ZTD server for activating the virtual firewall.
Because the ART menu is the starting point for configuring a virtual appliance, the firewall is not yet fully configured at this point. To keep the activation from failing, consider the following:
If you have received your token, perform the following steps:
- Click the down button to go to the menu CloudGen Firewall.
- Press Enter.
- If your network was initially configured correctly, your firewall displays an area for entering the firewall-related token.
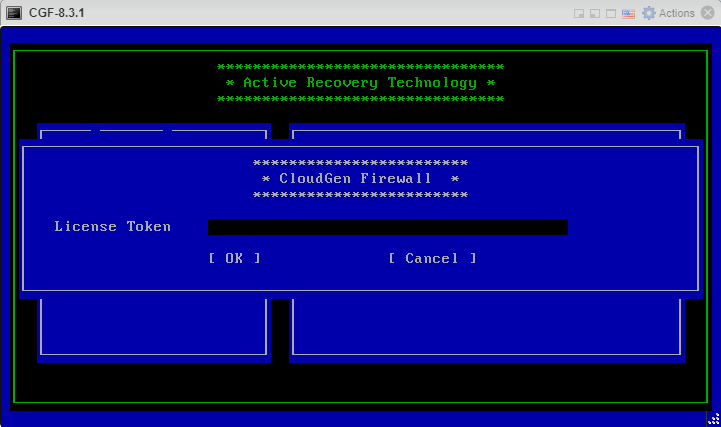
- Enter the token that you received with your purchase order. Your license token has the format XXXXX-XXXXX-XXXXX, where each letter 'X' is a placeholder for a number or letter.
- Click the down arrow on your keyboard to go to the [OK] button.
- Press Enter.
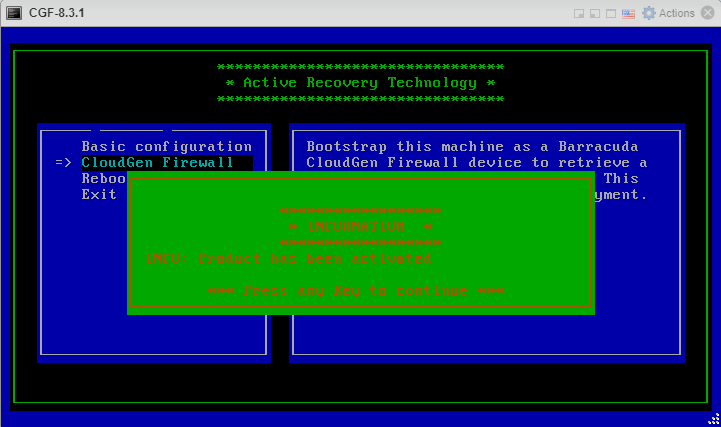
- If the firewall can connect to the ZTD server, your license is downloaded and installed automatically.
- The firewall will confirm the successful product activation by displaying the following screen:
- If an error is displayed in a red dialog requesting you to configure network connectivity, check if the values you entered earlier are correct.
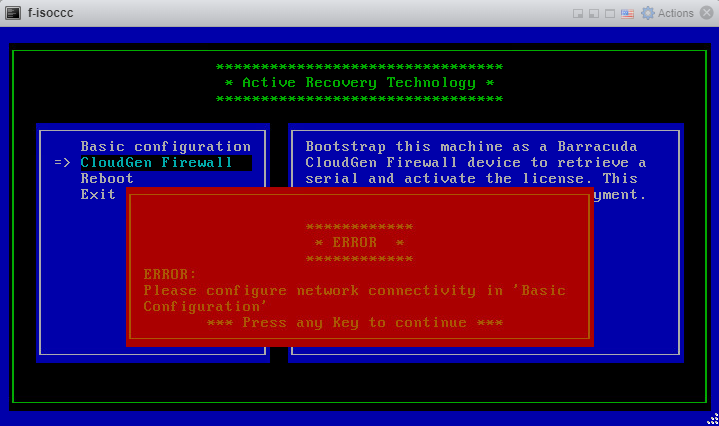
If you had to change any of the values for the network configuration, repeat all the steps for the Basic Configuration on Your Firewall.
If activation still fails, reboot the firewall and continue with Option 2 below.
Step 6. Reboot the Firewall
- Click the down arrow key on your keyboard to go to the menu entry Reboot.
- Press Enter.
- The firewall will reboot.
- After the firewall has rebooted, check the activation status in the Subscription Status element in DASHBOARD.
If the Subscription Status element displays that the firewall is not licensed, then the activation has failed. Continue performing the steps in the following Option 2.
Option 2 - Activate Your Firewall Using Firewall Admin
If the deployment with activation does not succeed as described in Option 1 - Step 1: Activate Your Firewall Using Zero Touch Deployment in the ART Window, perform the following steps:
Step 1. Perform Finalizing Configurations
After the firewall has rebooted, you must change your password.
- Log into your firewall.
- When asked if you want to continue to change your password, click Yes.
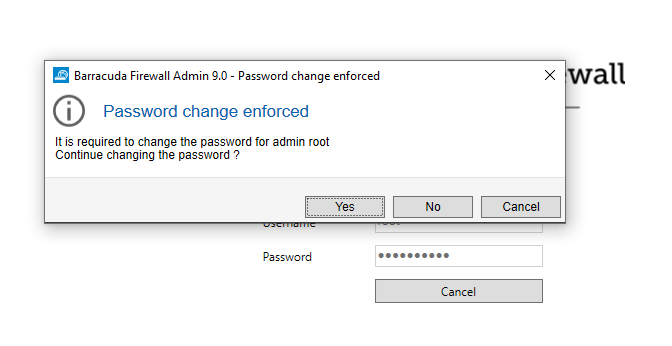
- Enter a new password in the required edit field and confirm your input.
- The firewall displays a dialog stating Password successfully changed.
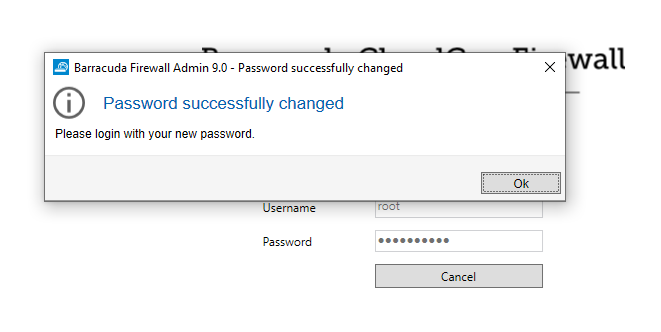
- Click Ok.
- Re-log into your firewall.
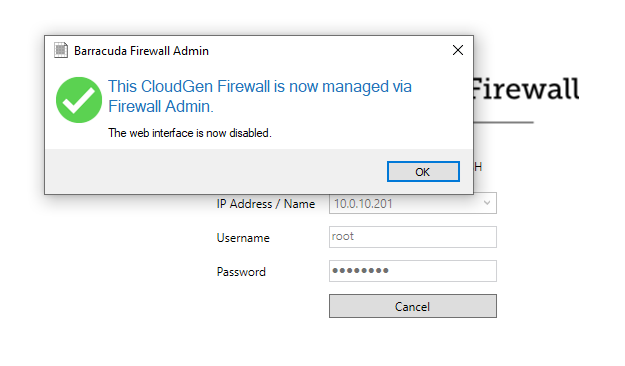
- The firewall displays a dialog window asking how you want to manage your appliance.
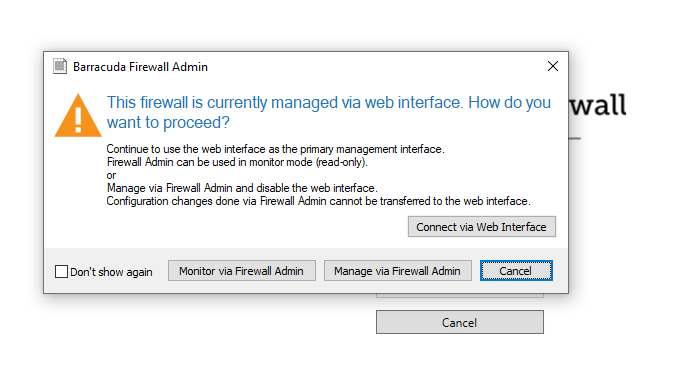
- Click Manage via Firewall Admin.
- The firewall confirms your choice by displaying a dialog window.
Step 2. License Your Barracuda CloudGen Firewall
For the firewall to get licensed, the Barracuda Firewall Admin application must be able to connect to the Internet directly or via proxy. You must enter a license token before activating your unit. Your token is sent to you by email from Barracuda Networks.
Your license token has the format XXXXX-XXXXX-XXXXX, where each letter 'X' is a placeholder for a number or letter.
Perform the following steps to complete the activation for your firewall:
- Enter the license token.
- Fill out the activation form.
- Licenses are downloaded and installed automatically.
For more information, see How to Activate and License a Stand-Alone Virtual or Public Cloud Firewall or Control Center.
Use the VMware OVF Tool
On an ESXi7 Hypervisor, the VMware tools are installed already. In this case, it is not necessary to perform the following steps.
For any other lower version of the Hypervisor, perform the following steps:
- Download the VMware OVF Tool from vmware.com. Use the following command:
ovftool -datastore=datastorename ovaimage vi://server-ip
where:-
datastore– The name of the data store. -
ovaimage– The path and name of the OVA file. -
server-ip– The IP address for the virtual appliance.
-
- Configure the resources pool and the network mapping within the VMware virtual machine settings.
- Using Barracuda Firewall Admin, connect to the virtual appliance for configuration.
Next Step
After you deploy the Barracuda CloudGen Firewall Vx unit, continue with Get Started and optionally Best Practice - Performance Tuning on VMware Hypervisors.