

HA auto-pairing lets you extend a managed firewall to an HA pair of managed boxes. As of firmware release 8.2.1, HA auto-pairing is enabled by default and now supports automated pairing of managed firewalls. If you are using an earlier firmware release, you should not use the auto-pairing feature. Instead, apply the PAR file.
Before You Begin
- Ensure you are familiar with the basic concept of HA auto-pairing. For more information, see HA Auto-Pairing.
- Ensure your managed firewall has firmware 8.3.0 or higher and that the HA auto-pairing feature is enabled by default.
- Ensure that both firewalls are connected via the private uplink cable on the HA port. For more information, see HA Auto-Pairing.
Enable HA Auto-Pairing for Two Managed Firewalls
Step 1 (Only for Virtual Appliances) Activate the HA Auto-Pairing Feature on Both Boxes
You can omit the following steps on hardware appliances because HA auto-pairing is already enabled.
- Log into your primary/(secondary) firewall.
- Go to CONFIGURATION > Configuration Tree > Box > Network.
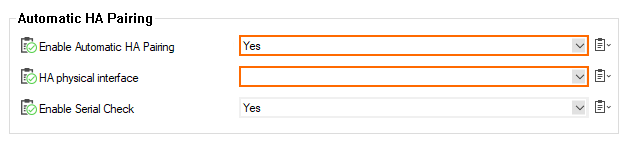
- In the left menu bar, select Automatic HA Pairing.
- Click Lock.
- In the section Automatic HA Pairing, set Enable Automatic HA Pairing to yes.
- Select the interface from the list HA physical interface.
- Click Send Changes/Activate.
- Repeat the previous steps on the secondary firewall.
Step 2. Create a DHA Configuration on the Primary Firewall
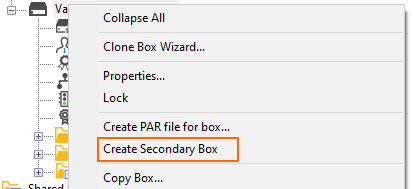
- On the primary firewall, go to CONFIGURATION > Configuration Tree > Multi Range > your range > your cluster > Boxes > your primary box.
- Right-click Box and select Create Secondary Box.
Step 3. Add the Secondary Serial Number on the Primary Firewall
- Log into the primary firewall.
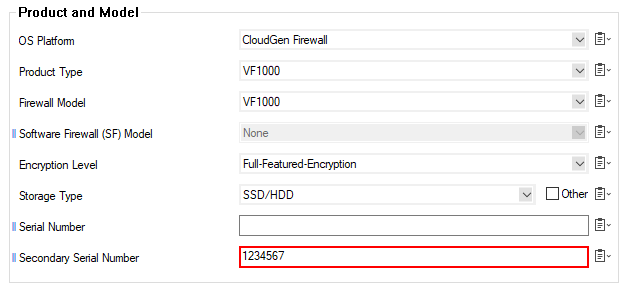
- Go to CONFIGURATION > Configuration Tree > Box > Properties > Identification.
- Click Lock.
- In the section Product and Model, enter the serial number of the secondary firewall in the field Secondary Serial Number.
- Click Send Changes/Activate.
Step 4. On the Primary Firewall, Set the Management IP of the Secondary Firewall
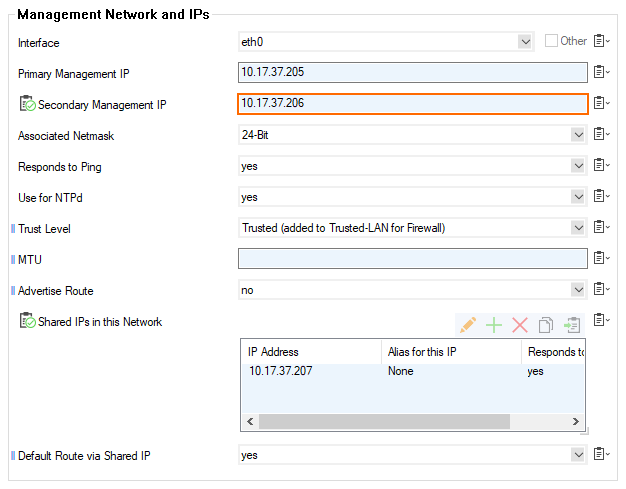
- On the primary firewall, go to CONFIGURATION > Configuration Tree > Box > Network > IP Configuration.
- In the section Management Network and IPs, enter the management IP of the secondary firewall in the field Secondary Management IP.
- Click Send Changes/Activate.
Step 5. Initiate a Network Activation on the Primary Firewall
- Log into your primary firewall.
- Go to CONTROL > Box > Network and click Activate new network configuration to initiate a network activation on the primary firewall.
Wait until the pairing is completed. You can also inspect the log-files box_Config.log and box_Control_daemon.log for details. You can identify all entries caused by HA auto-pairing by the prefix [AutoPairing].