

Follow the guide below to create a SAML endpoint in Microsoft Azure and to configure a Barracuda CloudGen Firewall to use SAML authentication for the client-to-site VPN service.
Before You Begin
- Create and configure a VPN service. For more information, see VPN.
- You must have an existing user group in Microsoft Entra ID. For more information, see https://learn.microsoft.com/en-us/entra/fundamentals/how-to-manage-groups.
- An Advanced Remote Access subscription is required. For more information on subscriptions, see Base Licensing and Subscriptions.
Step 1. Create a SAML Endpoint in Microsoft Azure
- Log into the Azure portal: https://portal.azure.com
- In the left menu, click All services and search for Microsoft Entra ID.
- Click Microsoft Entra ID.
- In the left menu of the Microsoft Entra ID blade, click Enterprise applications.
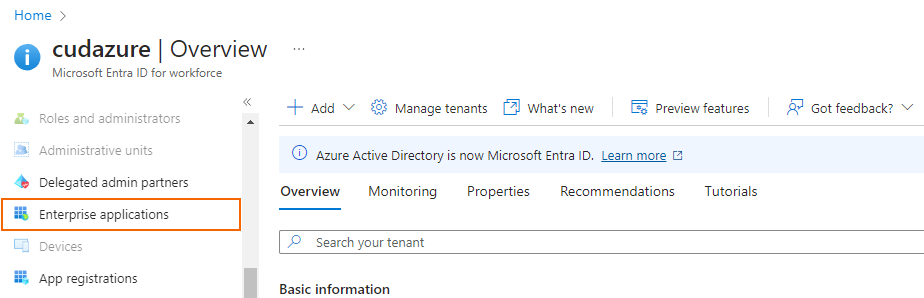
- The Enterprise applications blade opens. Click Overview.
- In the Overview blade, click New application.

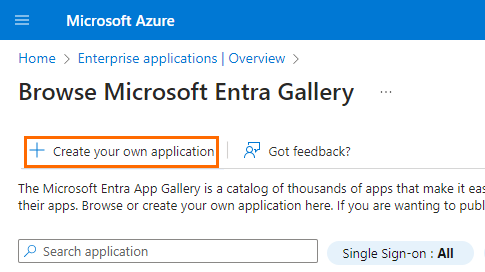
- The Browse Microsoft Entra Gallery blade opens. Click Create your own application.
- Enter the name of your application, and select Integrate any other application you don't find in the gallery (Non-gallery).

- Click Create.
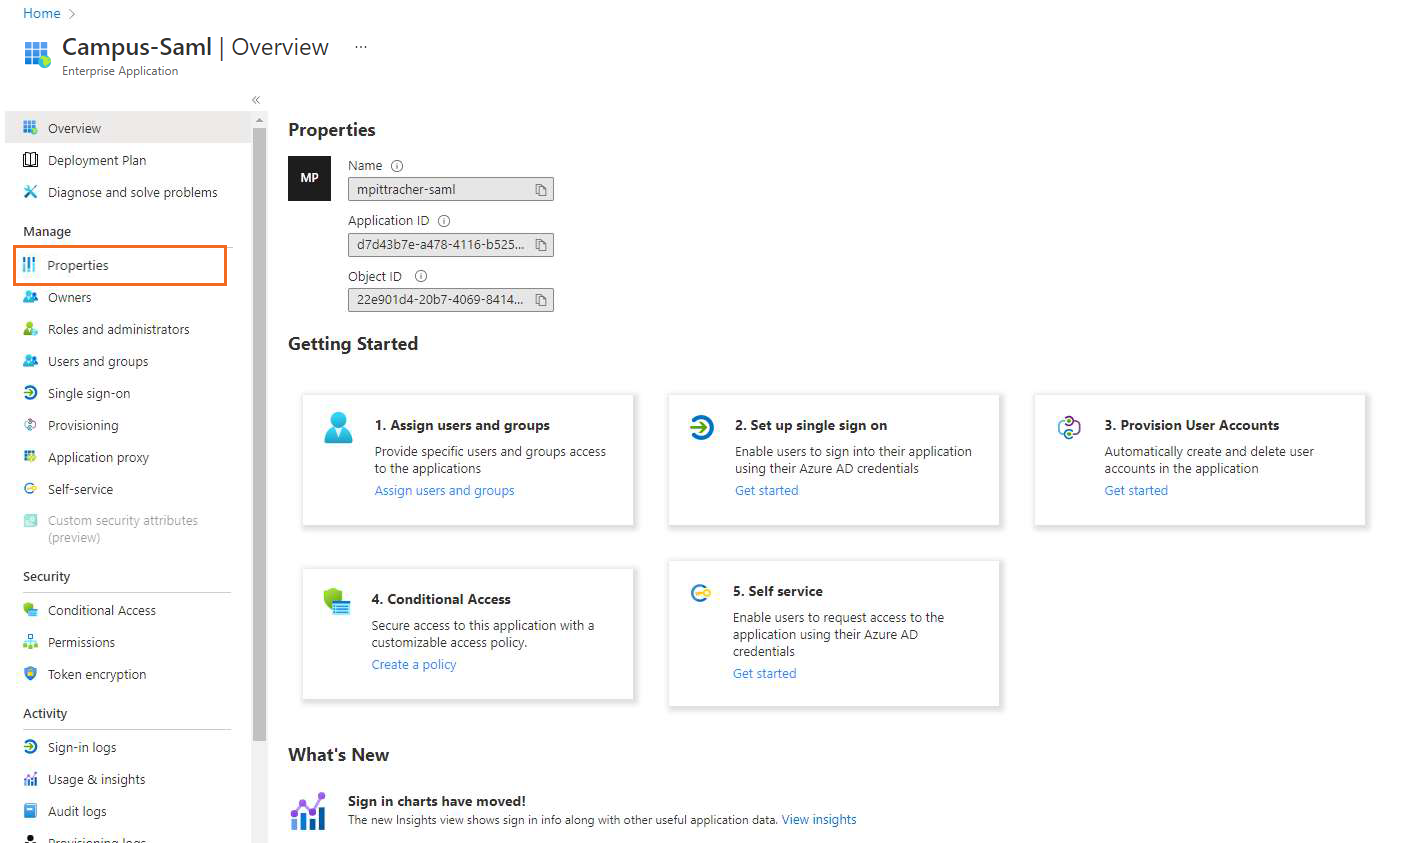
After the application is successfully deployed, it automatically opens the Overview blade of the created application. - In the left menu, select Properties.
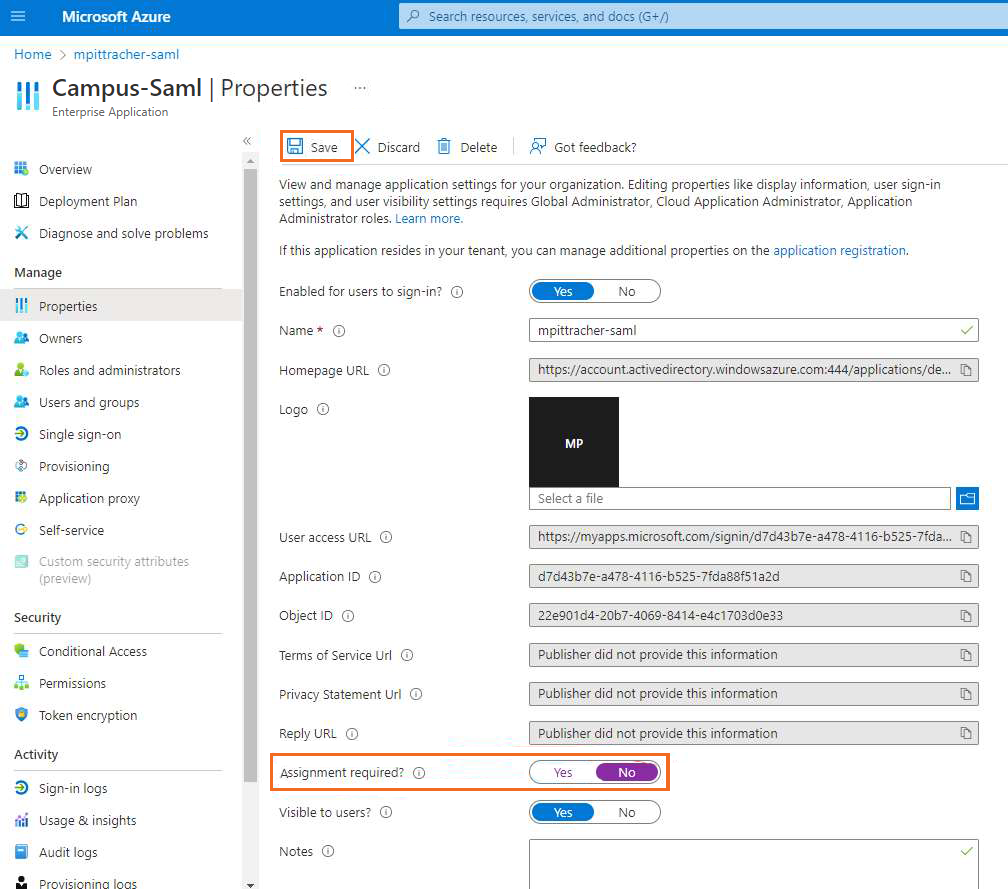
- In the Properties blade, disable Assignment required and click Save.
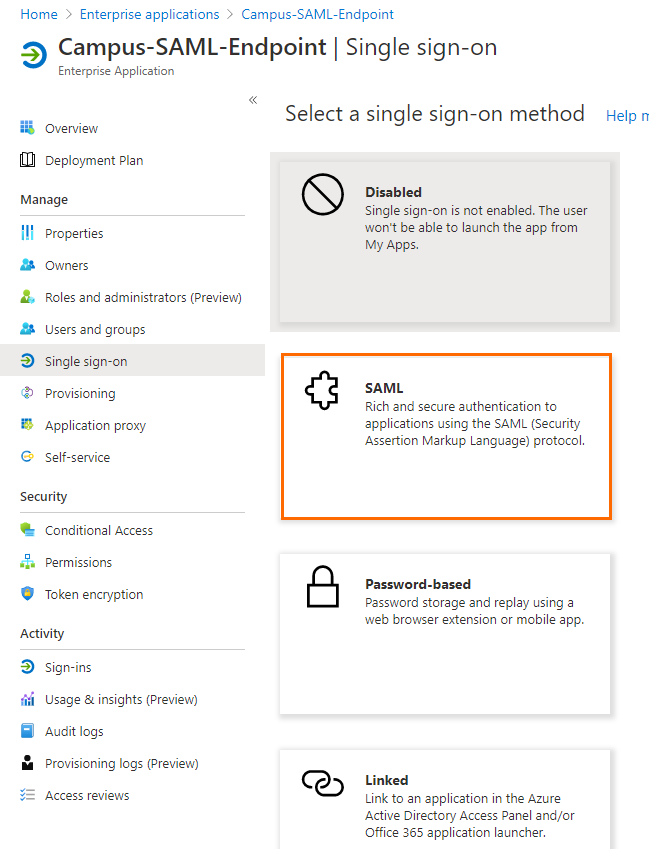
- In the left menu, click Single sign-on.
- The Single sign-on blade opens. Select SAML.
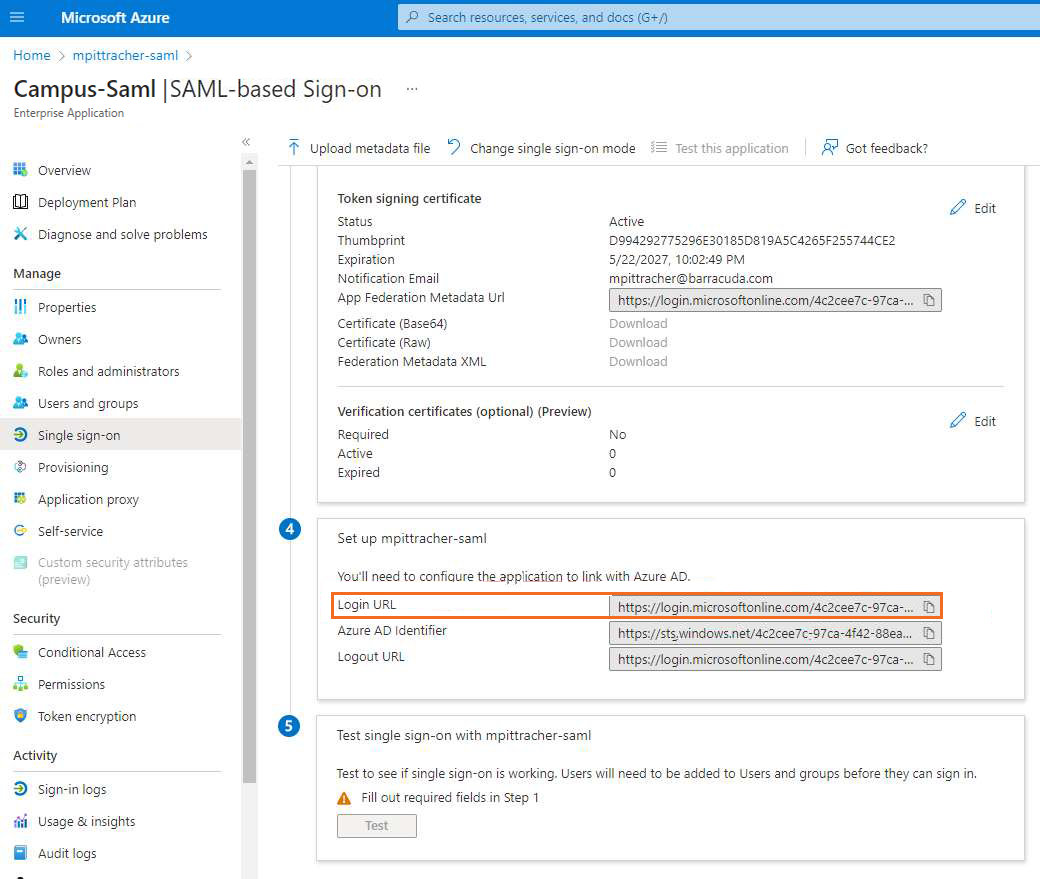
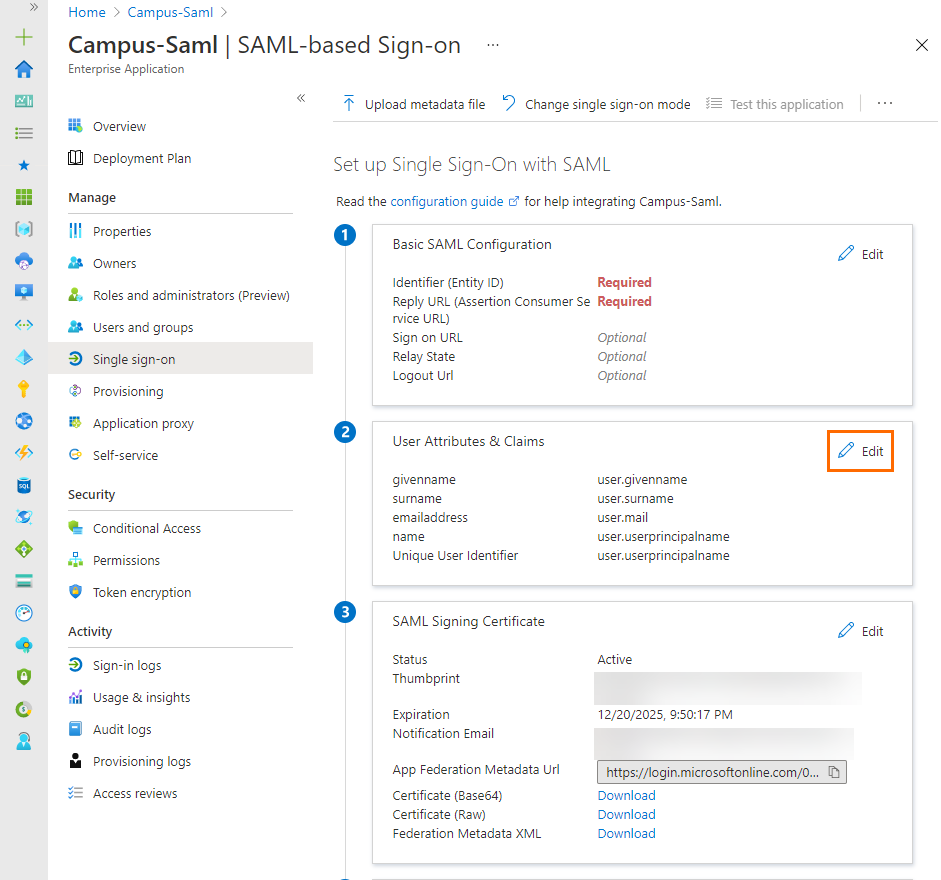
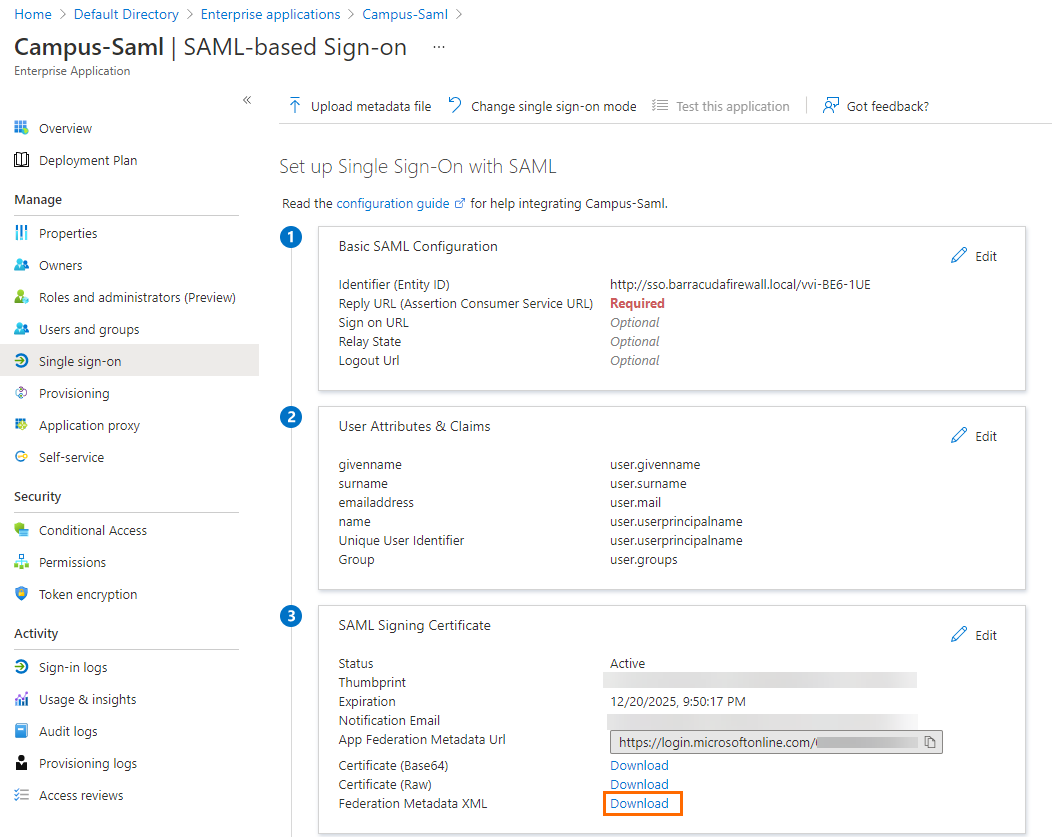
- The SAML-based Sign-on blade opens. Copy the Login URL.
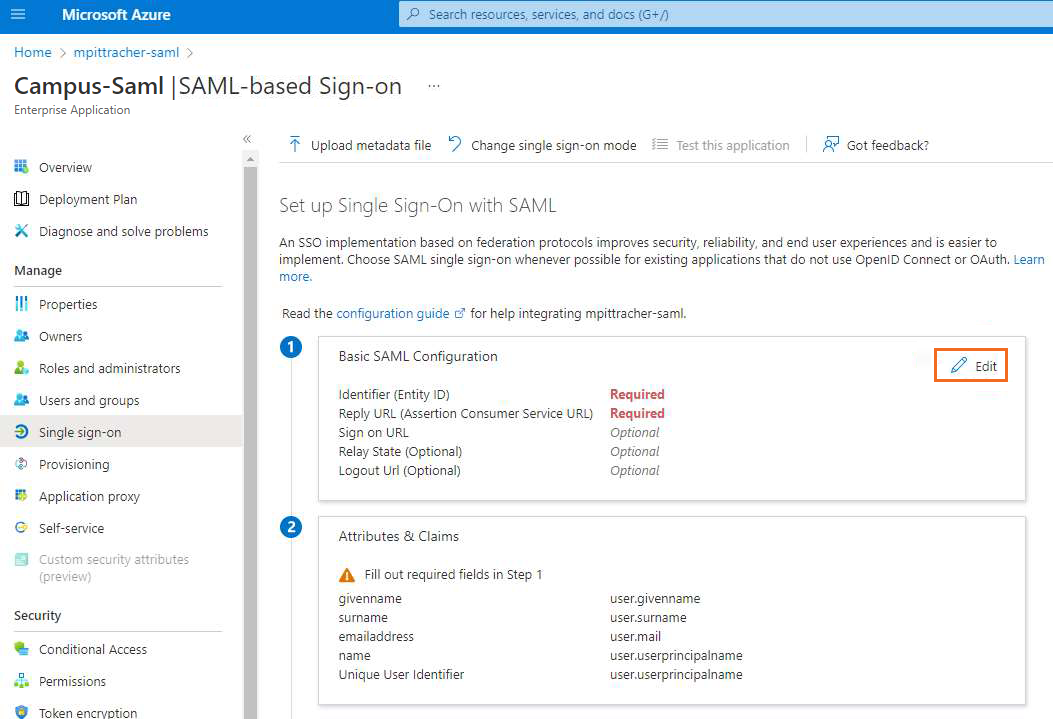
- Click Edit next to Basic SAML Configuration.
- Click Add reply URL and paste the copied URL.
- Open the SAML configuration on your Barracuda CloudGen Firewall, and copy the Service Provider Entity ID.
- In the Basic SAML Configuration blade, click Add identifier and paste the copied login URL.
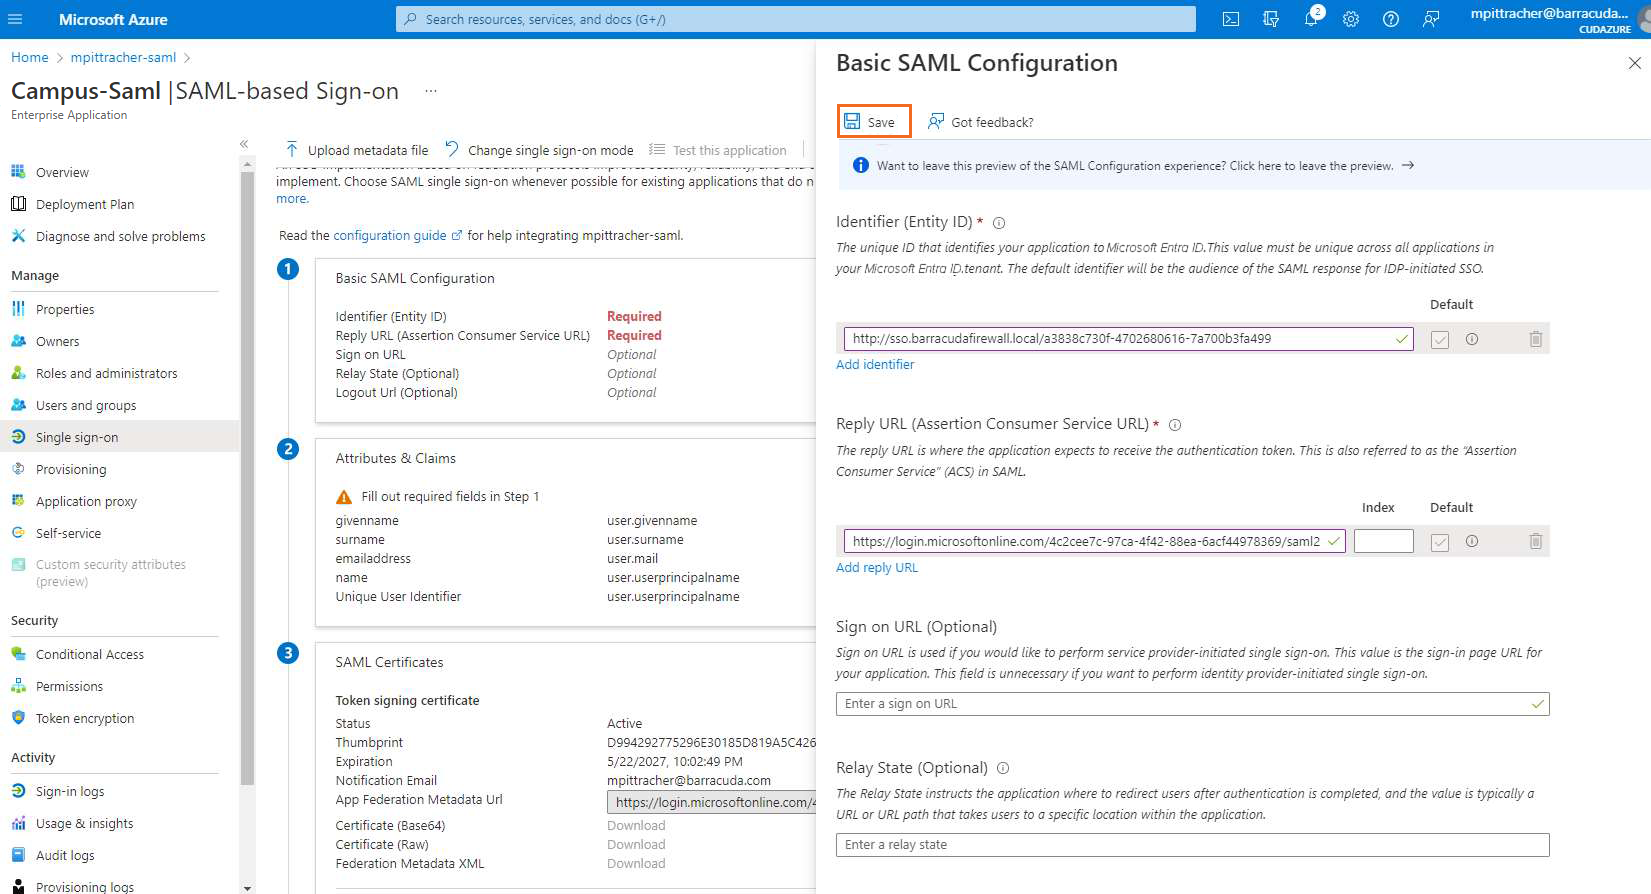
Click Save.
Click X to close the Basic SAML Configuration blade.
In the User Attribute & Claims section, click Edit.
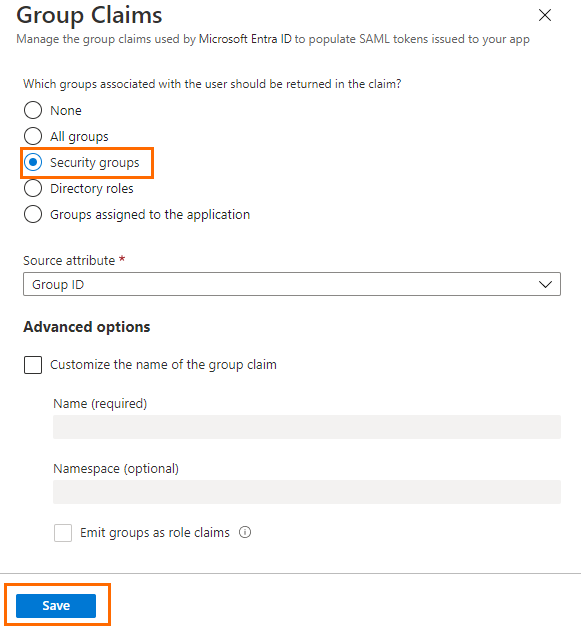
- The User Attributes & Claims blade opens. Click Add a group claim.

The Group Claims blade opens. Select Security groups and click Save.
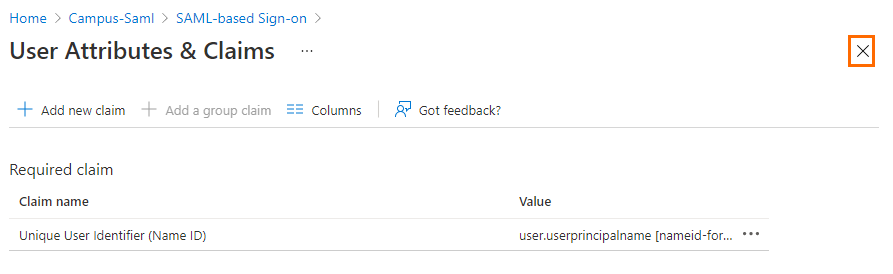
- Click X to close the User Attributes & Claims blade.
- In the SAML-based Sign-on blade, click Download to download the Federation Metadata XML.
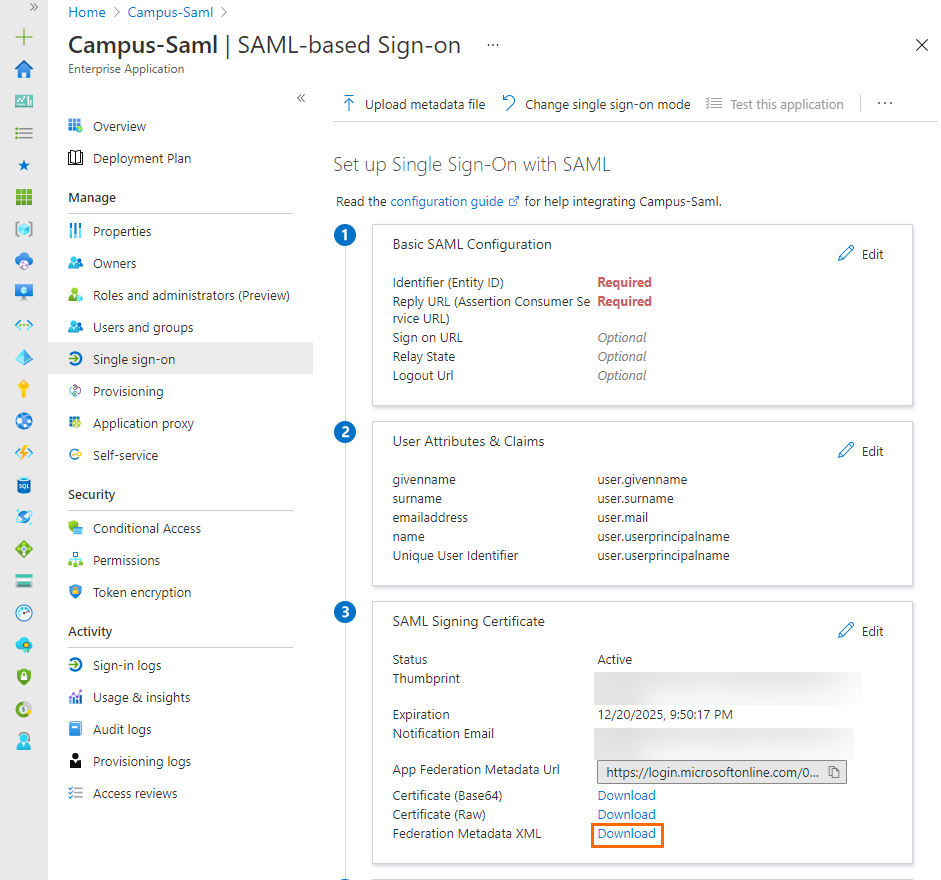
Note that some browsers might block the *.xml file. - Save the file to your local machine.
Step 2. Configure the Barracuda CloudGen Firewall to Use SAML Authentication
- Connect to your Barracuda CloudGen Firewall and log in.
- Go to CONFIGURATION > Configuration Tree > Infrastructure Services > Authentication Service.
- In the left menu, click SAML/ADFS Authentication.
- Click Lock.
- In the SAML General Information section, set Activate Scheme to yes.
- In the Identity Provider section, click Ex/Import. Then, click Import from File... and select the file retrieved in Step 1.

- Click Send Changes.
- In the Attributes section, specify the Assertion Name ID and select um:oasis:names:tc:SAML:1.1:nameid-format:emailAddress from the drop-down menu.
- Click Send Changes.
- Specify values for the following:
- User Attribute – Select Name ID (um:oasis:names:tc:SAML:1.1:nameid-format:emailAddress) from the drop-down menu.
- Group Attribute – Select Attribute(Groups) from the drop-down menu.
- In the Certificates section, specify values for the following:
- Enable Assertion Encryption – Clear the check box.
- Enable Assertion Signing – Clear the check box.

- In the left menu of the SAML/ADFS Authentication window, click Configuration Mode and select Switch to Advanced.
- In the Endpoints section, specify values for the following if SAML/ADFS is not used for Firewall Authentication. Otherwise, you can skip this step.
Use Hostname from – Select Explicit-Hostname from the drop-down menu.
- Explicit Hostname – Enter
localhost.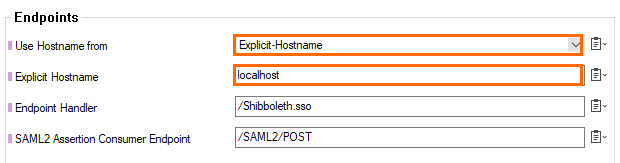
- Click Send Changes and Activate.
- On the firewall, go to CONTROL > Services > Box Services.
Restart the authentication daemon (phibs).
- Go back to CONFIGURATION > Configuration Tree > Infrastructure Services > Authentication Service.
- In the left menu, click SAML/ADFS Authentication.
- Click Lock.
In the Service Provider Metadata section, export the metadata by clicking Generate Data.

Copy the information and save it to your local machine in an .xml file. This file has to be updloaded in Azure at a later stage.
- Click Send Changes and Activate.
Step 3. Finalize the SAML Configuration in Microsoft Azure
- Log into the Azure portal: https://portal.azure.com
- In the left menu, click All services and search for Microsoft Entra ID.
- Click Microsoft Entra ID. The Microsoft Entra ID blade opens.
- In the left menu, select Enterprise applications.
- In the Enterprise applications blade, click All applications.
- Click on the application you created in Step 1, e.g., Campus-SAML-Endpoint.
- In the left menu, click Single sign-on.
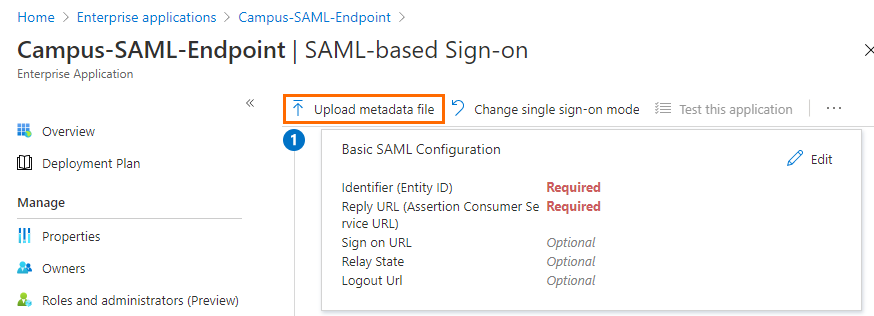
- Select SAML. The Single sign-on blade opens.
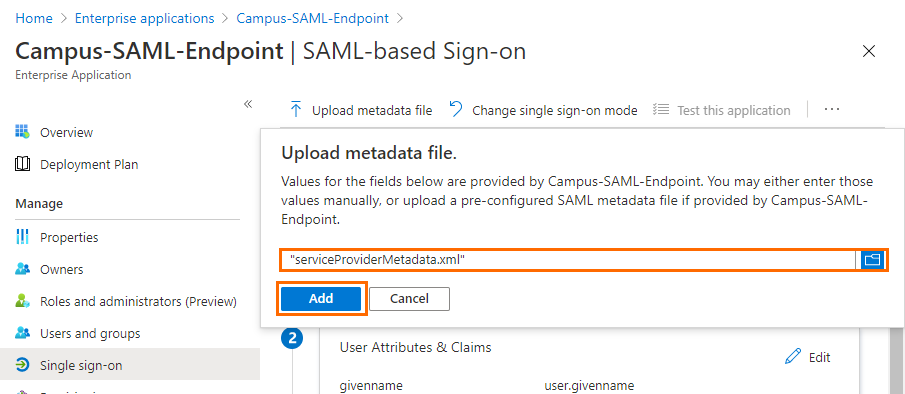
- Click Upload metadata file.
- Select the file downloaded in Step 2 and click Add.
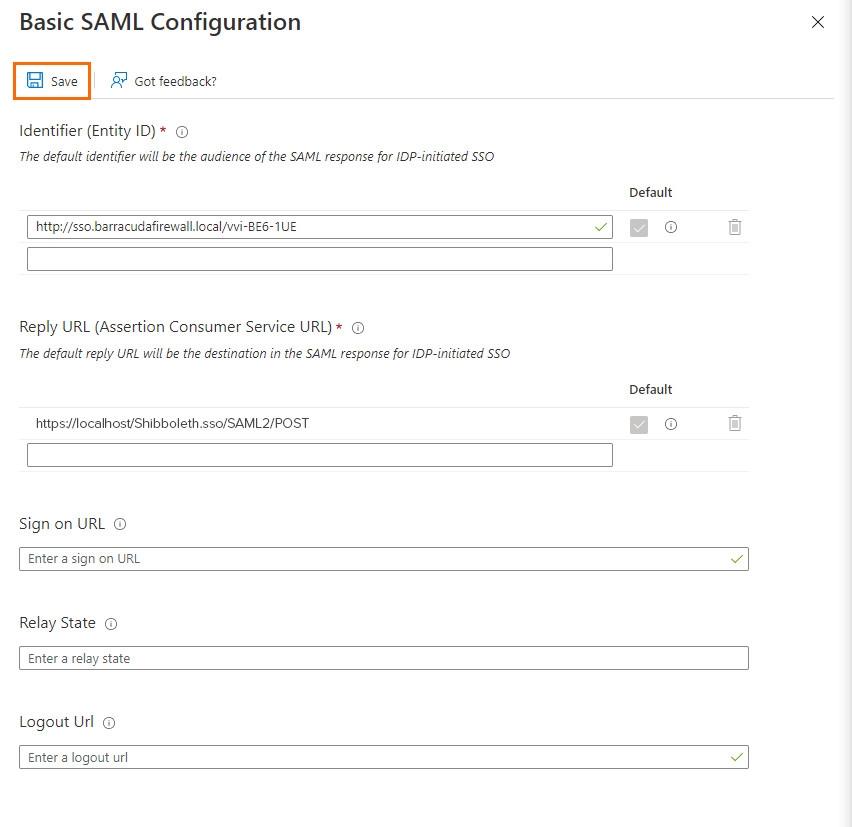
- Click Save.
- Close the Basic SAML Configuration blade.
You are now back in the Single sign-on blade. - Click Download to download the Federation Metadata XML file and save it to your local machine.
Step 4. Finalize the Barracuda CloudGen Firewall SAML Configuration
- Connect to your Barracuda CloudGen Firewall and log in.
- Go to CONFIGURATION > Configuration Tree > Infrastructure Services > Authentication Service.
- In the left menu, click SAML/ADFS Authentication.
- Click Lock.
- In the Identity Provider section, click Ex/Import.
- From the drop-down menu, select Clear.
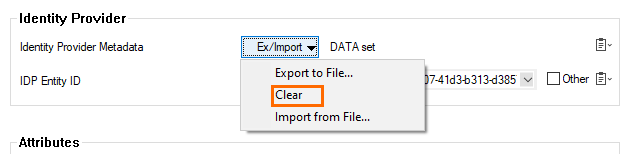
- In the Identity Provider section, click Ex/Import.
- From the drop-down menu, select Import from File.
- Select the file downloaded in Step 3 and import it.
- Click Send Changes and Activate.
Restart the authentication daemon (phibs) in CONTROL > Services > Box Services.
Step 5. VPN Configuration of the Barracuda CloudGen Firewall
- Connect to your Barracuda CloudGen firewall and log in.
- Go to CONFIGURATION > Configuration Tree > Assigned Services > VPN (VPN-Service) > VPN Settings.
- In the left menu, click General.
- Click Lock.
- In the Service section, specify values for the following:
- Private key – Click to generate a new private key. Select a key length and click OK.
- Certificate – Click to generate a new certificate. Enter a name and click OK.

- Click Send Changes and Activate.
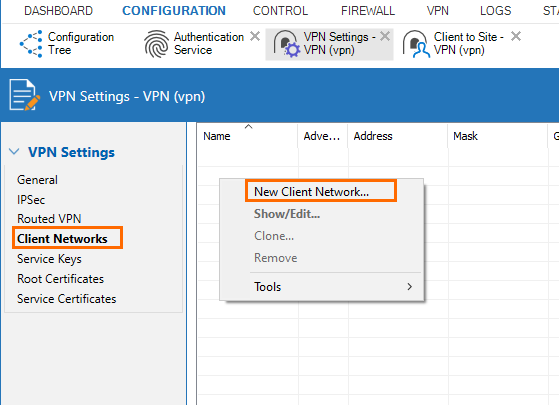
- In the left menu, click Client Networks.
- Click Lock.
- In the right menu, right-click in the table and select New Client Network from the drop-down menu.
- The Client Network window opens. Specify values for the following:
- Name – Enter a name.
- Network Address – Enter the network address.
- Gateway – Enter the gateway.
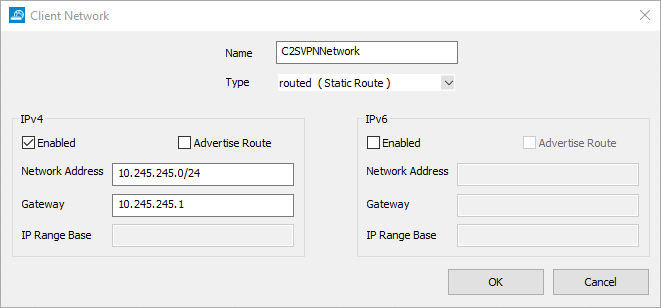
- Click OK.
- Click Send Changes and Activate.
- Go to CONFIGURATION > Configuration Tree > Assigned Services > VPN (VPN-Service) > Client to Site.
- Click Lock.
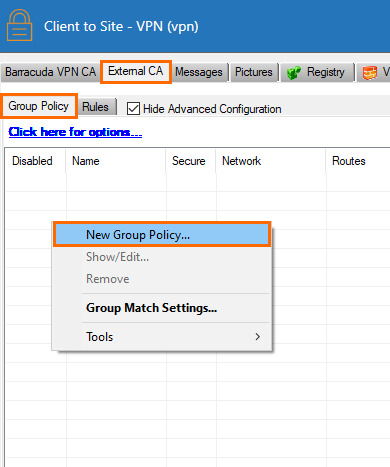
- Open the External CA tab.
Select Click here for options.
Select the check-box to Enable SAML support.
- Click OK.
- Right-click in the Group Policy tab, and select New Group Policy from the drop-down menu.
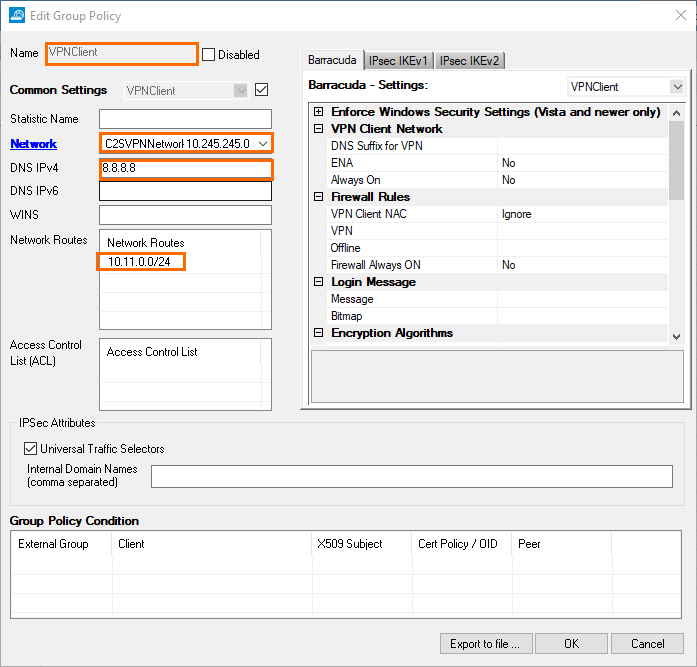
- The Edit Group Policy window opens. Specify values for the following:
- Name – Enter a name.
- Network – Select the client network created before.
- DNS IPv4 – Enter a DNS server.
- Network Routes – Enter one or more routes if applicable.
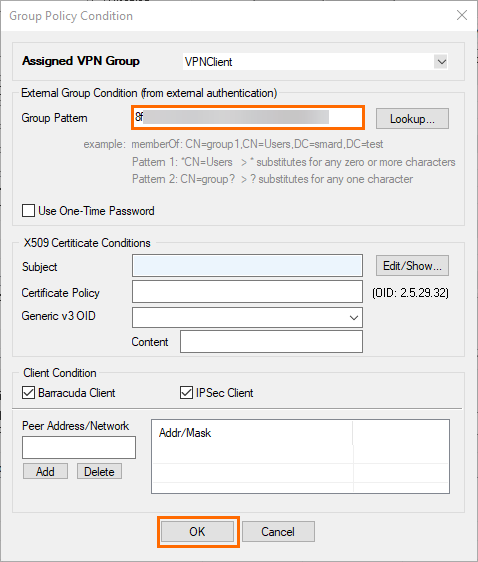
- Stay in the Edit Group Policy window. In the Group Policy Condition section, double-click to add a new entry.
- The Group Policy Condition window opens. Specify values for the following:
- Group Pattern – Enter the object ID of your Microsoft Entra ID group that will be enabled to use client-to-site VPN.
- Group Pattern – Enter the object ID of your Microsoft Entra ID group that will be enabled to use client-to-site VPN.
- Click OK.
- Click OK.
- Click Send Changes and Activate.
Step 6. Configuration of the VPN Client
- For the configuration of the Windows client, see How to Configure the Barracuda VPN Client for Windows.
- For the configuration of the macOS client, see How to Configure the Barracuda VPN Client for macOS.
- For more information on establishing VPN connections, see How to Establish a VPN Connection Using Barracuda VPN Client for Windows or How to Establish a VPN Connection Using Barracuda VPN Client for macOS.
Further Information
- For more information on client-to-site configuration, see Client-to-Site VPN.
- For more information on the VPN client, see Overview - VPN Client & Network Access Client 5.x.