

Use the following steps to restore data:
Log into https://login.barracudanetworks.com/. If you are not automatically forwarded to the Cloud-to-Cloud Backup application, select Cloud-to-Cloud Backup from the left pane.
Navigate to the Restore page from the side navigation menu, and select the desired data source.
Select the folder from which to restore data and locate the email or folder to restore.
Alternatively, to find the items you want to restore, use the search bar or the Filters icon (
 ) to narrow down your options. See How to Search and Filter a Data Source.
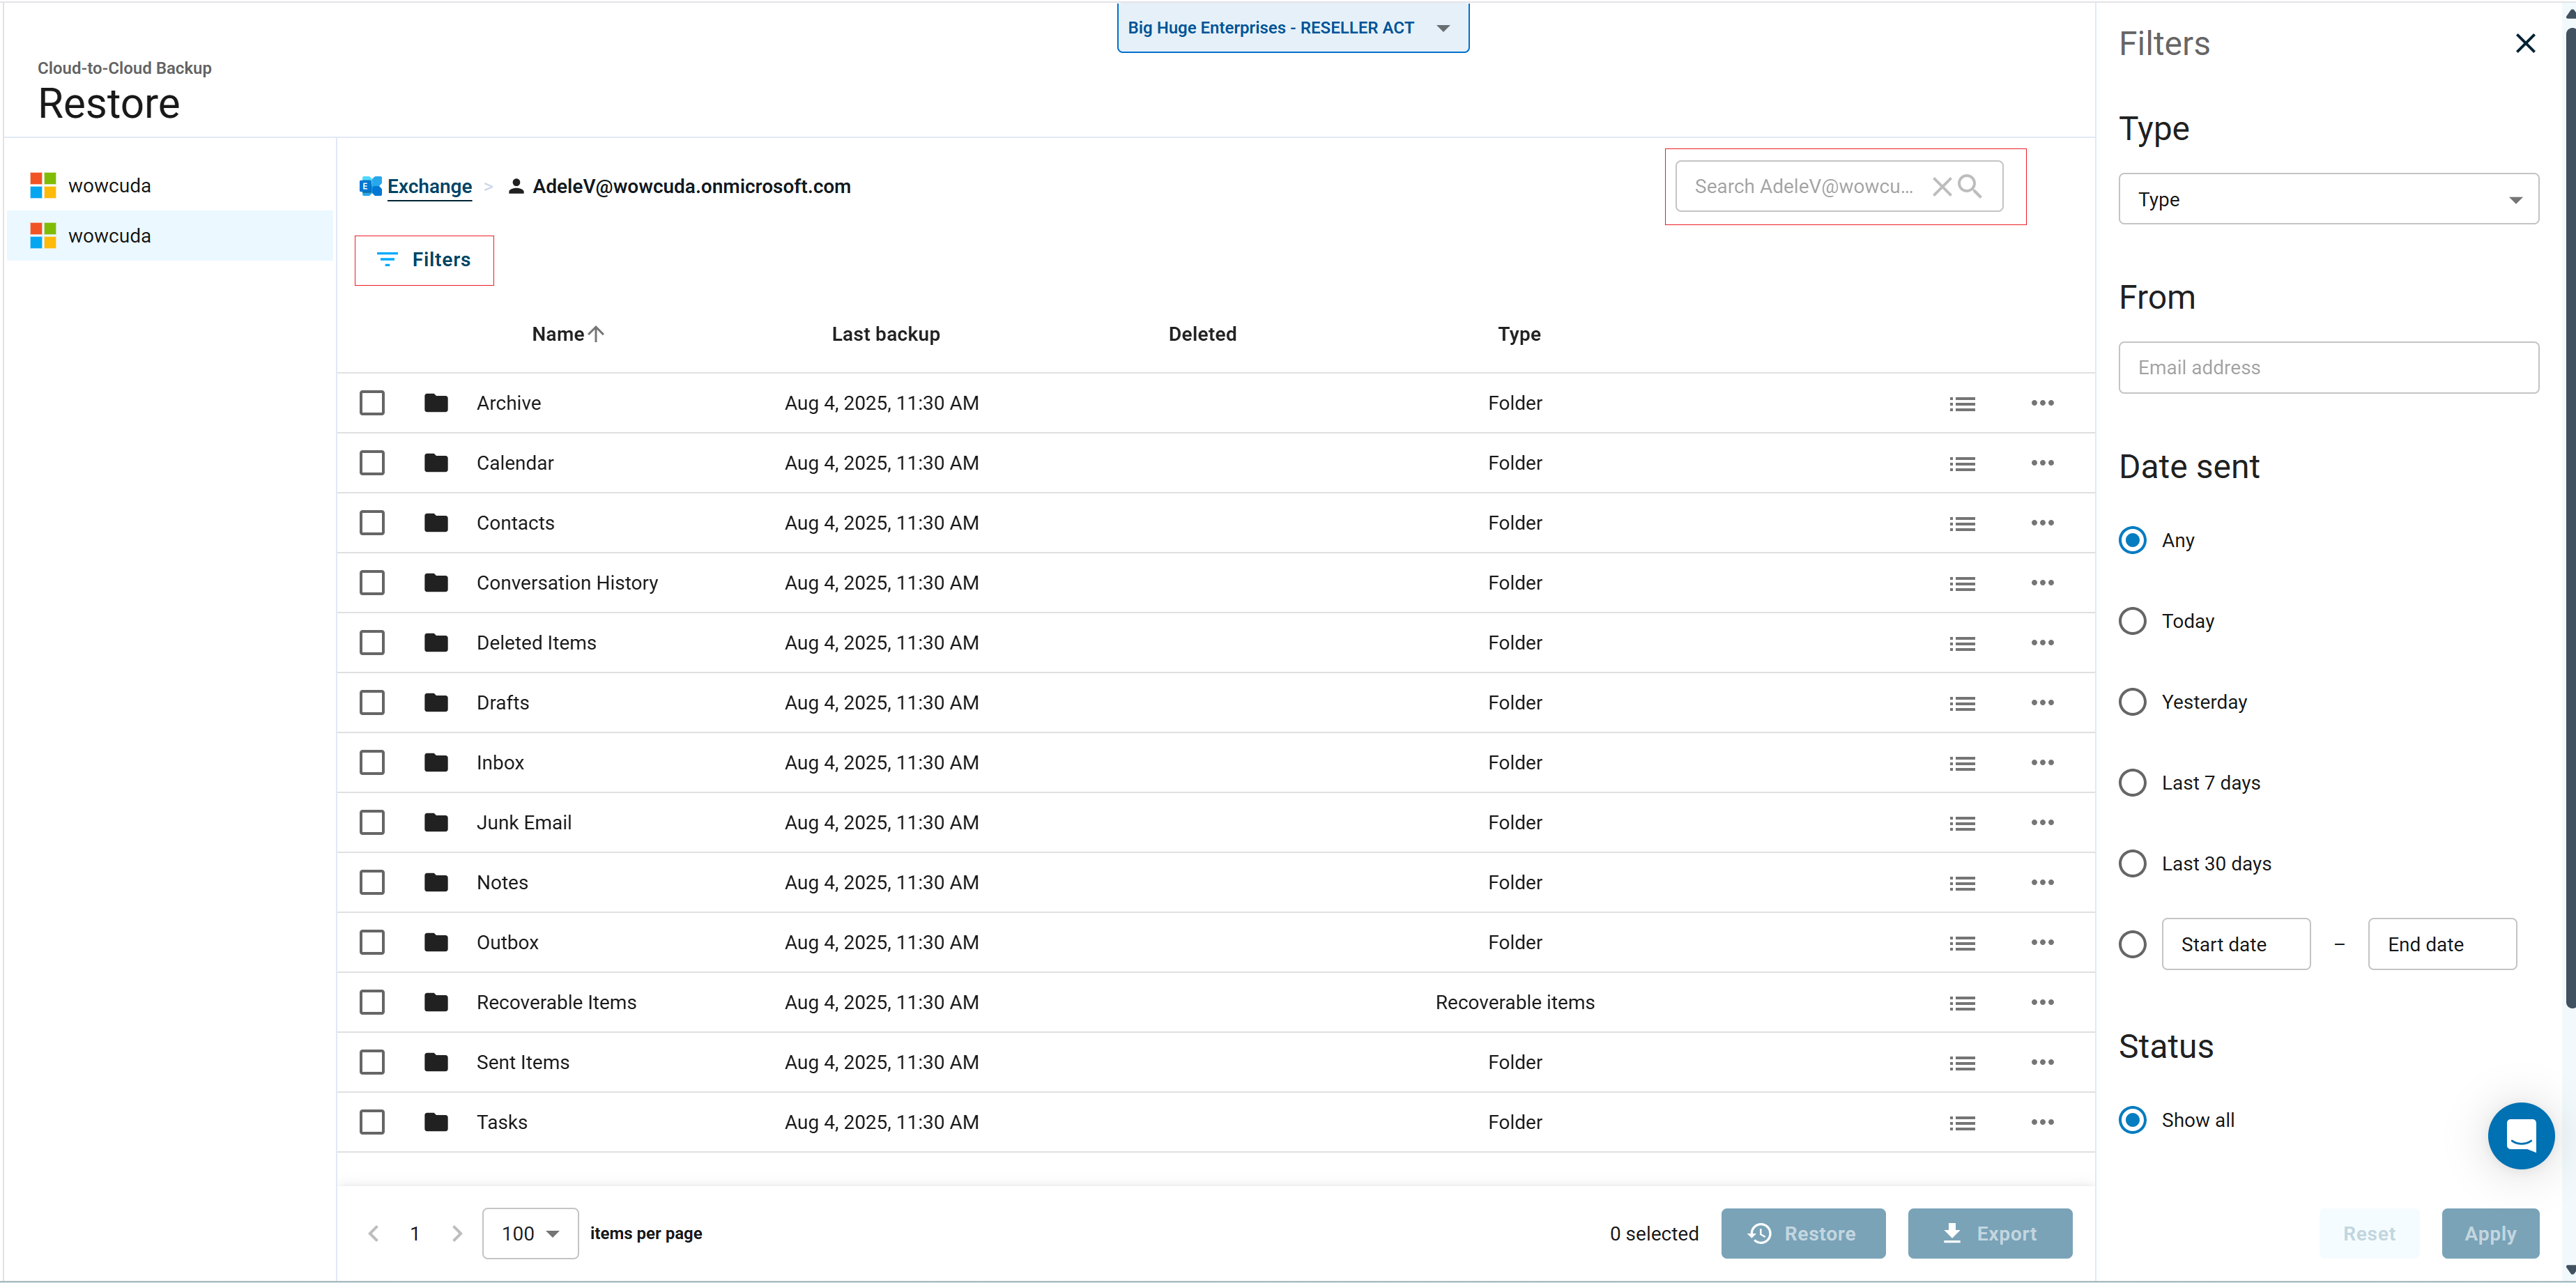
Select the file(s) and folder(s) to restore, and click the Restore button. You can also restore a full user mailbox, site, account, or team.
The Restore dialog box displays.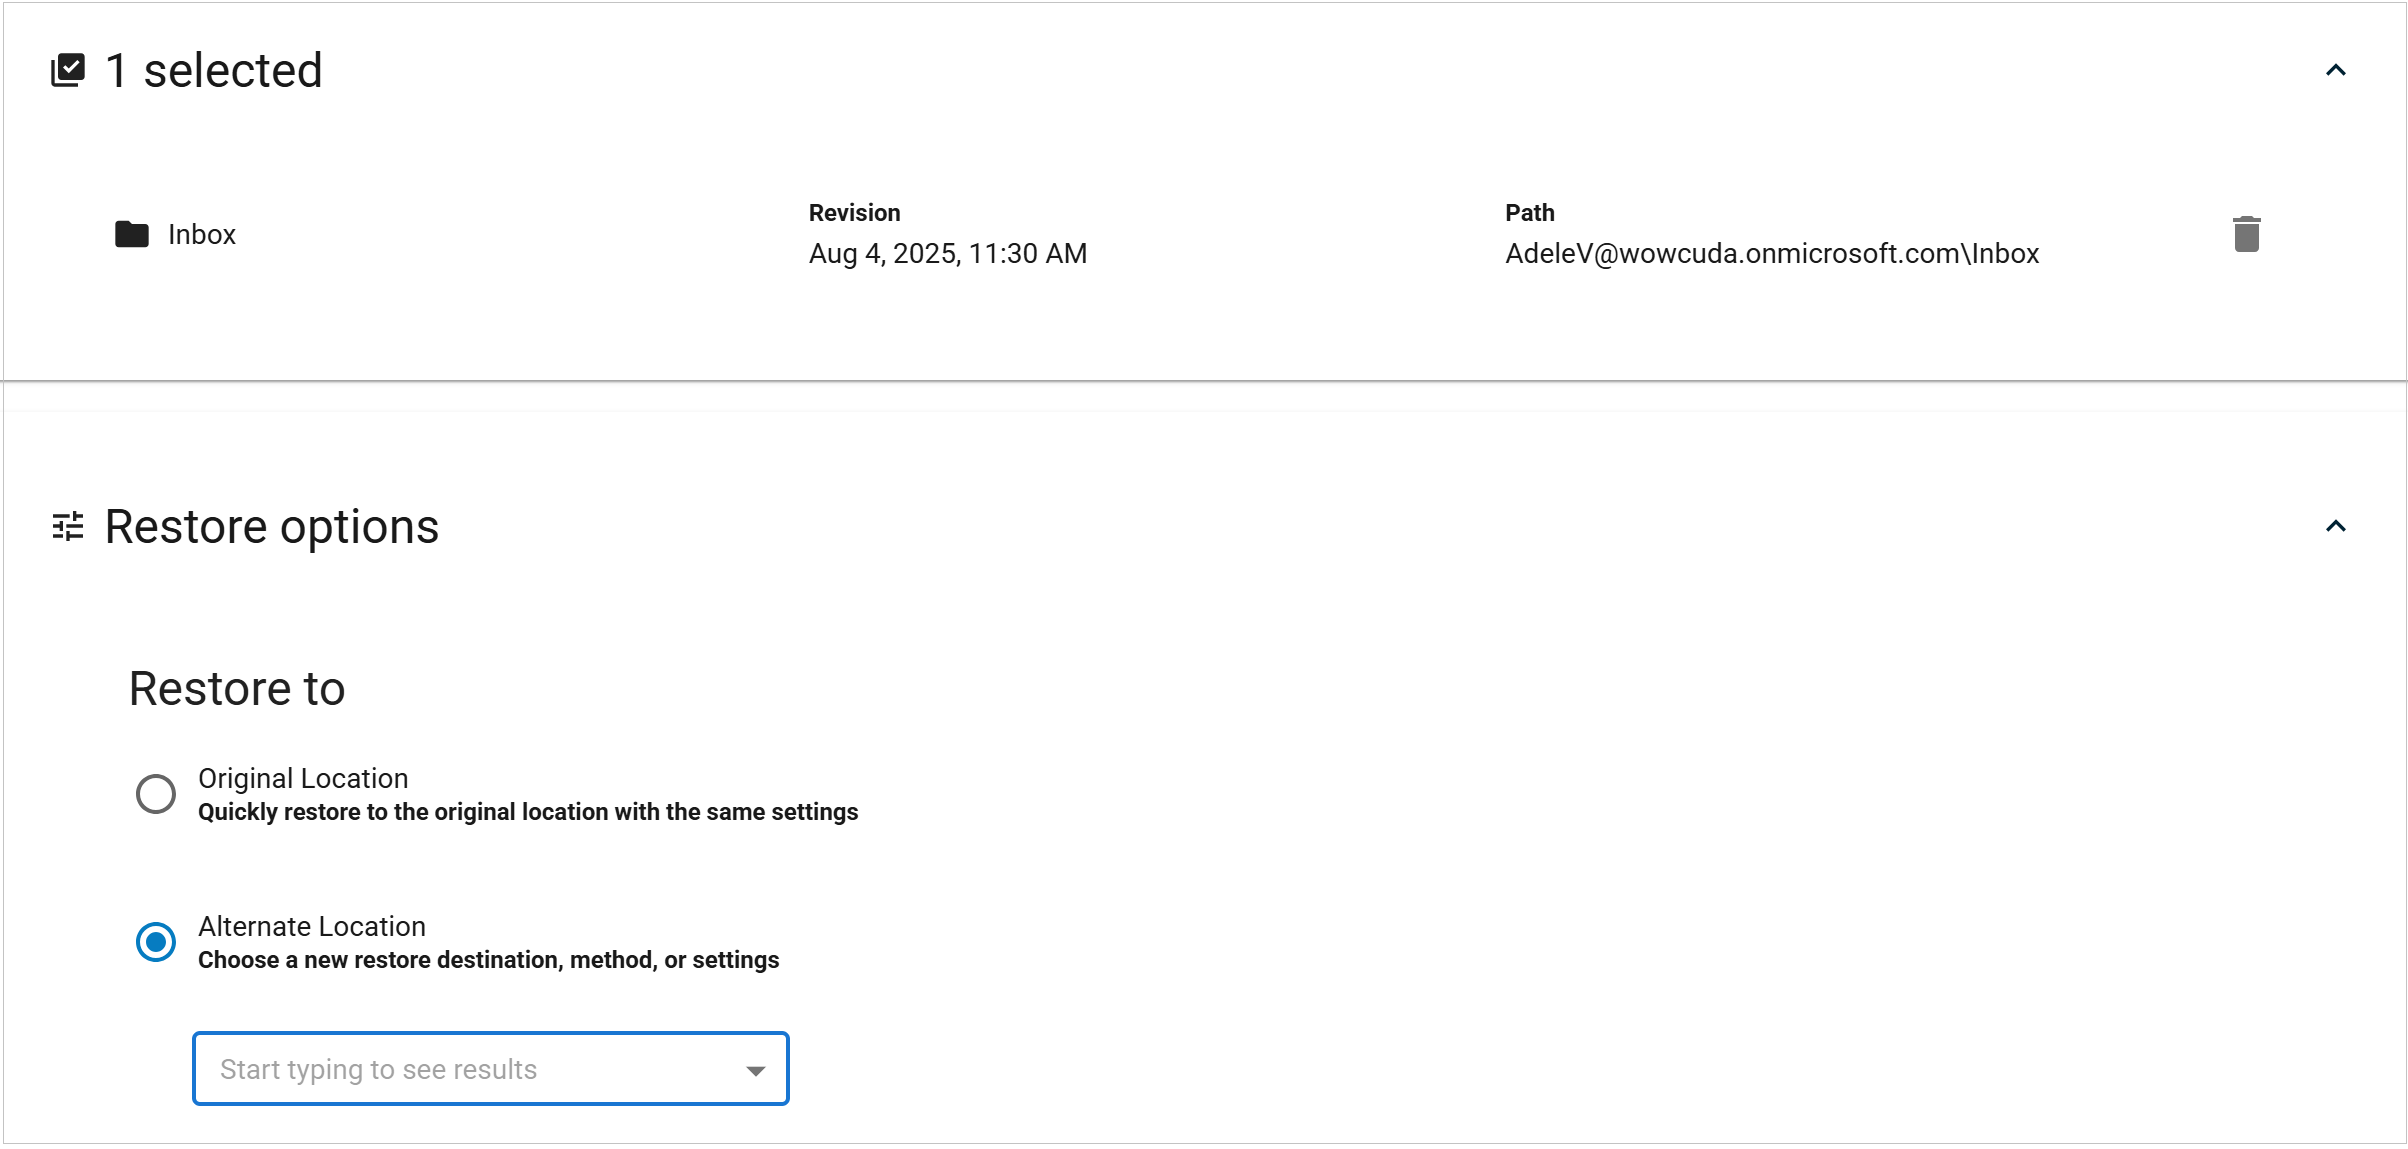
Select to restore to the Original Location or Alternate Location to select a new restore destination.
Click Start restore.
To view the restore status, go to the Reports page.
Restoring to an Alternate Location for Teams
Restoring a Teams notebook to Other Location is restored to a different folder under a different name. To access the restored notebook:
From the Team General channel, select Open in SharePoint.
Go to the Site contents folder. You will see more than one Site Assets folder.
The original folder backed up will contain a notebook with _original appended. The other restored Team folder is created automatically when the new Team is provisioned. Users can retrieve the pages from the notebook with the naming convention <original_team_name> Notebook_original.