

Use the following steps to export Entra ID data:
Log into https://login.barracudanetworks.com/. If you are not automatically forwarded to the Cloud-to-Cloud Backup application, select Cloud-to-Cloud Backup from the left pane.
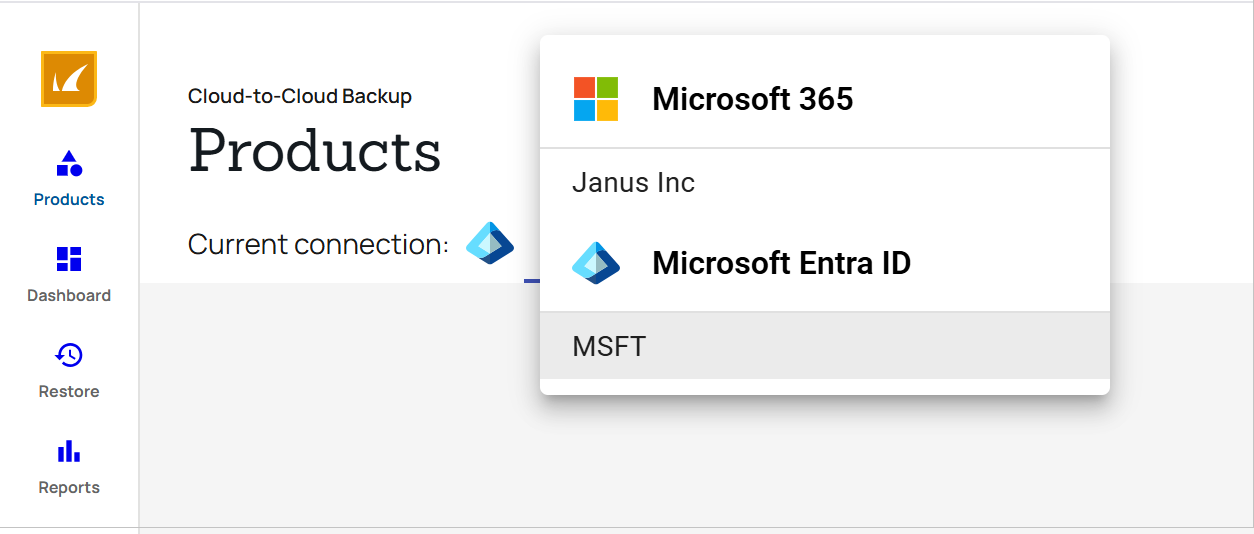
Select the desired Entra ID connection from the connection switcher in the top-left corner.
Navigate to the Restore page from the side navigation menu, and select the Entra ID data source.
Select the object from which to export data and locate the item(s) to export.
Alternatively, to find the items you want to export, use the search bar or the Filters icon ( ) to narrow down your options. See How to Search an Entra ID Data Source.
Select the item(s) to export, and click the Export button.
The Export dialog box displays.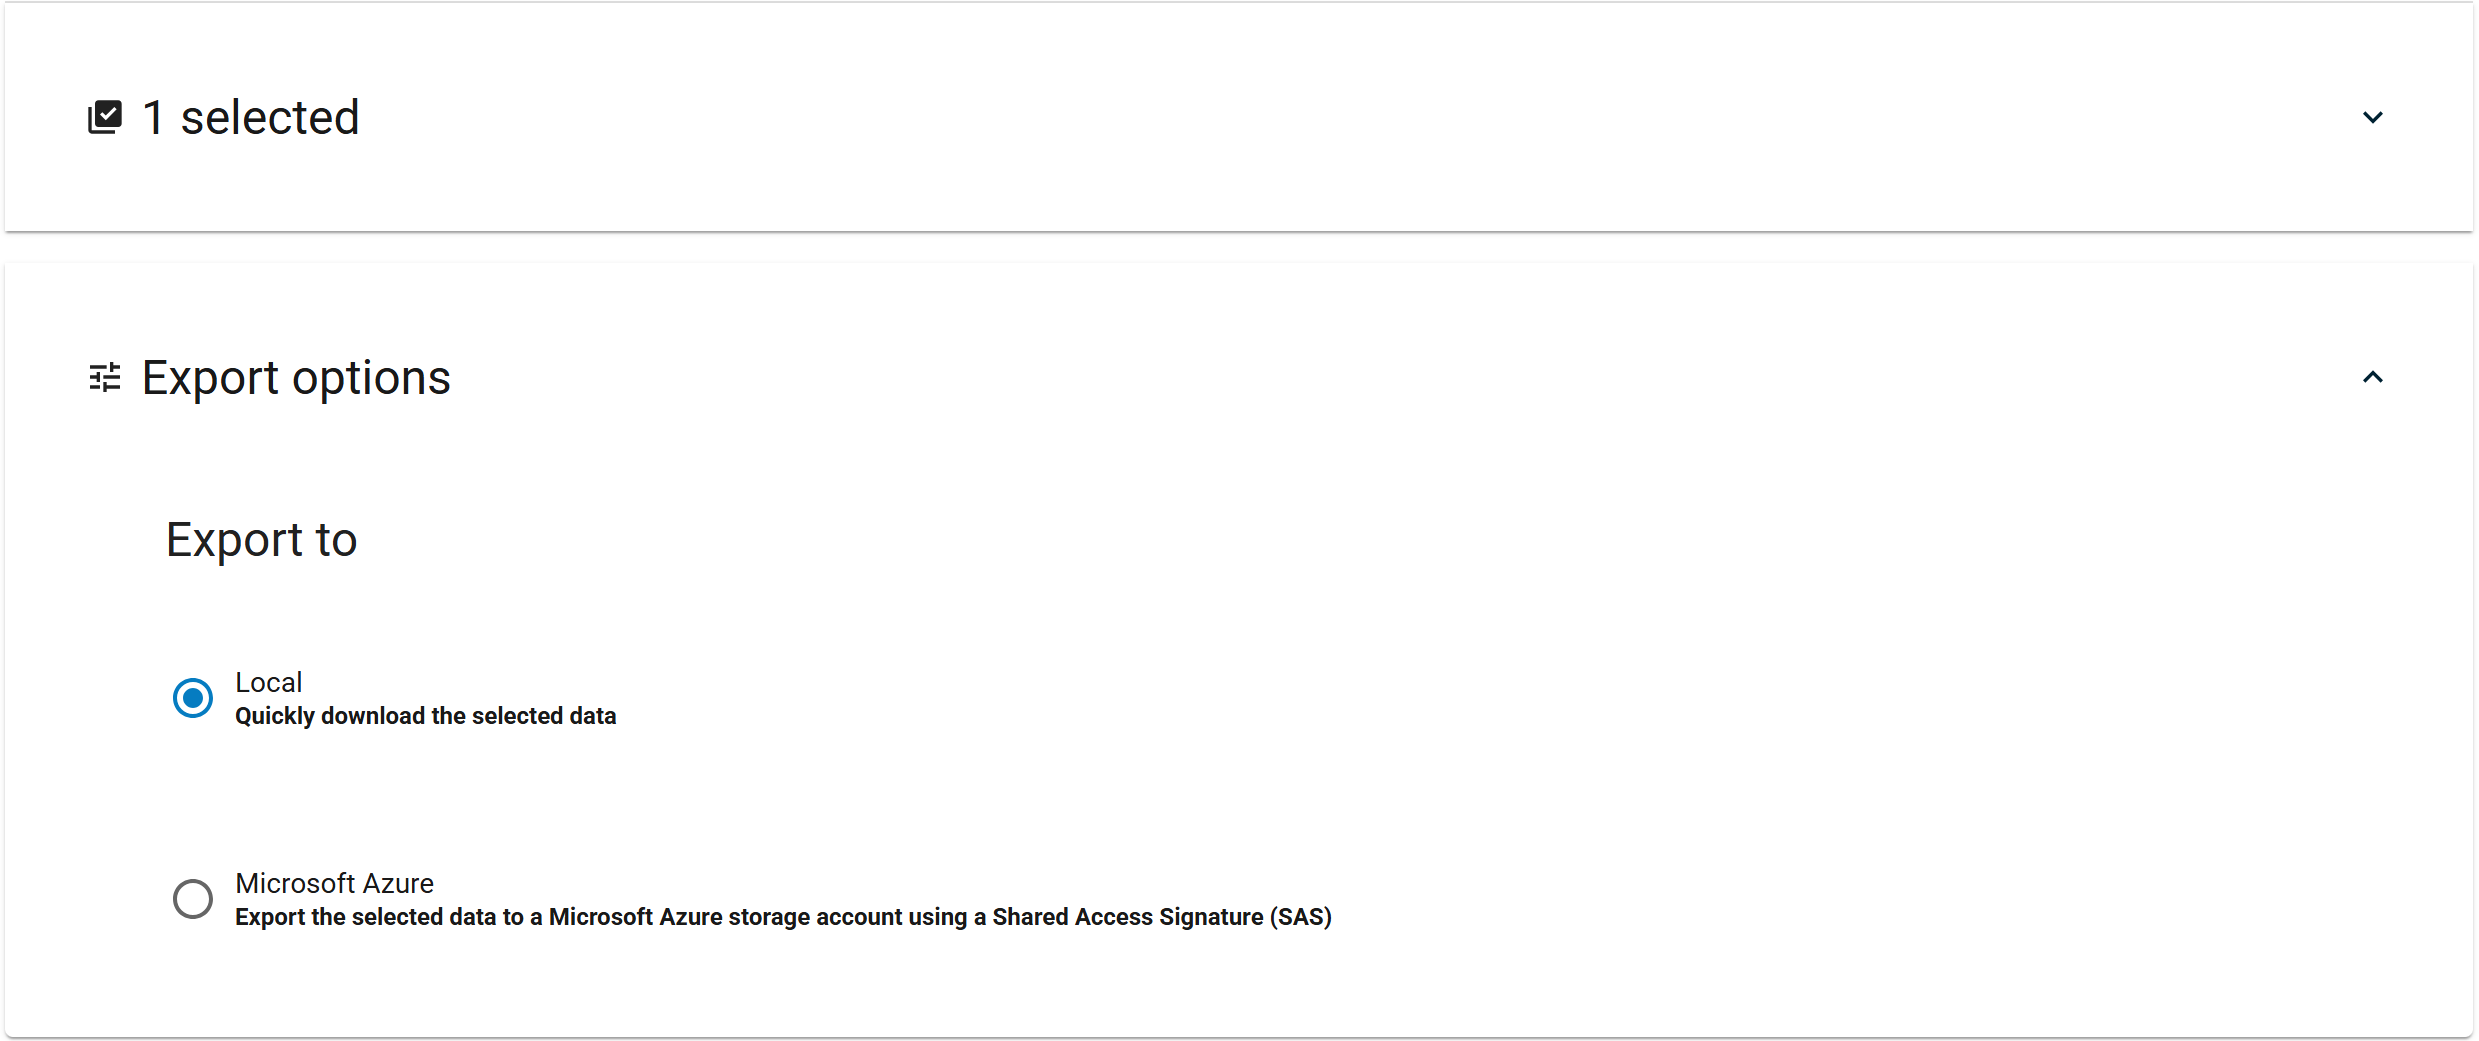
Select to export to Local or Microsoft Azure. For Microsoft Azure, enter your SAS token. For more information on how to generate a SAS token, see How to Export to Microsoft Azure.
Click Start export.
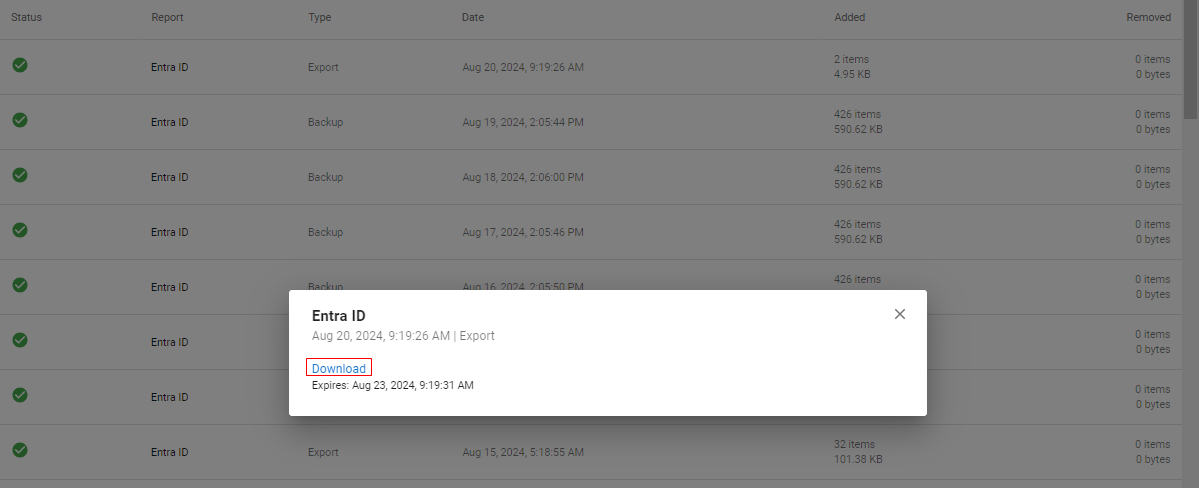
To view the export status, go to the Reports page.
To download the item(s), go to the Reports page and click on the item you exported. Click Download to download the item(s). A single file export less than 10GB will download automatically. If you are exporting multiple files, see below.
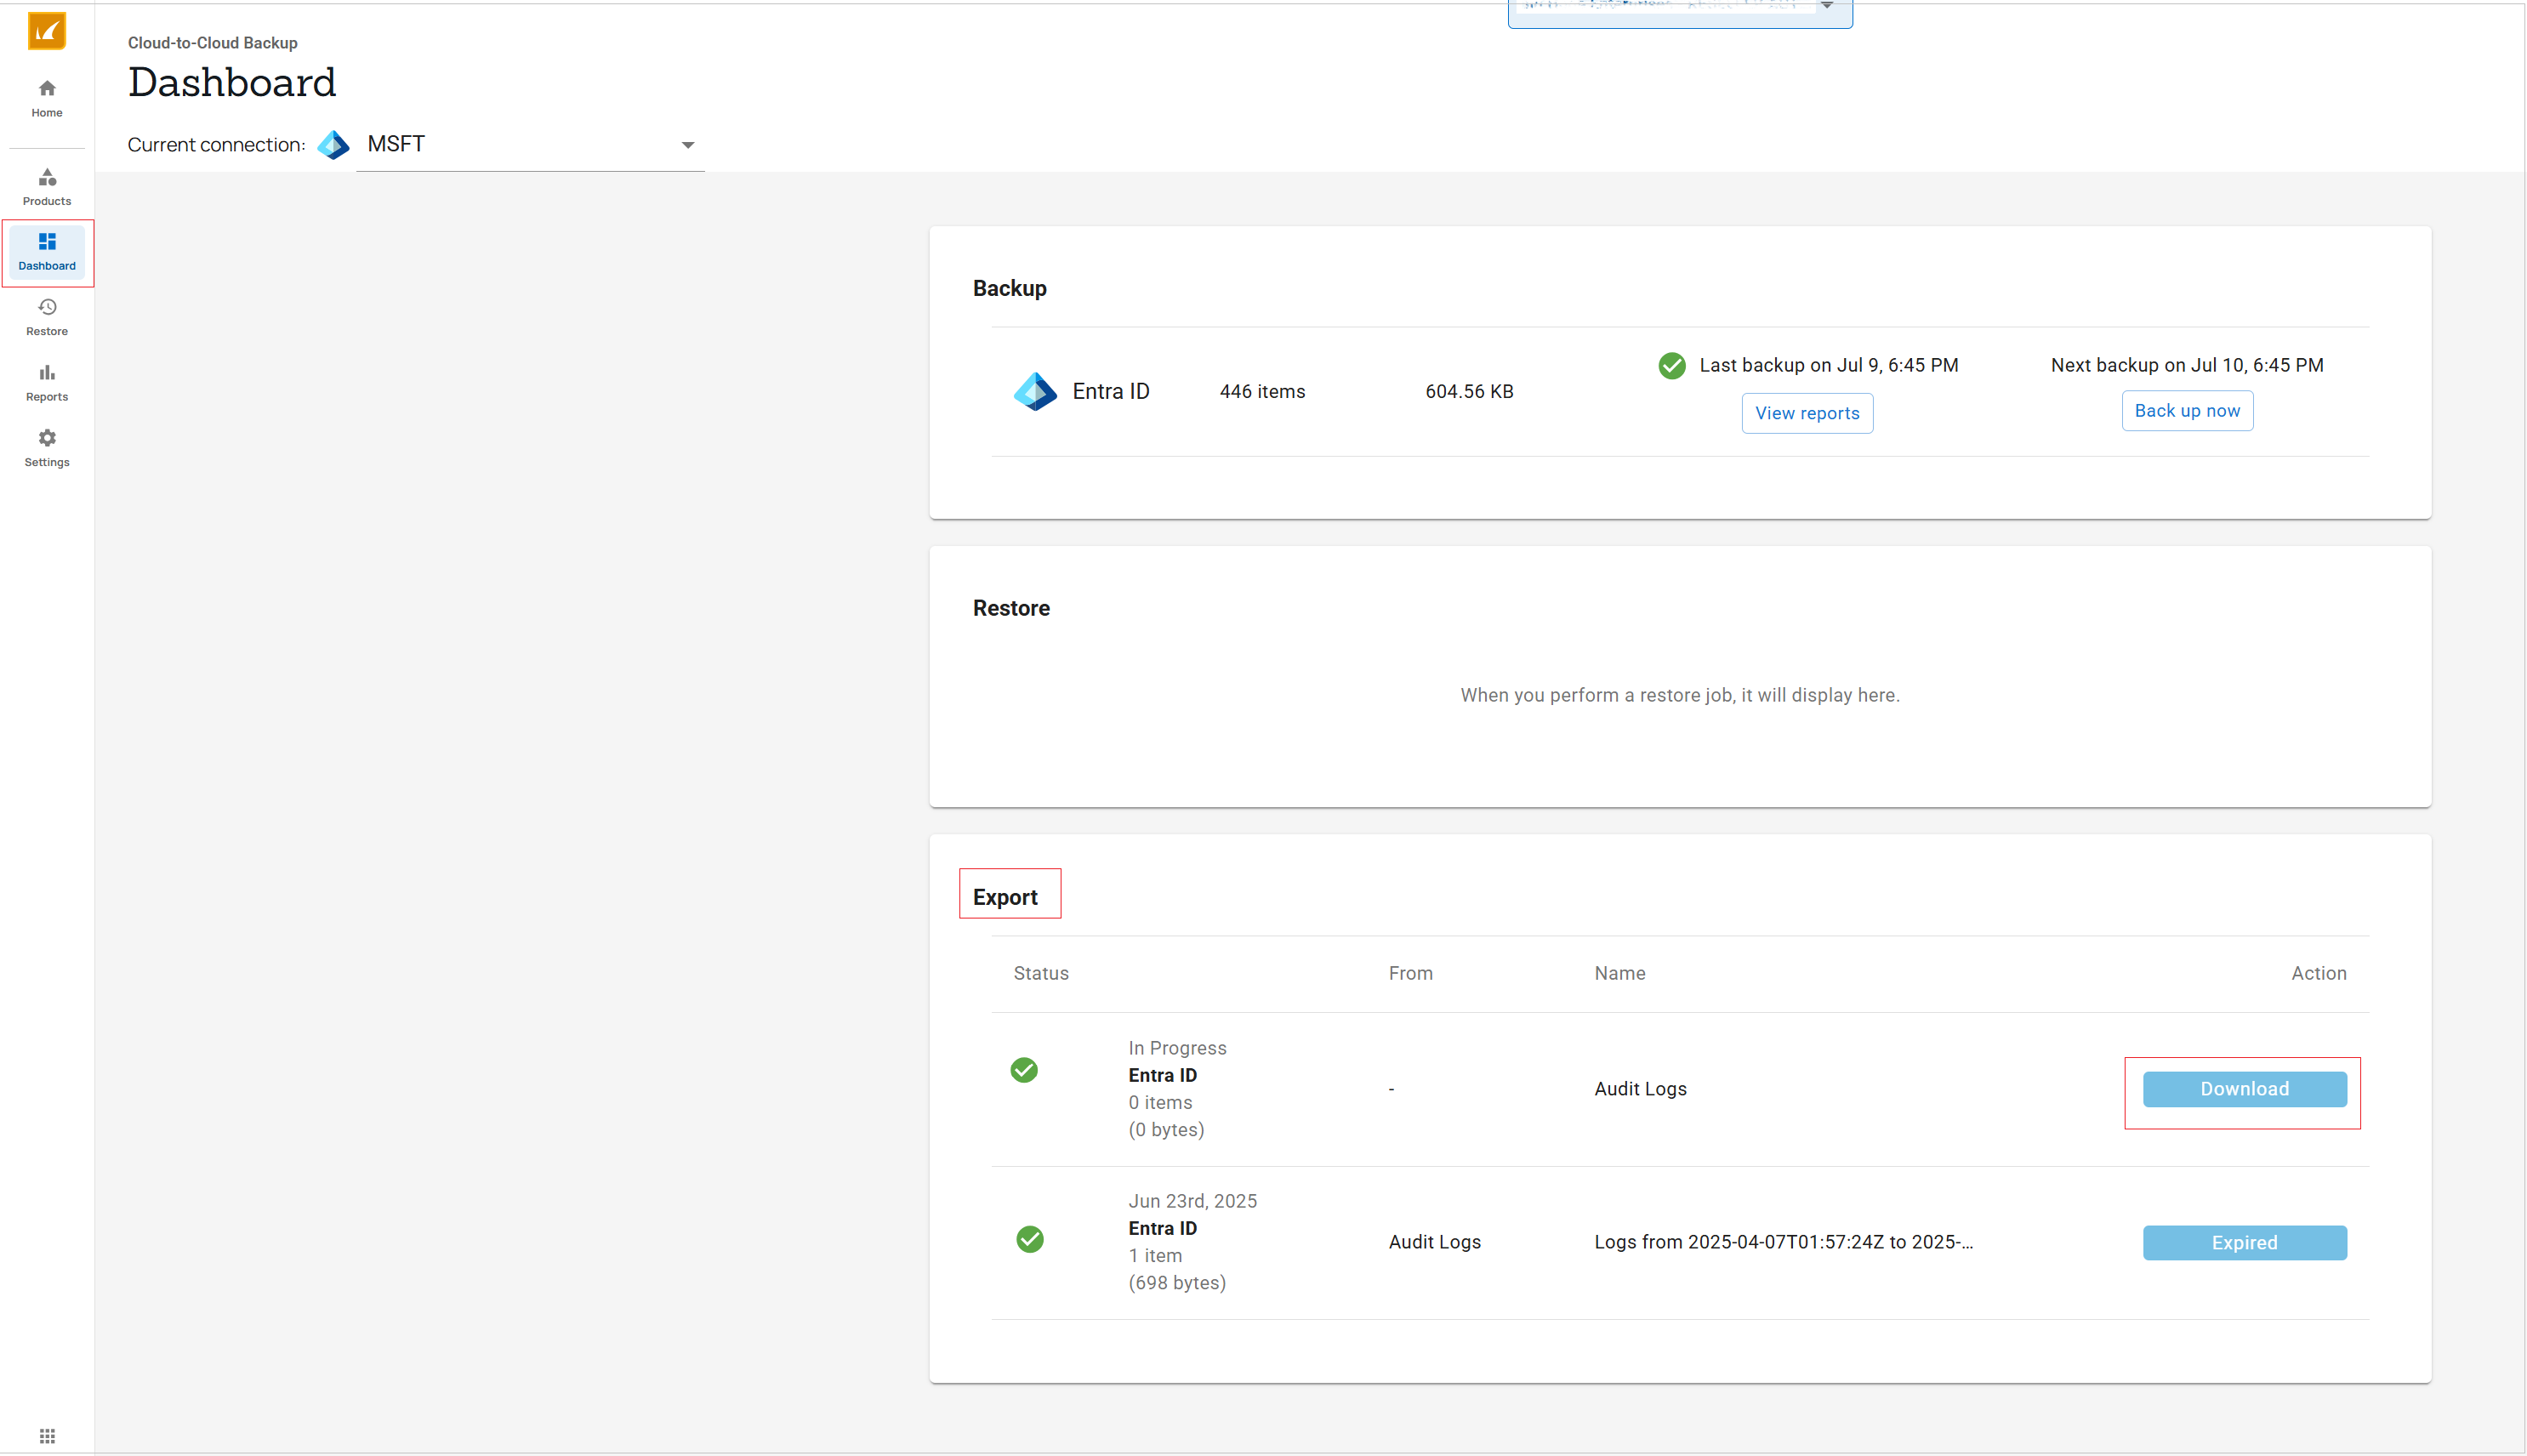
Alternatively, go to the Export section in the Dashboard to download the item(s). Click Download next to the item you want to download. A single file export less than 10GB will download automatically. If you are exporting multiple files, see below.
Exporting Multiple Files
When exporting multiple files, the Download link in the Reports page and Export section of the Dashboard will bring up a new page listing the ZIP file(s) in the export job. Note that you can only download the ZIP file(s) from this page. If the export job exceeds 10GB or 25,000 items, the page includes details of each ZIP file within the nested ZIP file. Use the browser download manager to select one or more download jobs at your convenience.