

The new Barracuda Cloud-to-Cloud Backup restore user interface now includes a new recovery feature, Export to Microsoft Azure. This feature allows you to export/restore data directly to your own Microsoft Azure storage account.
Use the following instructions to export data to your Microsoft Azure account:
In the new restore user interface, select an item, and click Export.
From the Export options screen, select Microsoft Azure.
Selecting Microsoft Azure will ask you for a Shared Access Signature (SAS) token. A shared access signature provides secure delegated access to resources in your Azure storage account. With a SAS, you have granular control over how a client can access your data.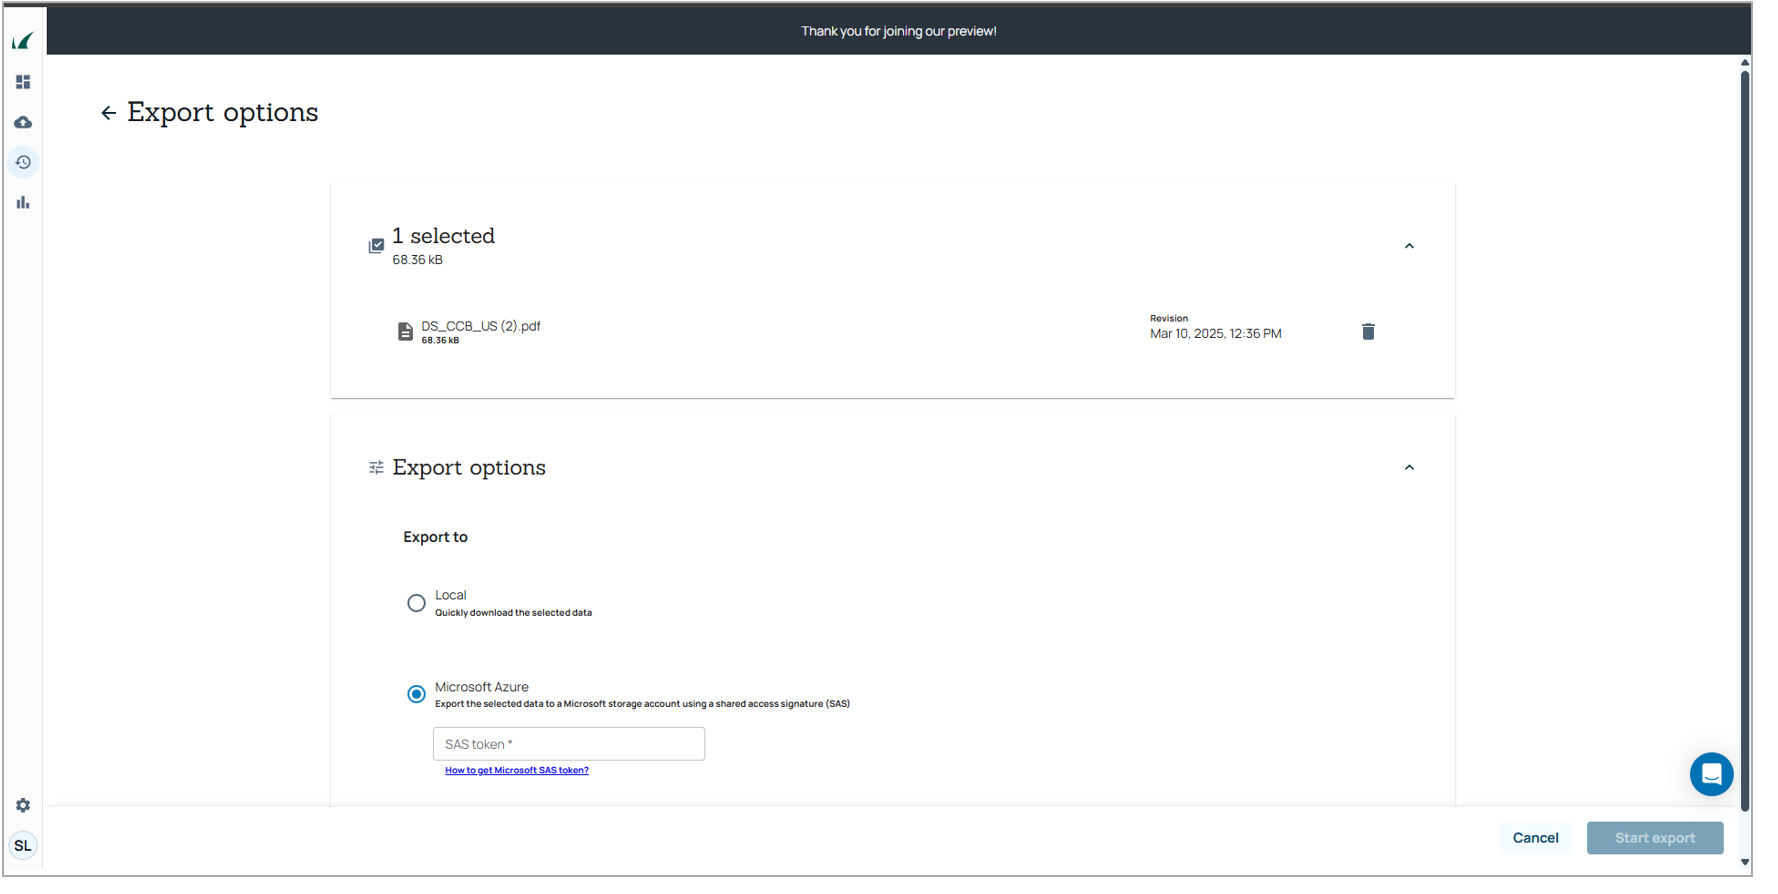
To generate a SAS token:
Log into your Microsoft Azure account and navigate to Storage accounts.
Select your desired Azure storage account.
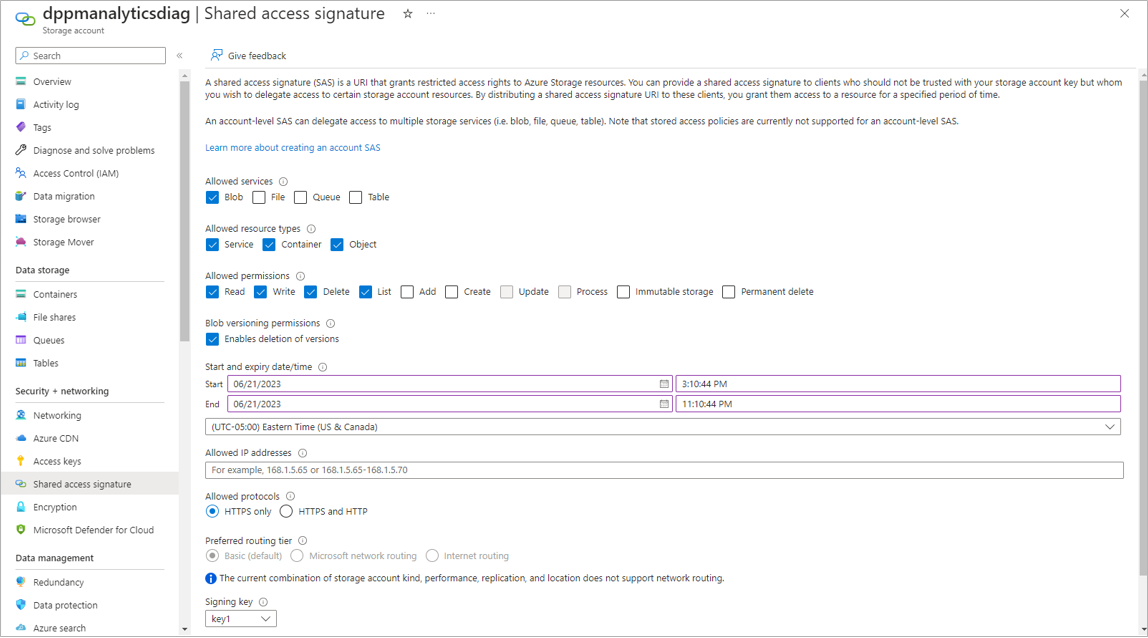
Select Shared Access Signature from the left-hand menu, under the Security + networking section.
The Export to Azure feature requires the following services, resource types, and permissions:
Allowed services – Blob
Allowed resource types – Service, Container, Object
Allowed permissions – Read, Write, Delete, List
Set a start and expiry date/time for the shared access signature. Barracuda Networks recommends setting the expiration to 3-7 days, however it will depend on the size of the data being exported and the length of time to do so.
Click the Generate SAS and connection string button.
Copy and paste the Connection string and SAS token value in a secure location. They'll only be displayed once and cannot be retrieved once the window is closed.
In the new restore user interface, paste the SAS token into the SAS token field in the Export to Azure option.
Click the Export button.
The export to Azure job will begin.To view the export status, go to the Dashboard or Reports page of the current, non-preview user interface. To download the data, click the Download button or access the data directly in your Azure storage account.